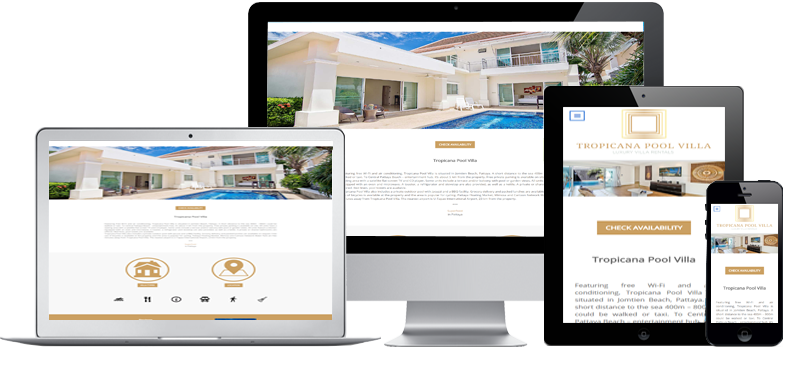
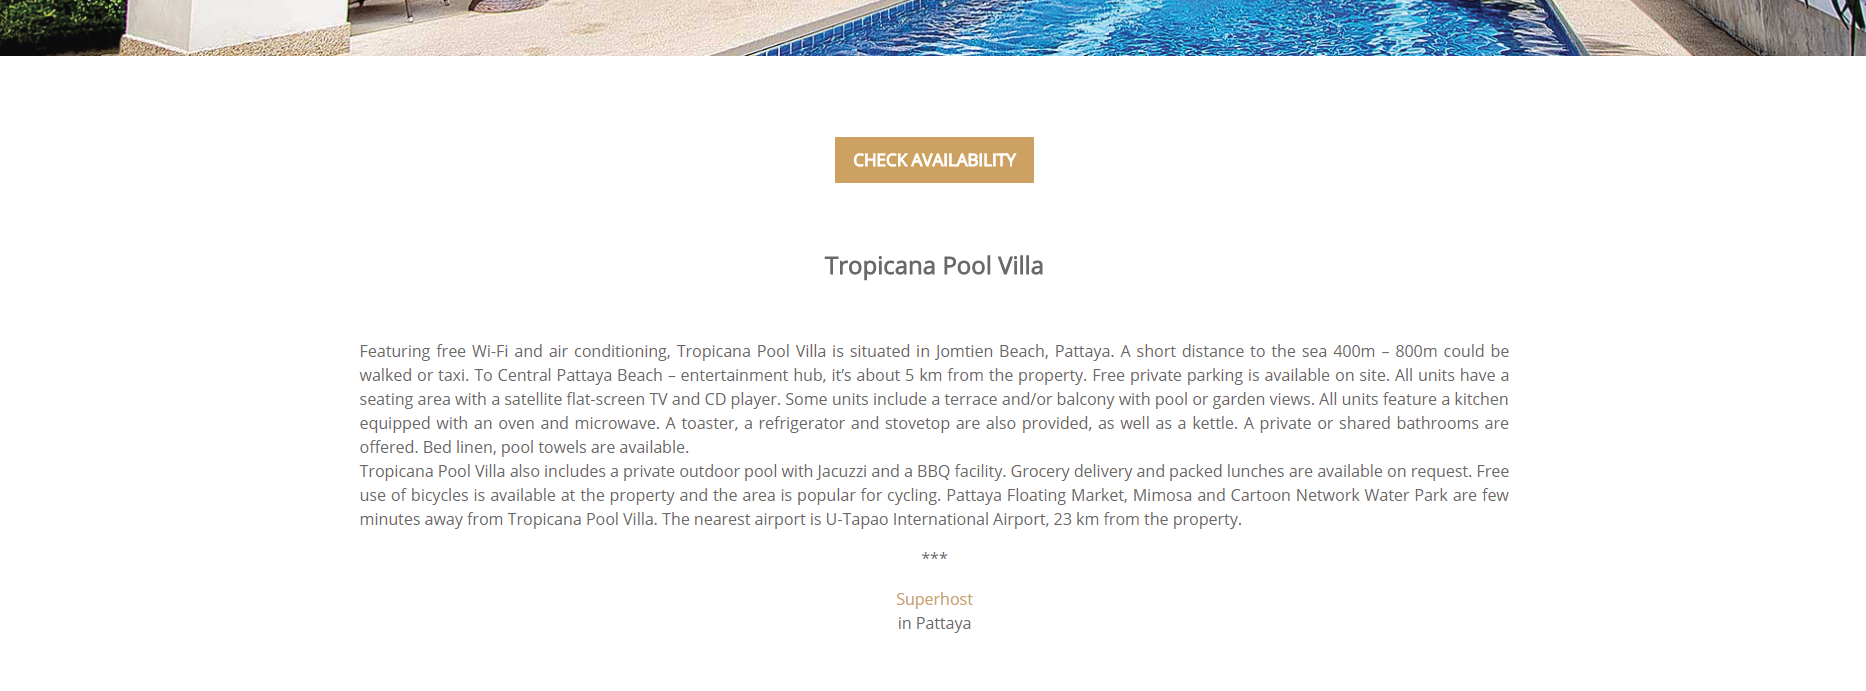
Tropicana Pool Villa
LOG IN

Provide the login access we've sent. (Keep it secret)
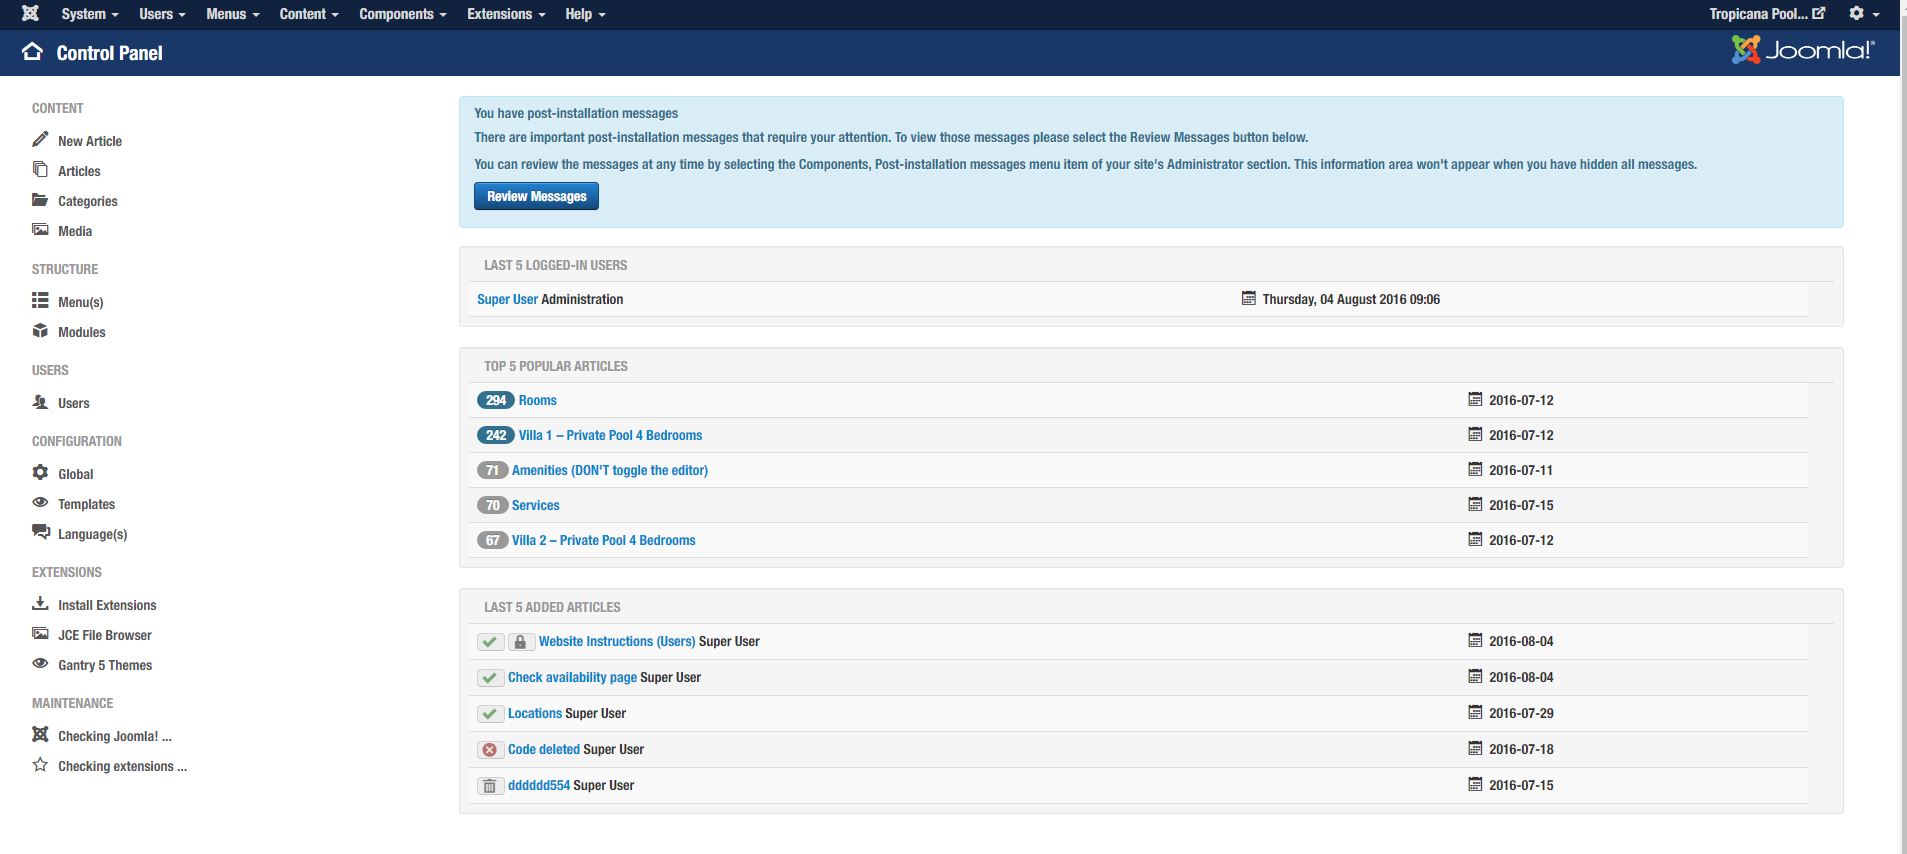
DASHBOARD
HOME
ROTATOR
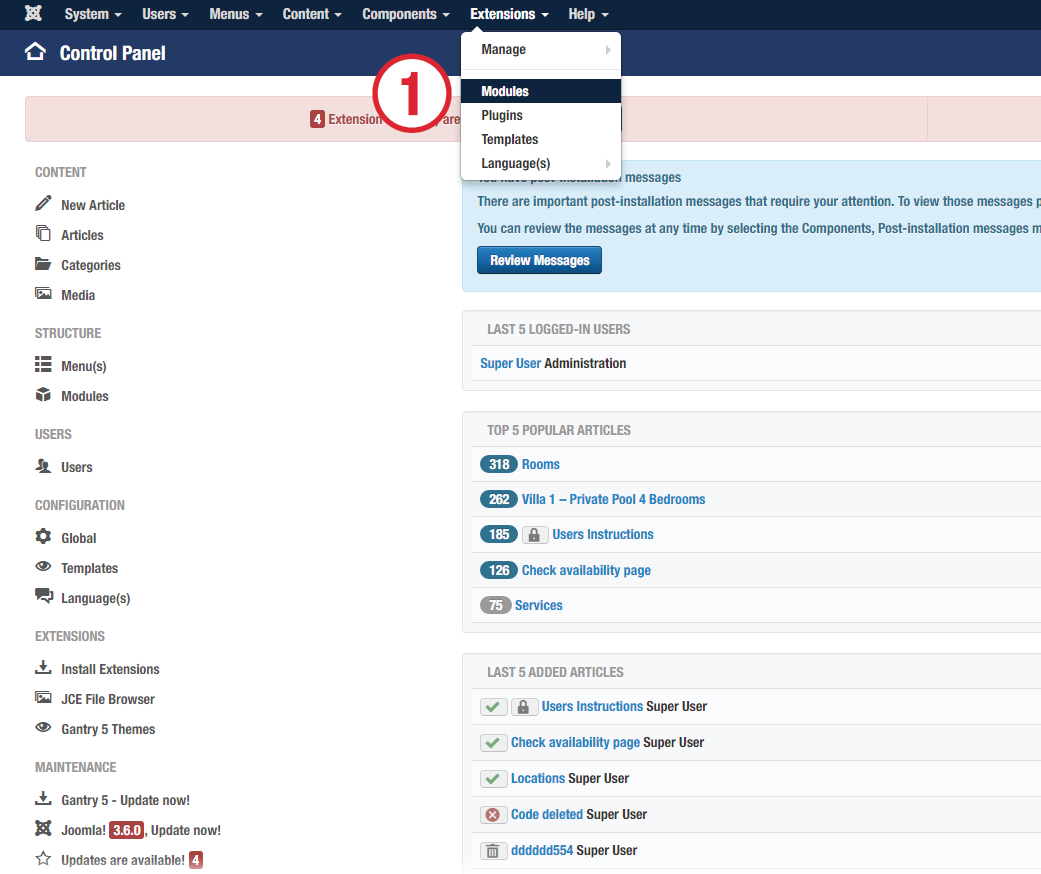
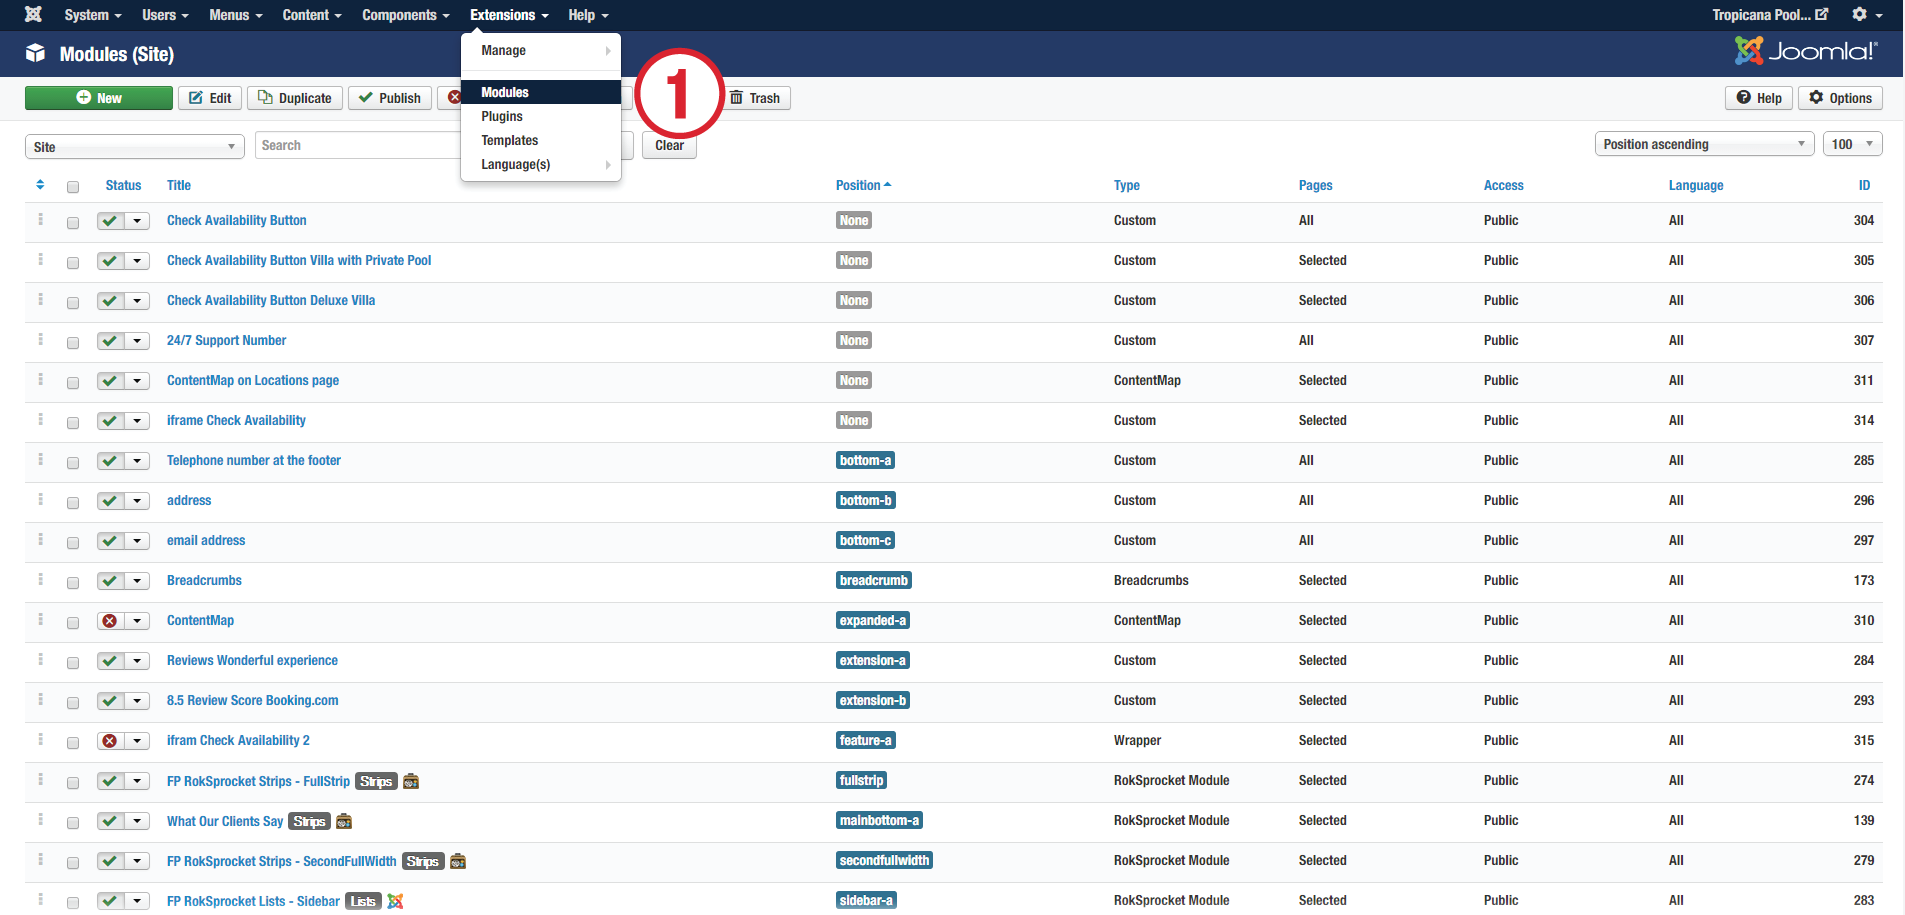
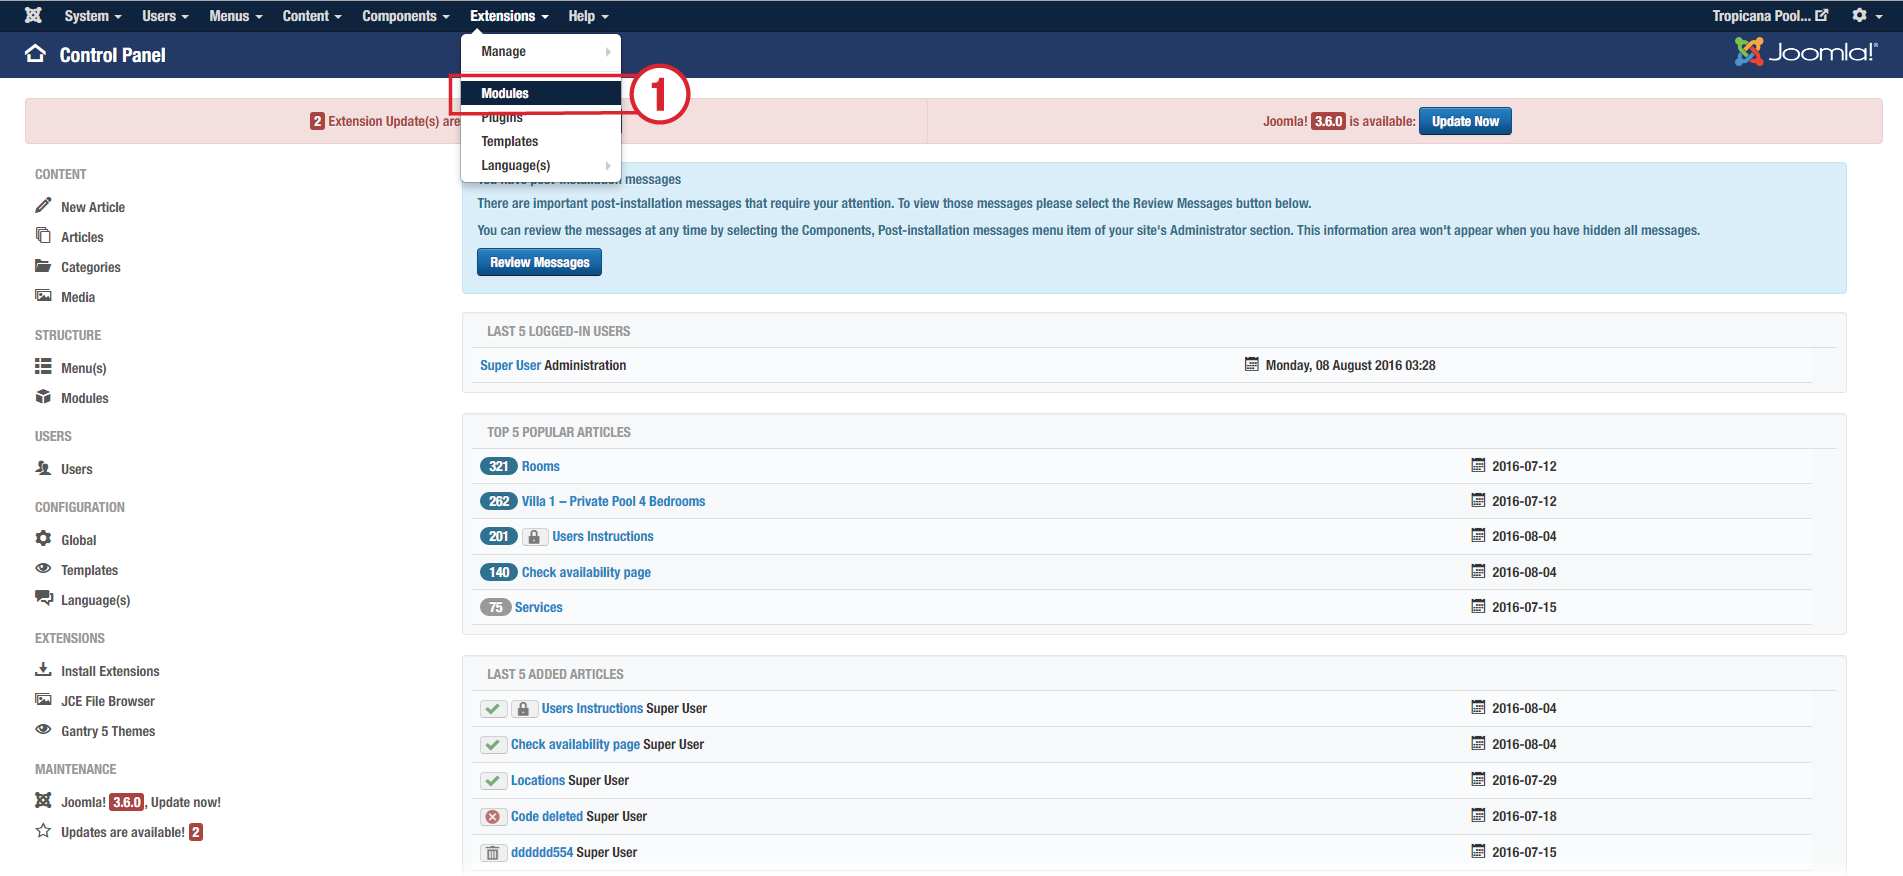
1. Click the Module menu and choose the module for editing.
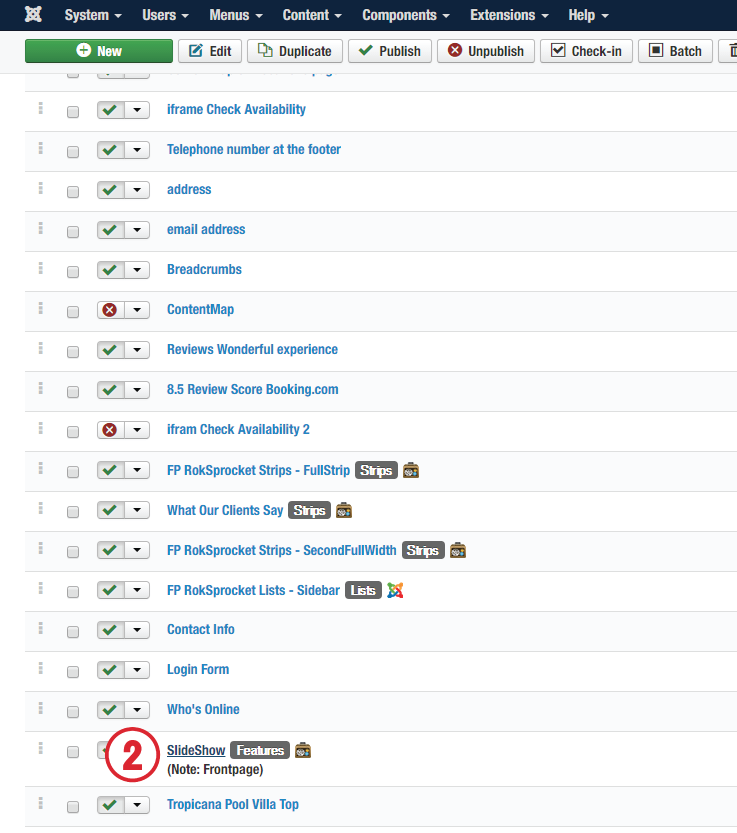
2. Choose the "SlideShow" module for editing.
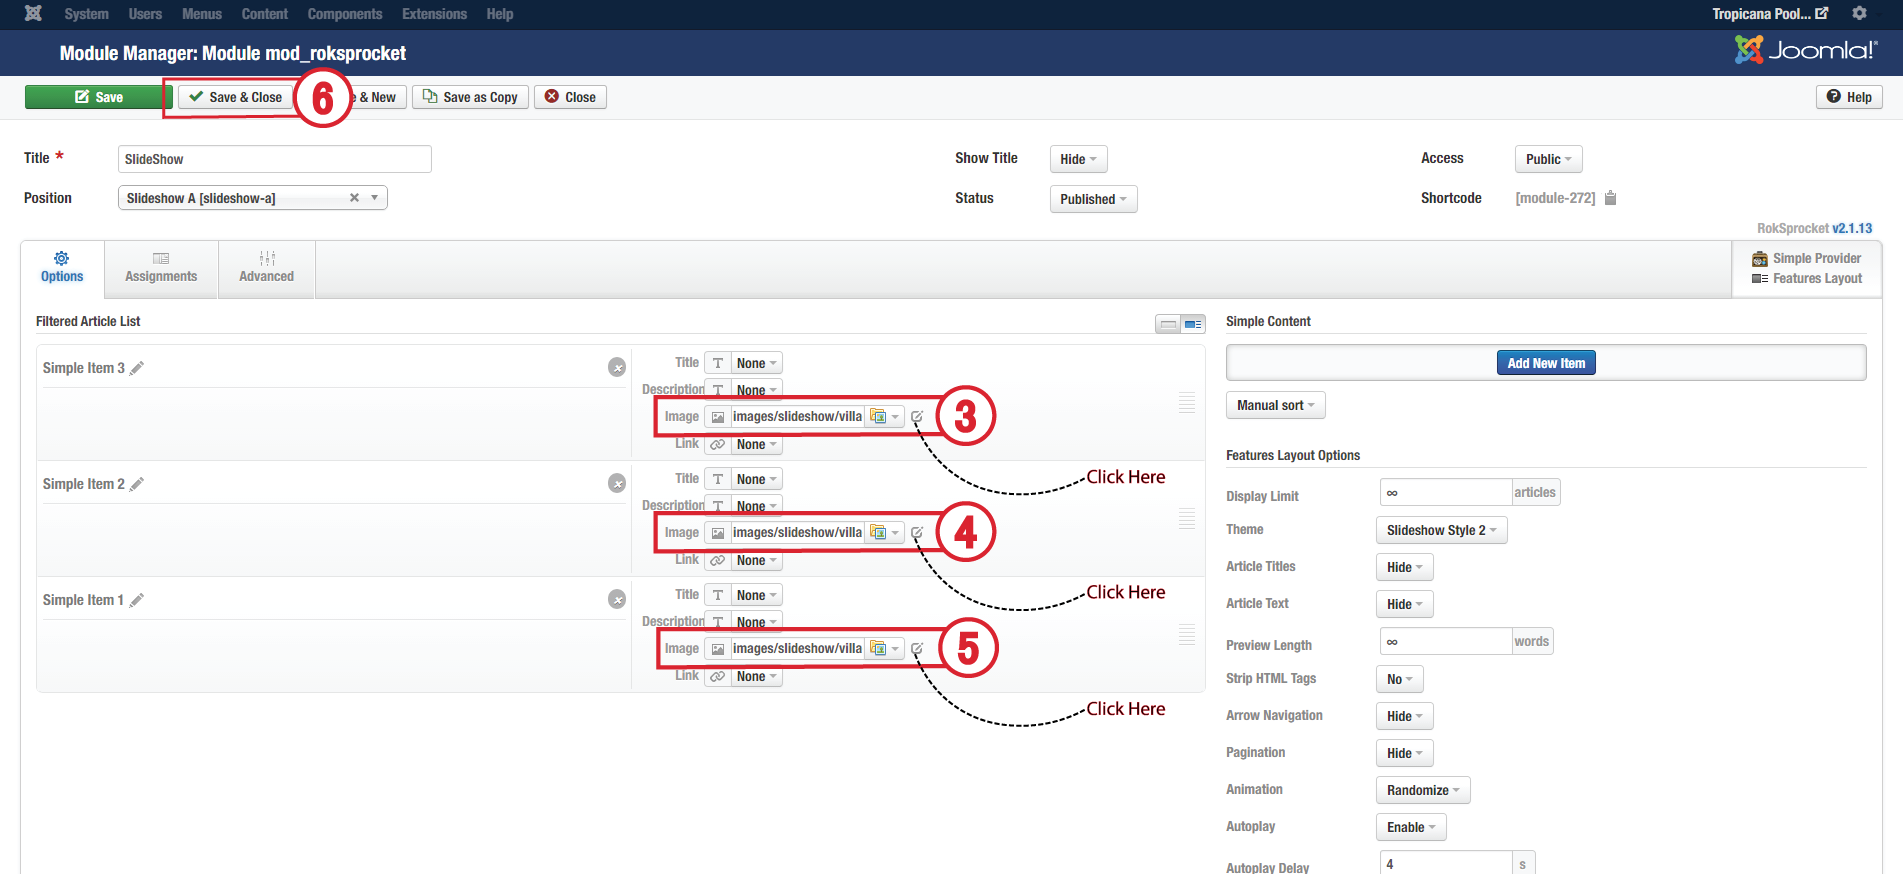
3 - 5. Get the new image or replace a new one.
6. Save & Close
MODULE : TROPICANA POOL VILLA
1. Click the Module menu and choose the module for editing.
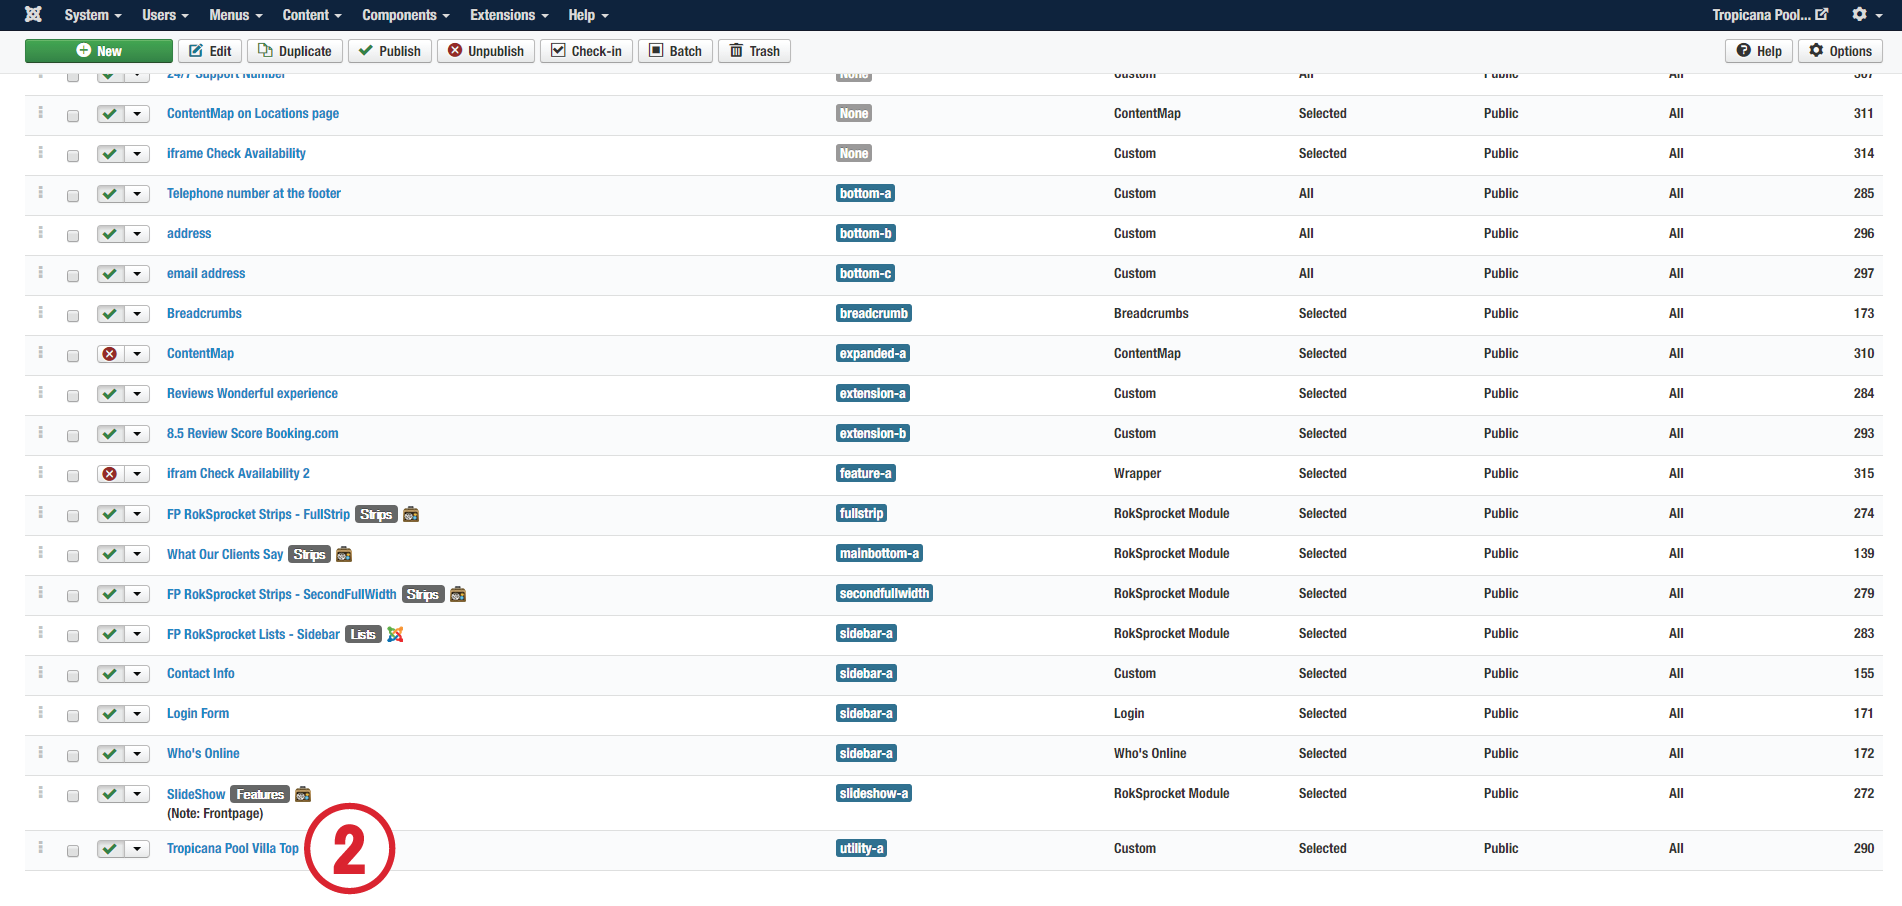
2. Choose the "Tropicana Pool Villa Top" module for editing.
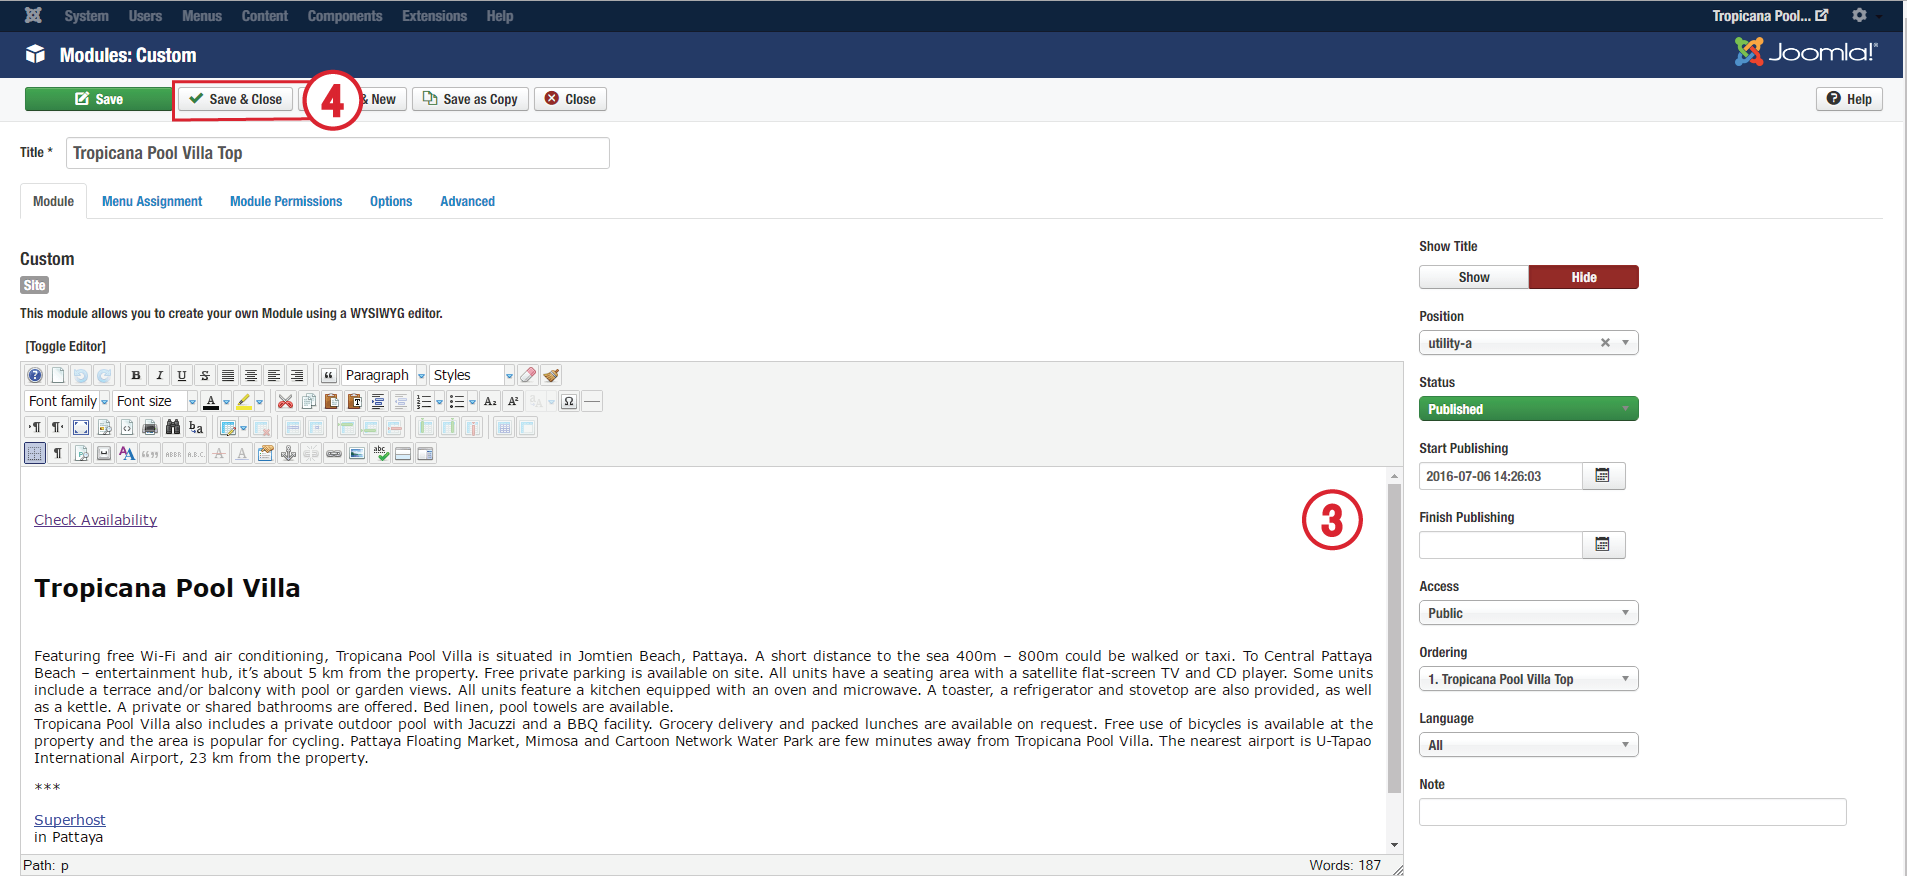
3. Edit content as you want.
4. Save & Close
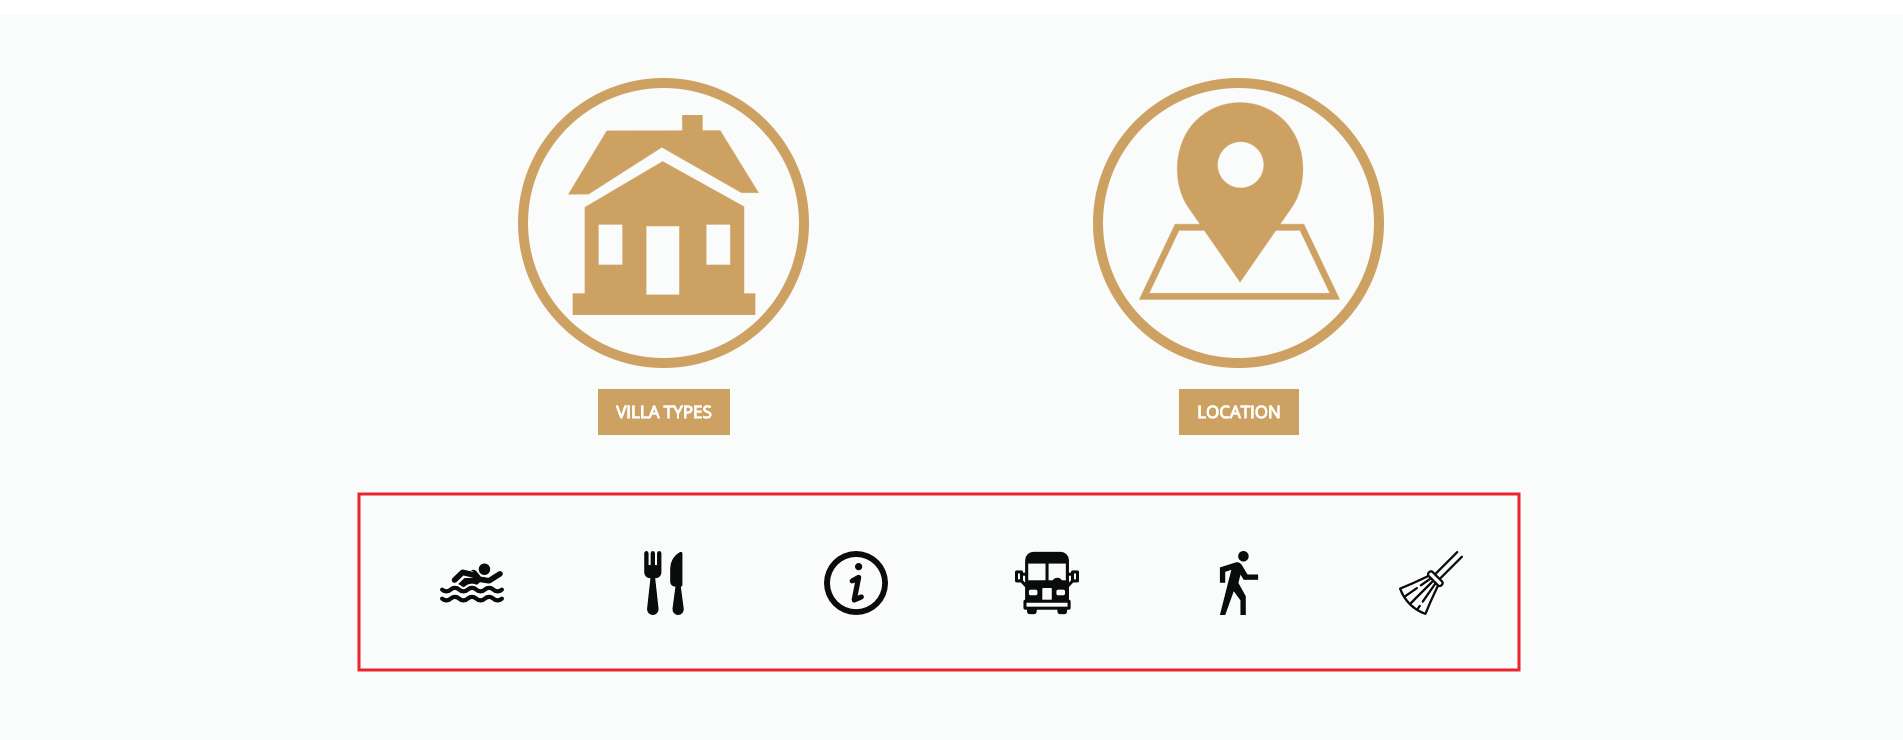
PARTICLE : VILLA TYPES / LOCATION

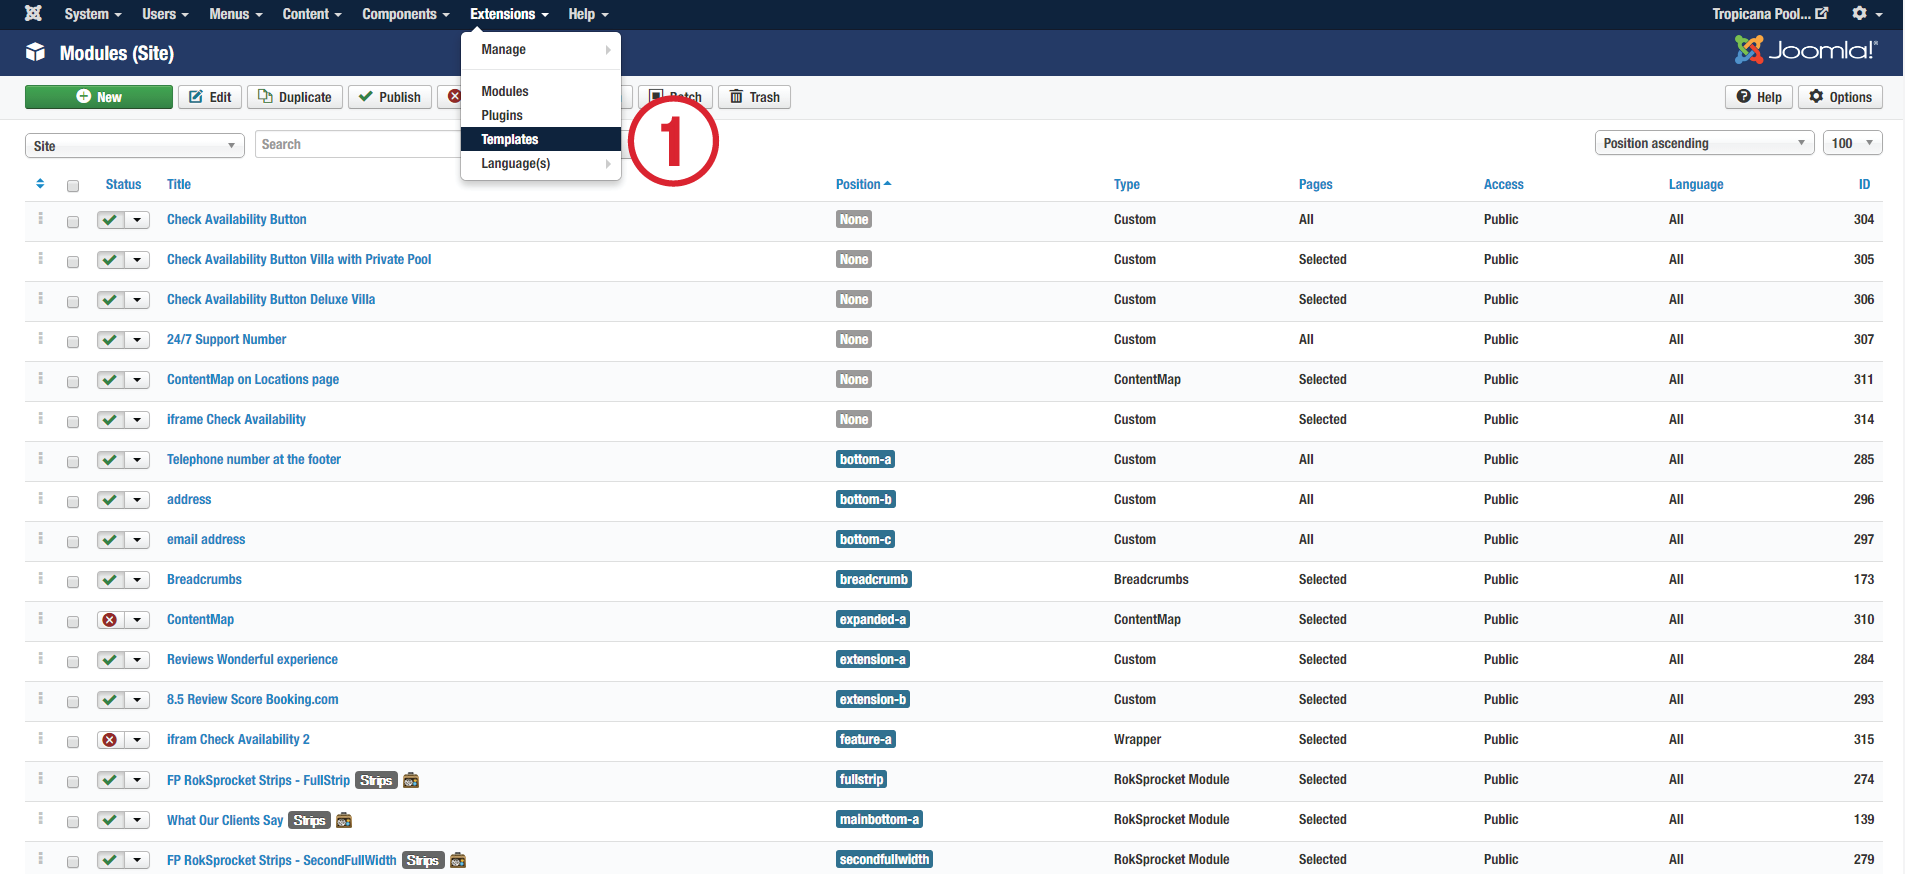
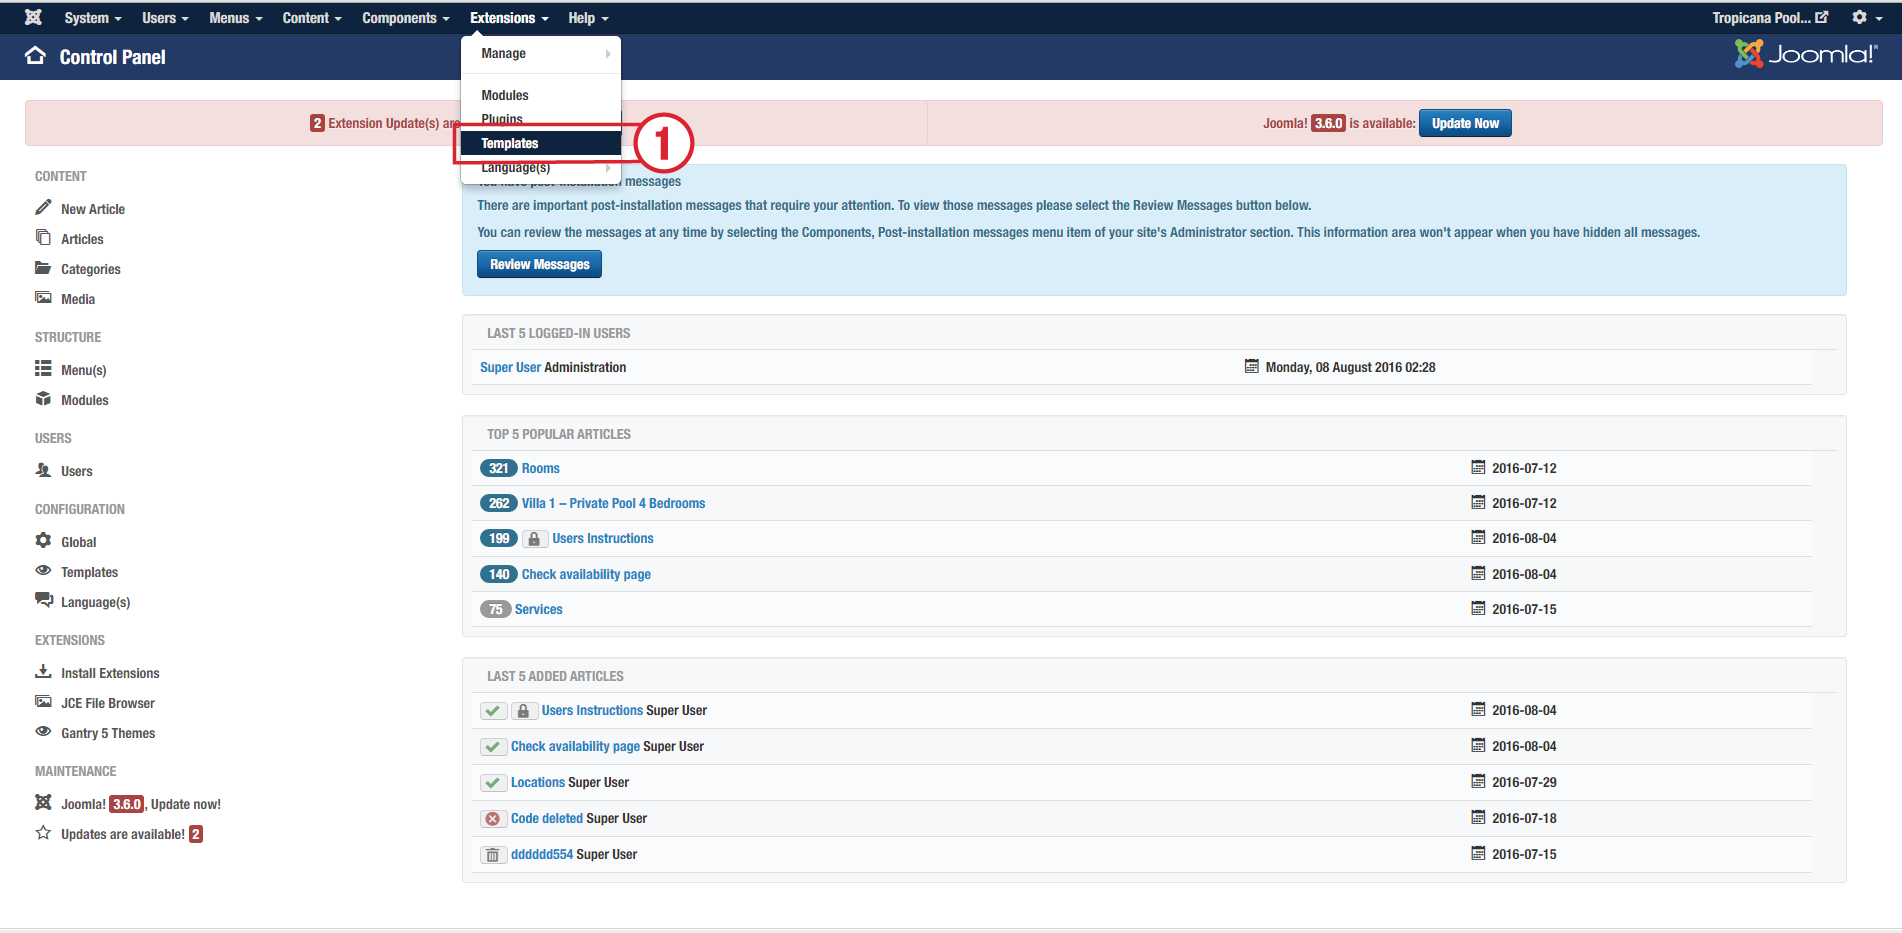
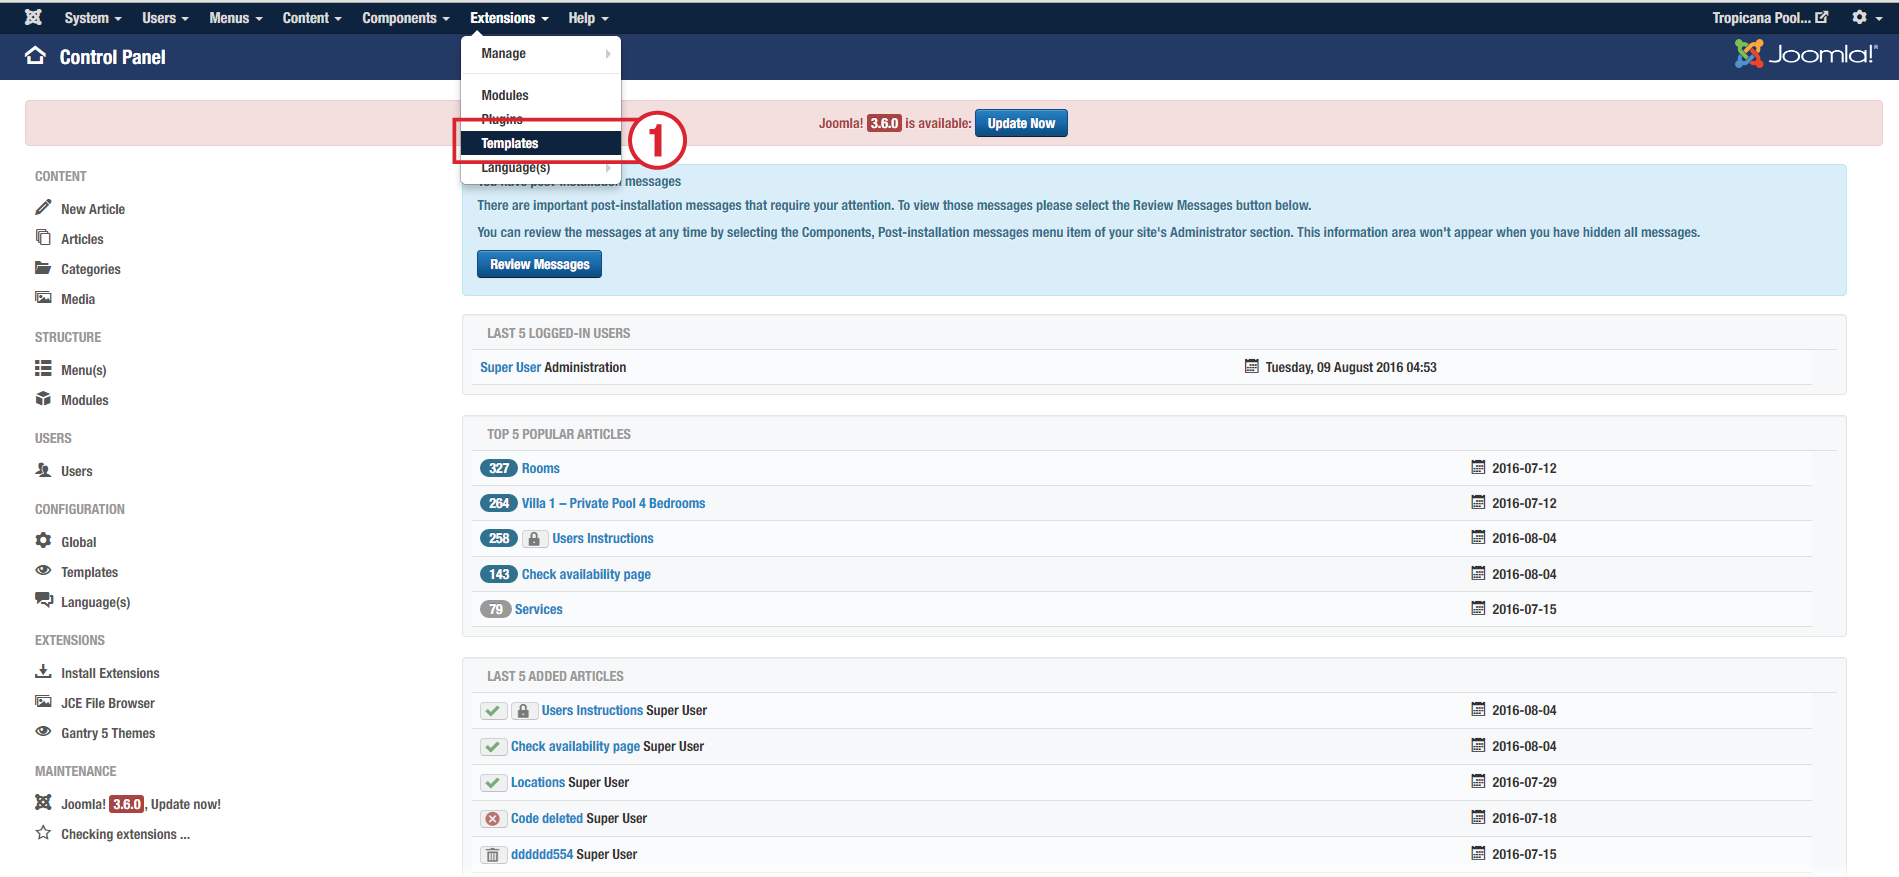
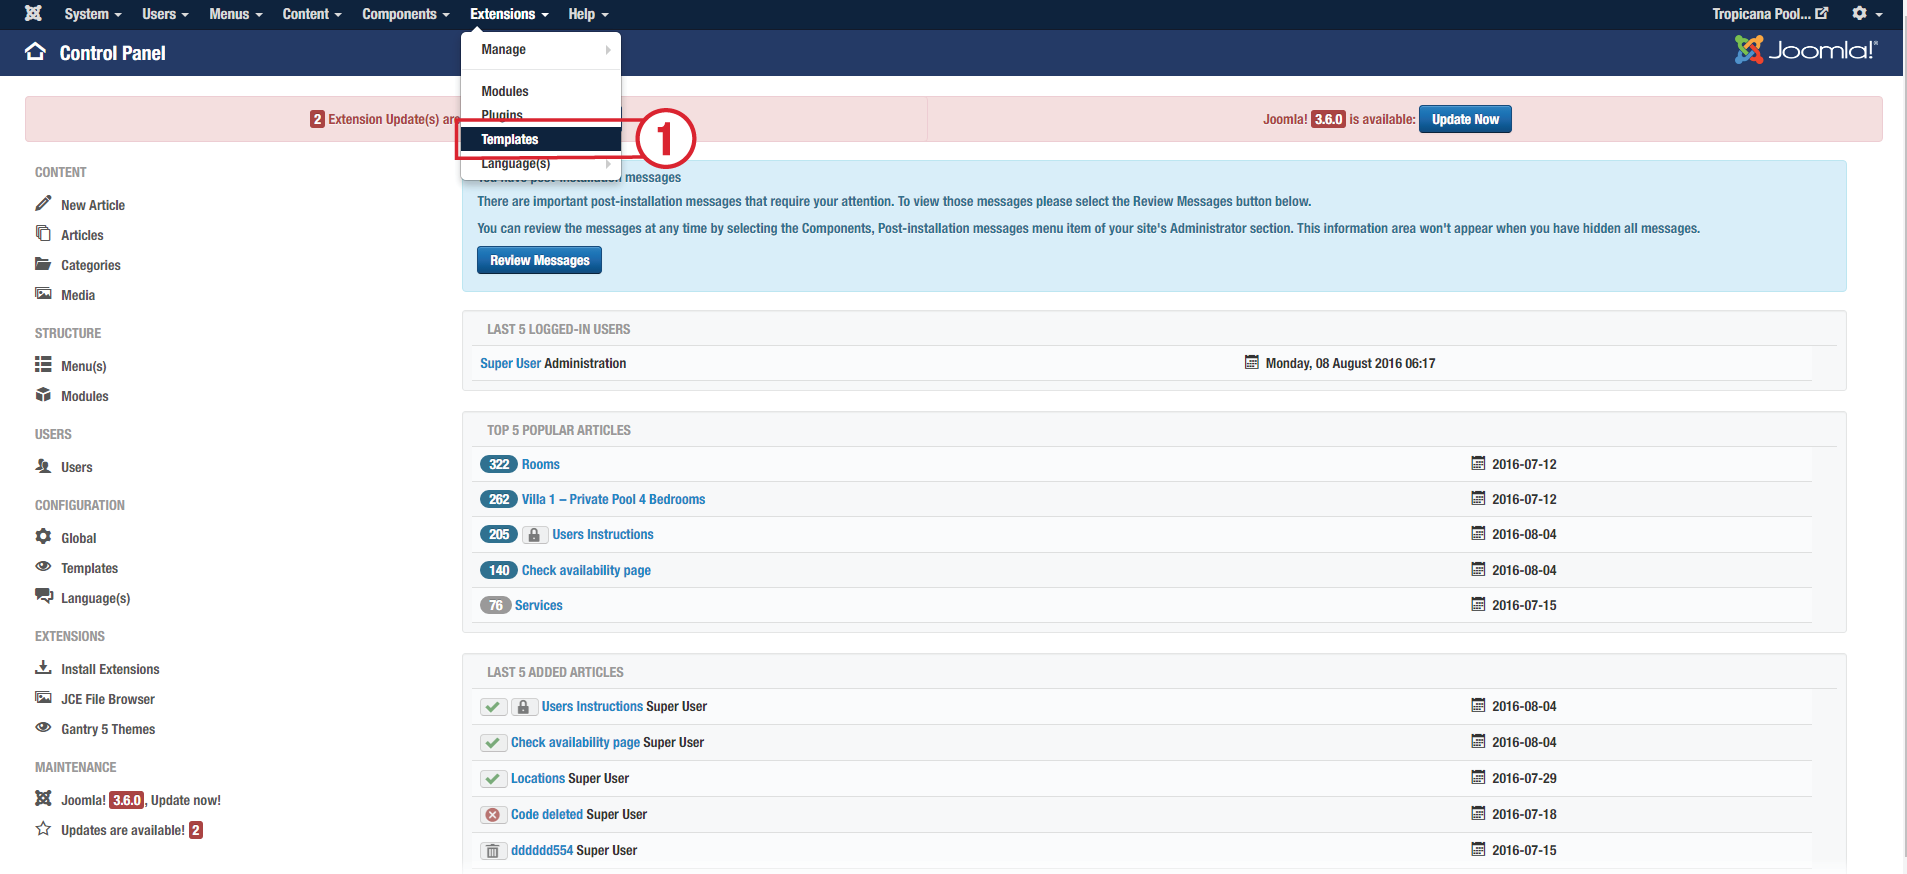
1. Click the Templates menu and choose the template for editing.
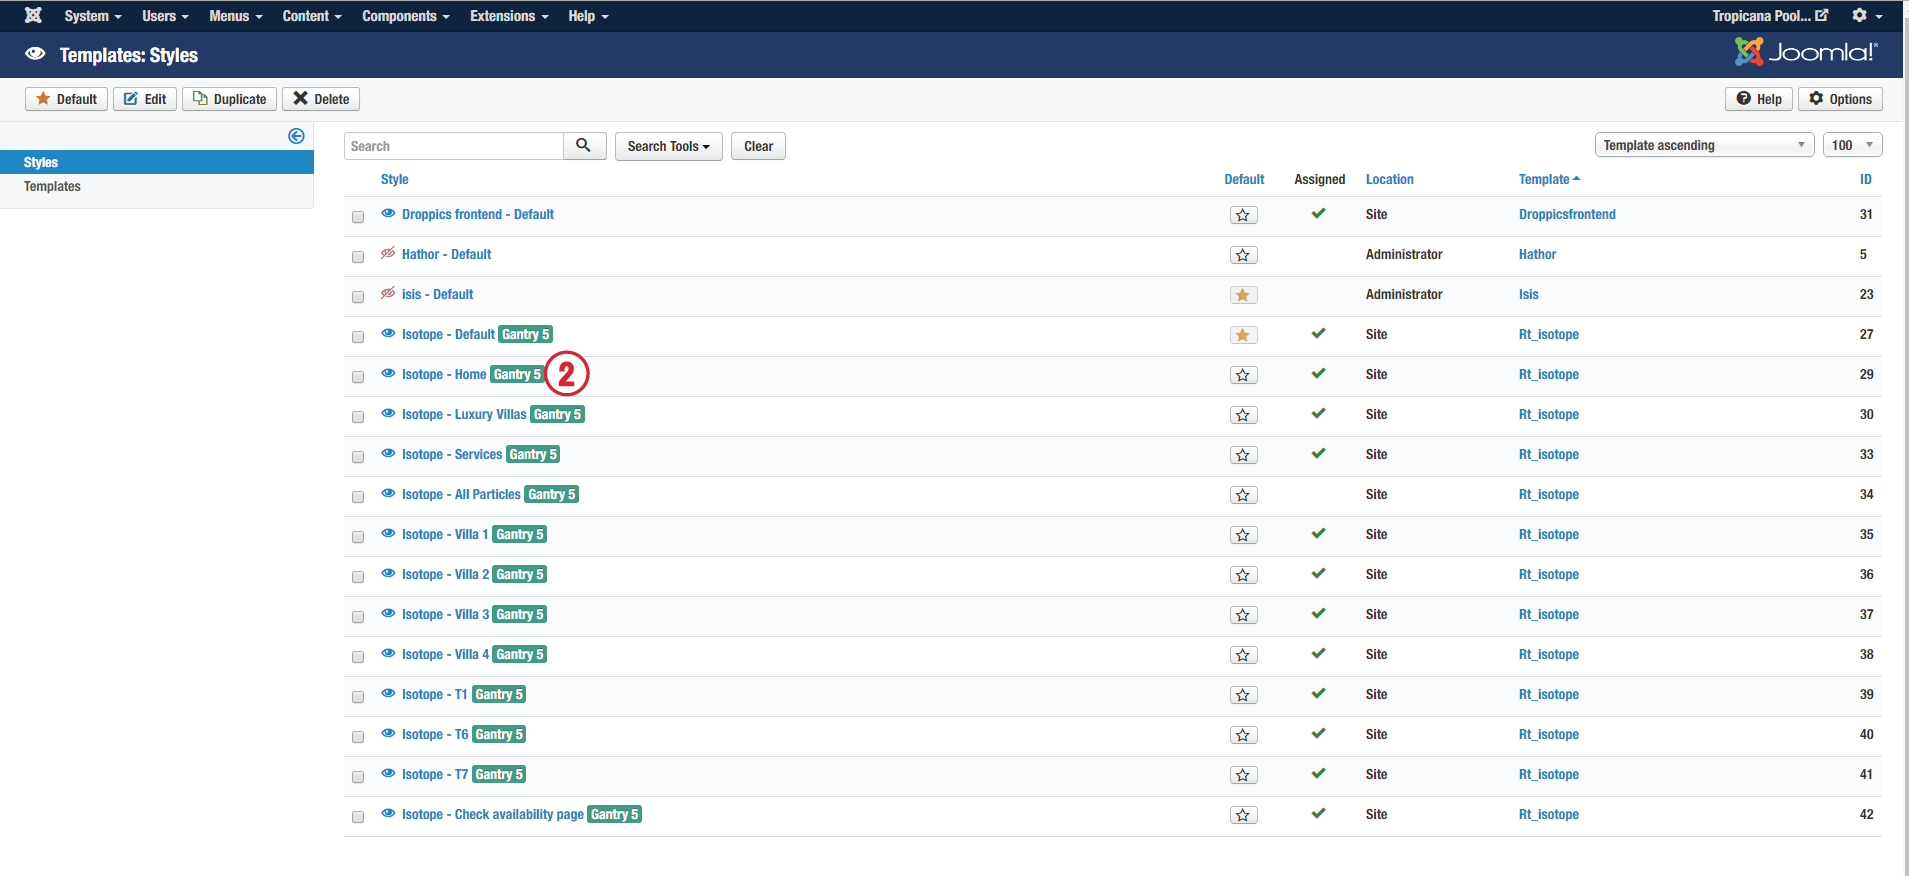
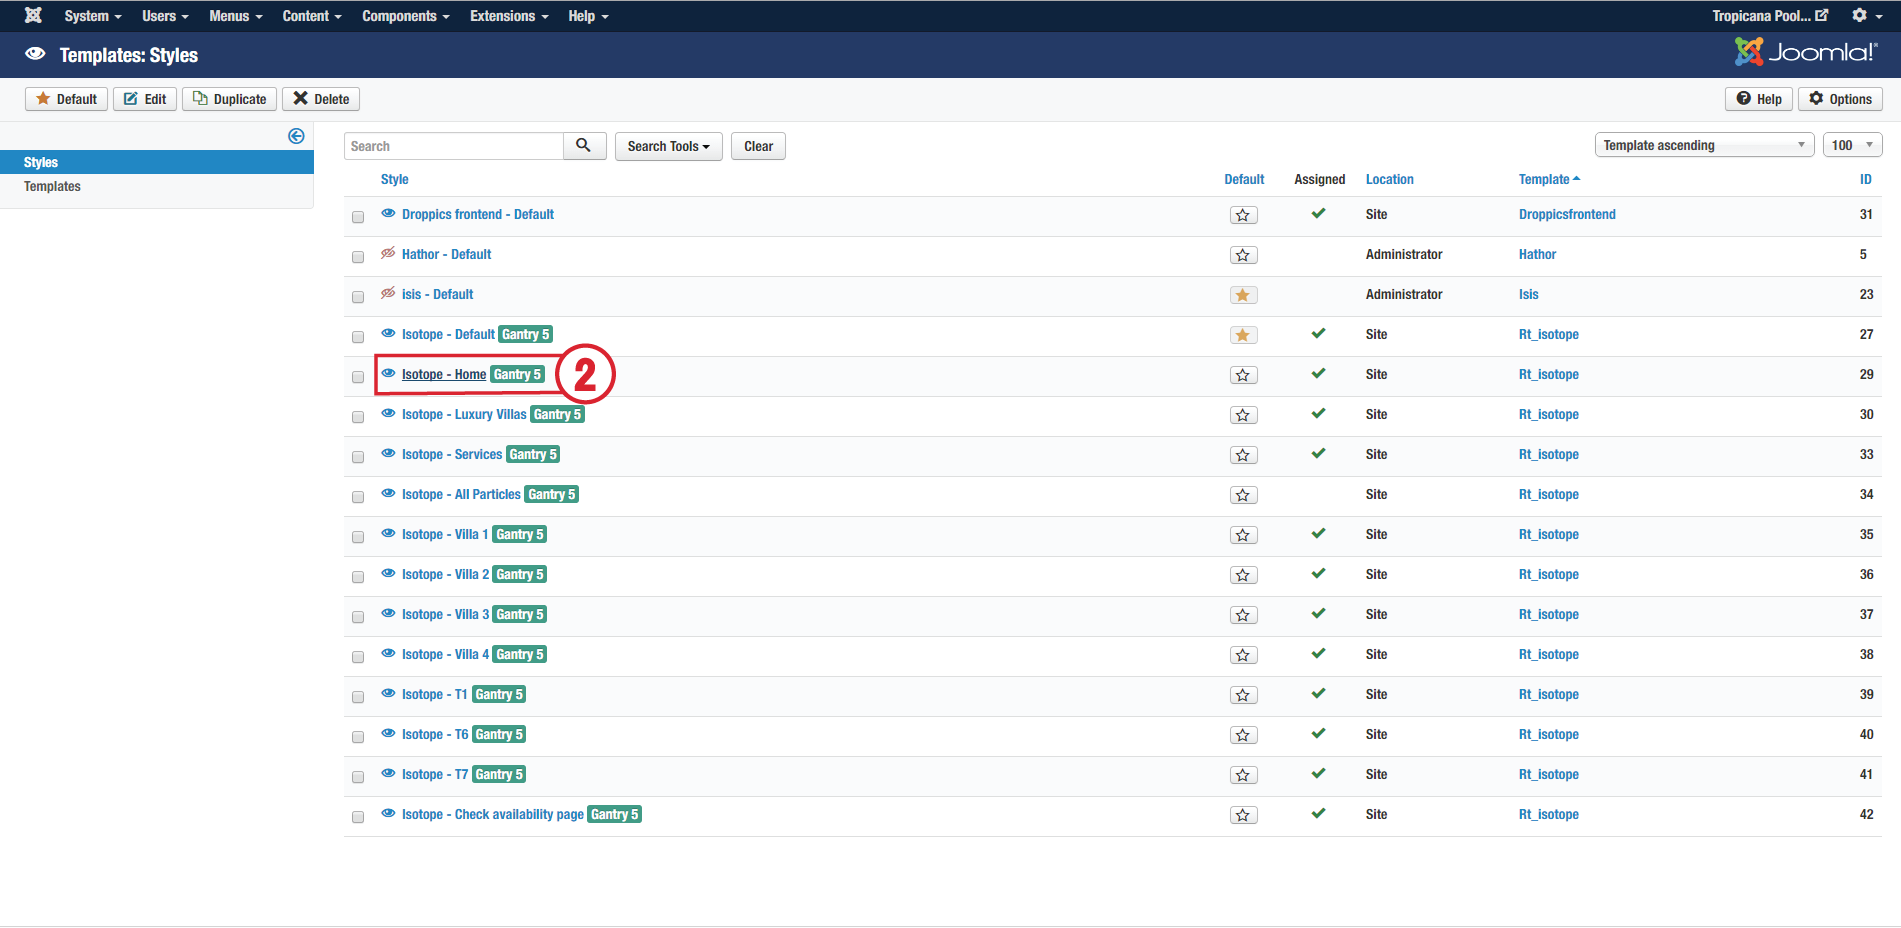
2. Choose the "Home" template for editing.
3. Click the "Layout" tab for editing the layout and positions.
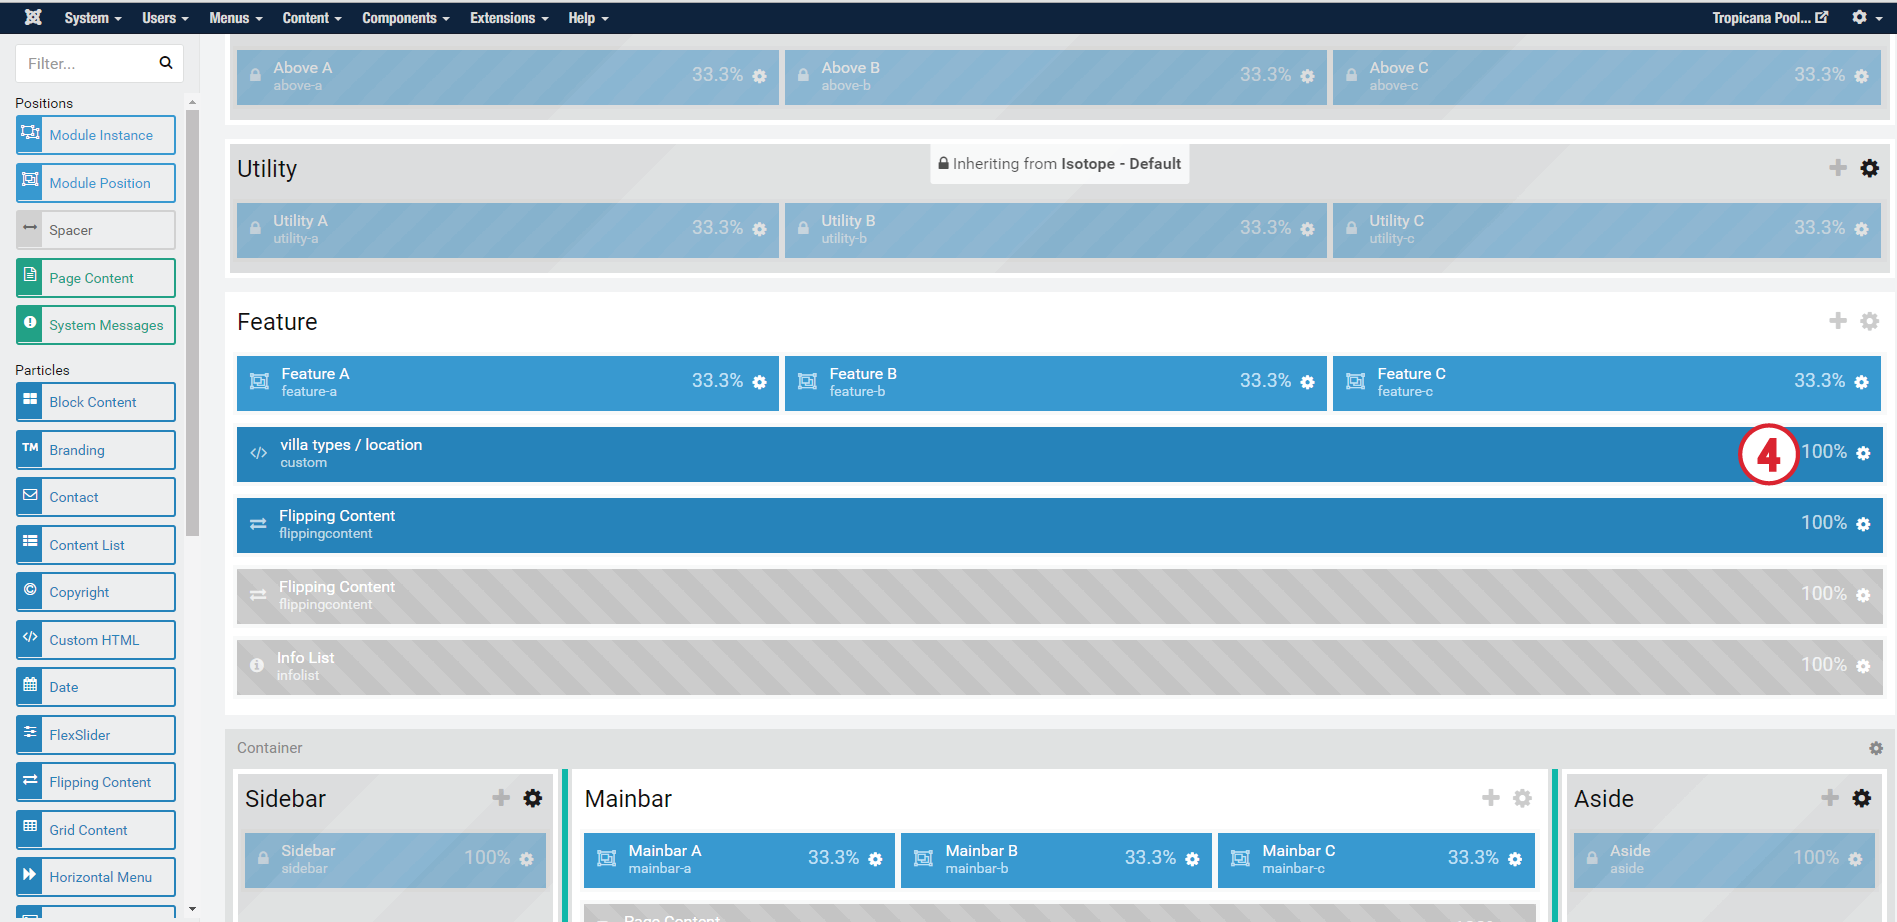
4. Click at the machine cog to get inside the editor.
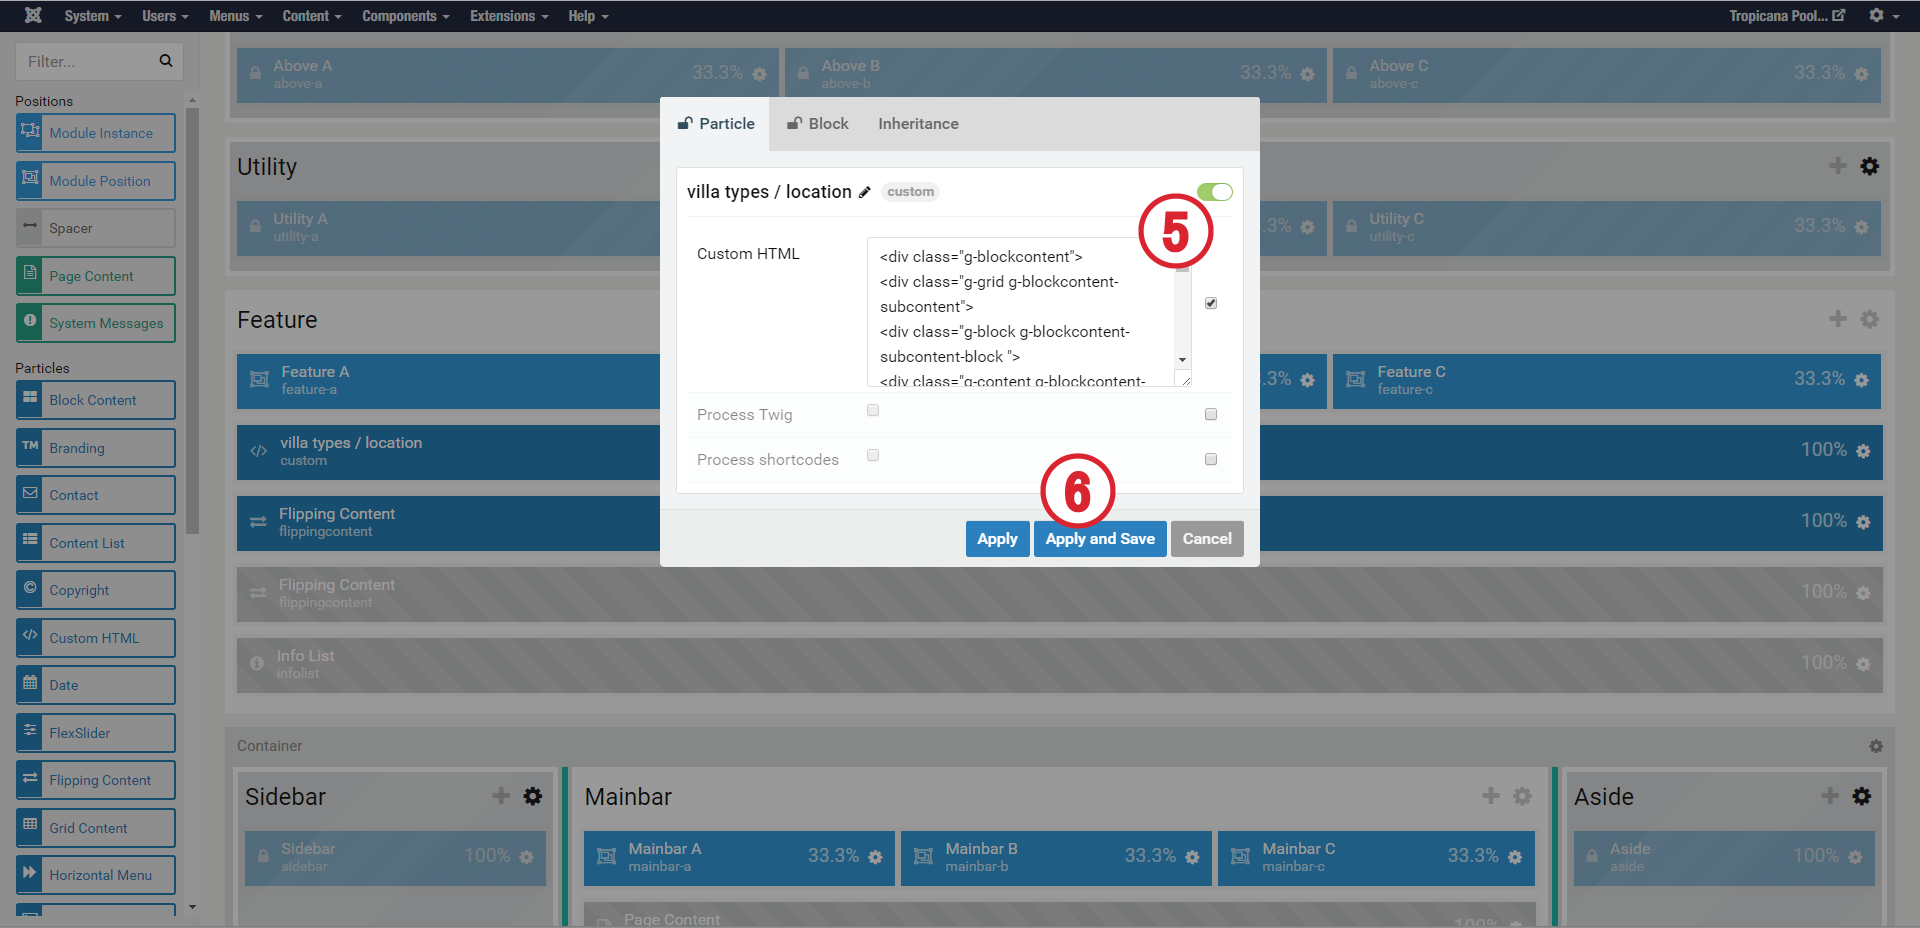
5. Add your content here.
6. Click Apply and Save
PARTICLE : FLIPPING CONTENT
1. Click the Template menu and choose the template for editing.
2. Choose the "Home" template for editing.
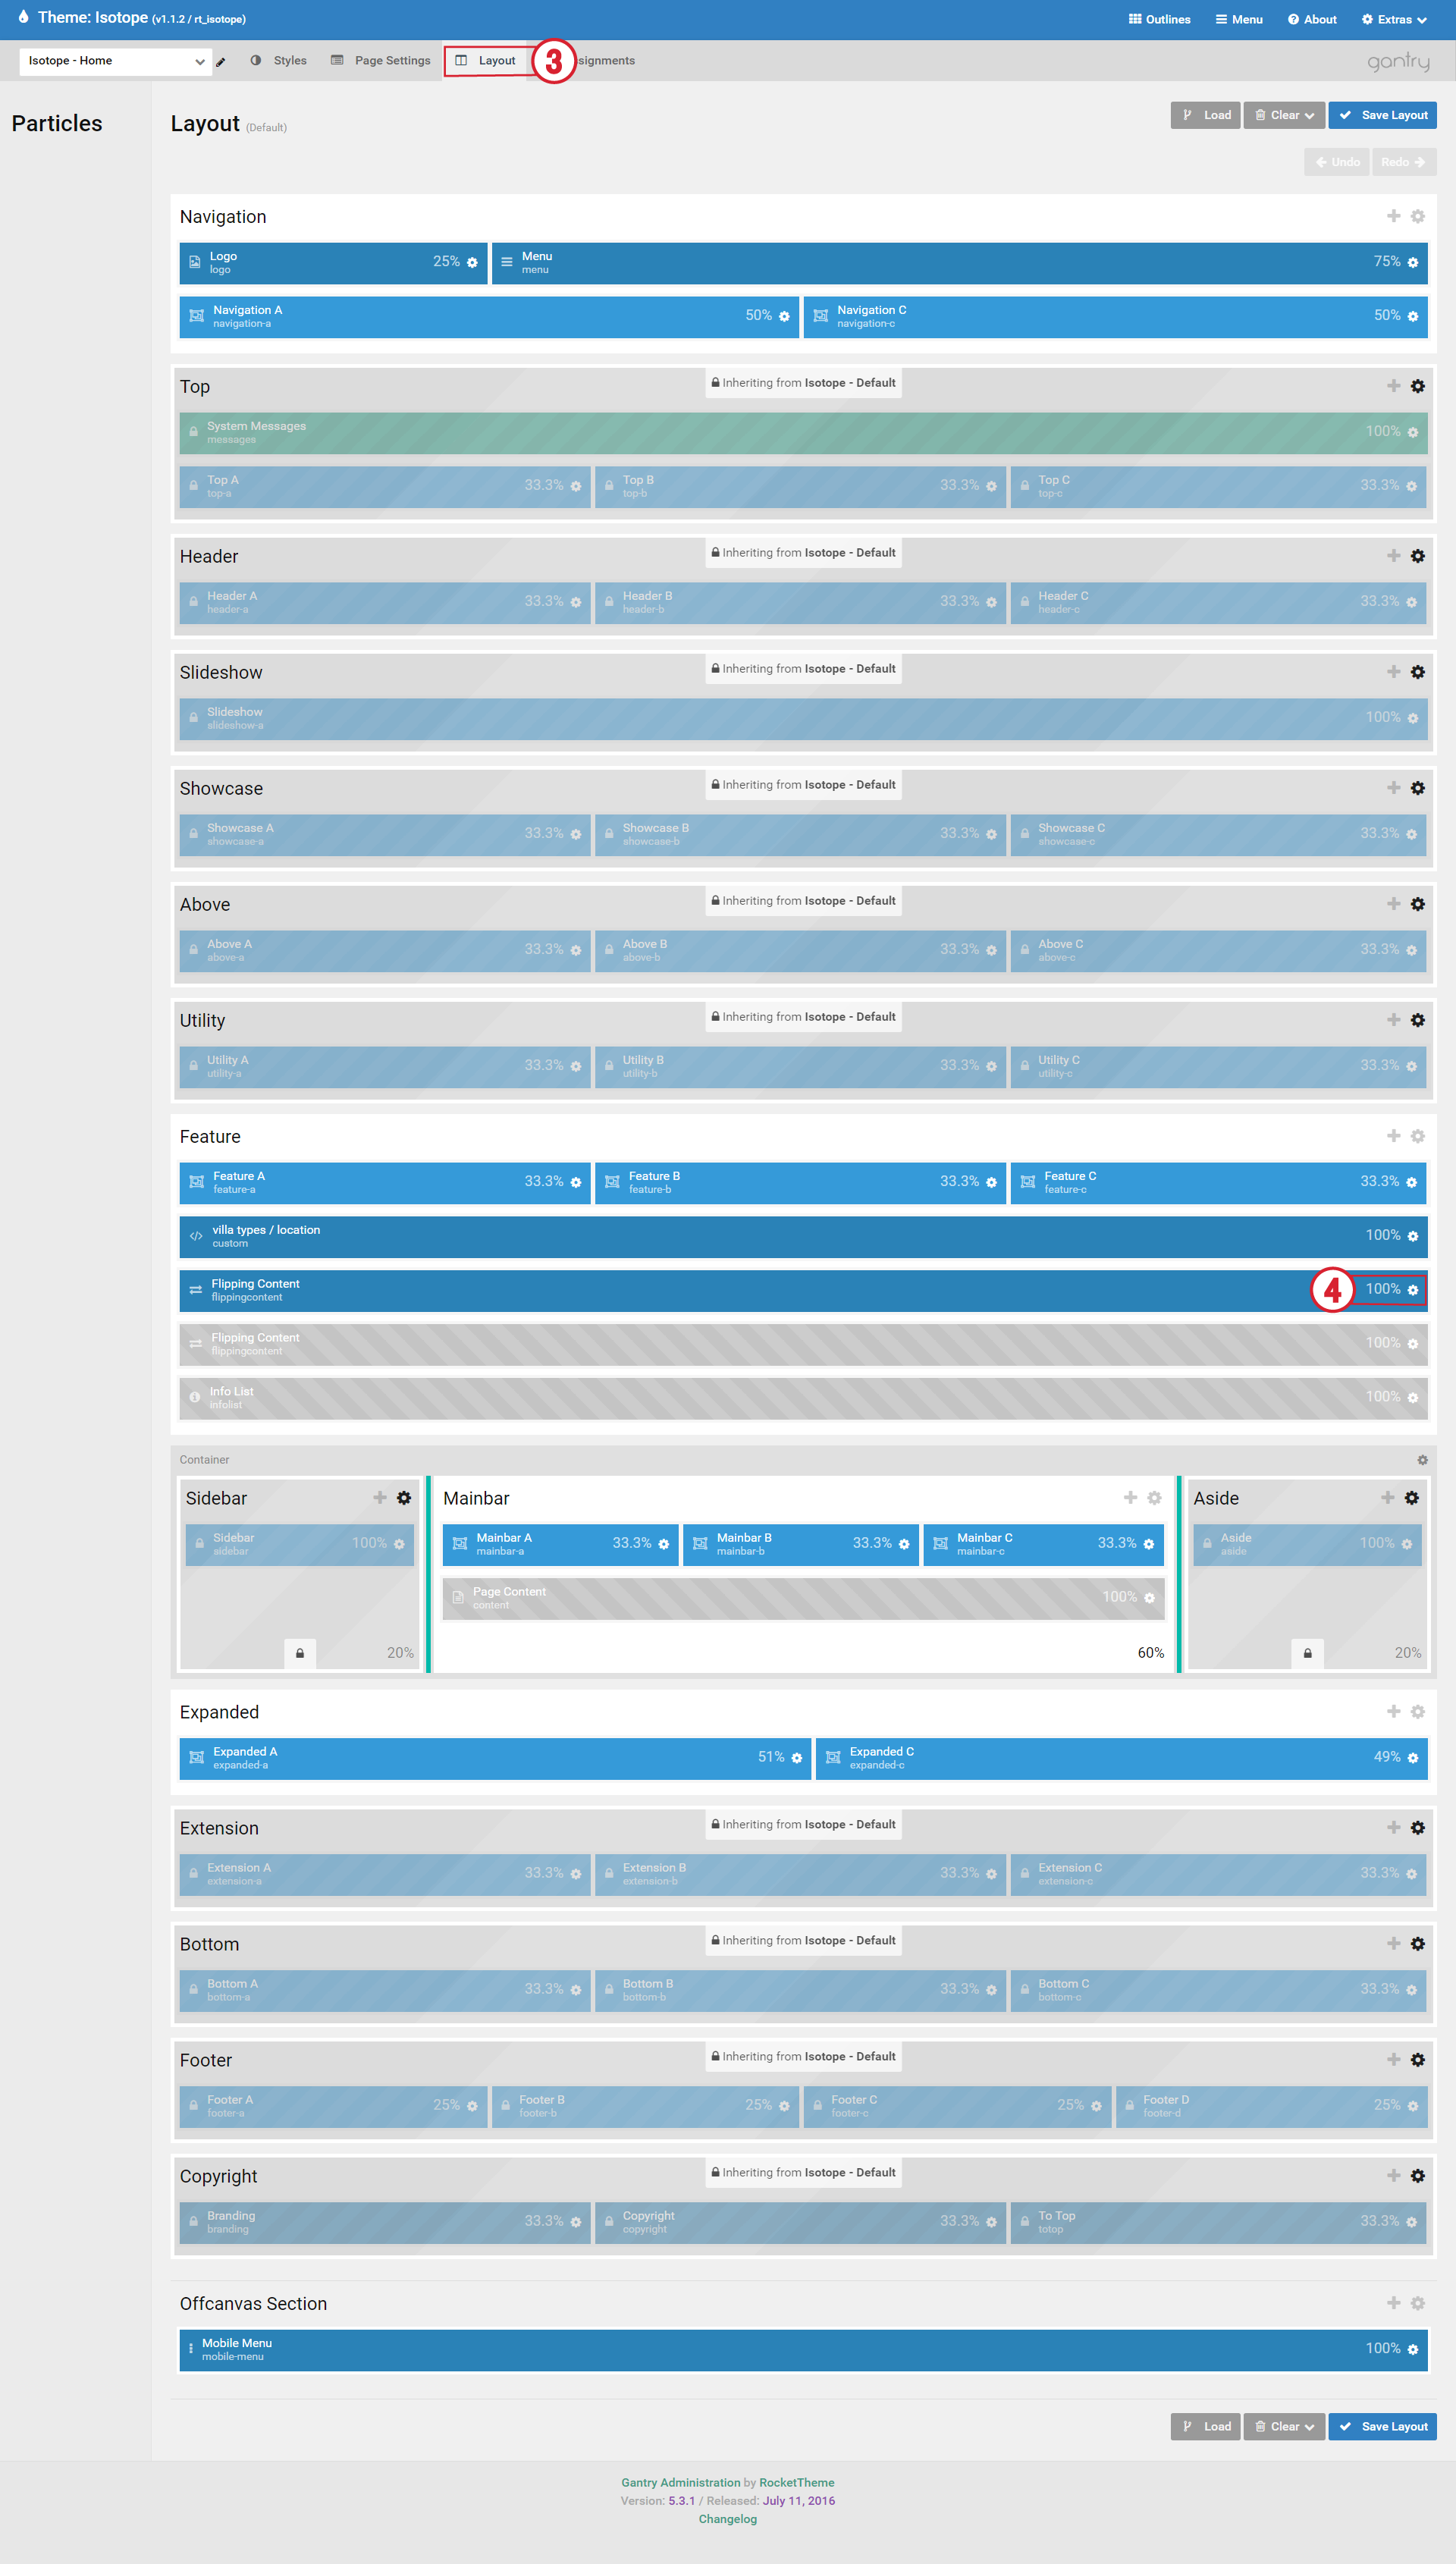
3. Click the "Layout" tab for editing the layout and positions.
4. Click at the machine cog to get inside the editor.
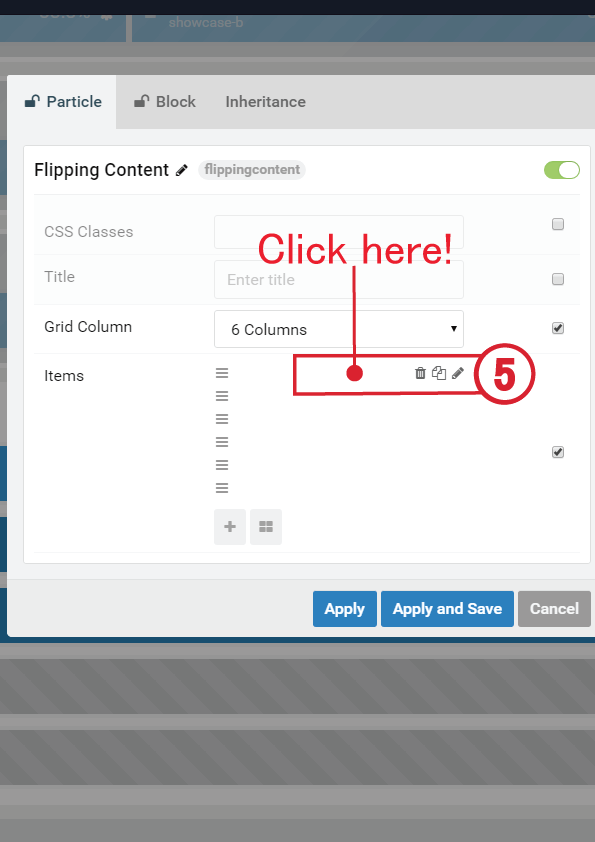
5. Click at the Red Dot to get in the editor.
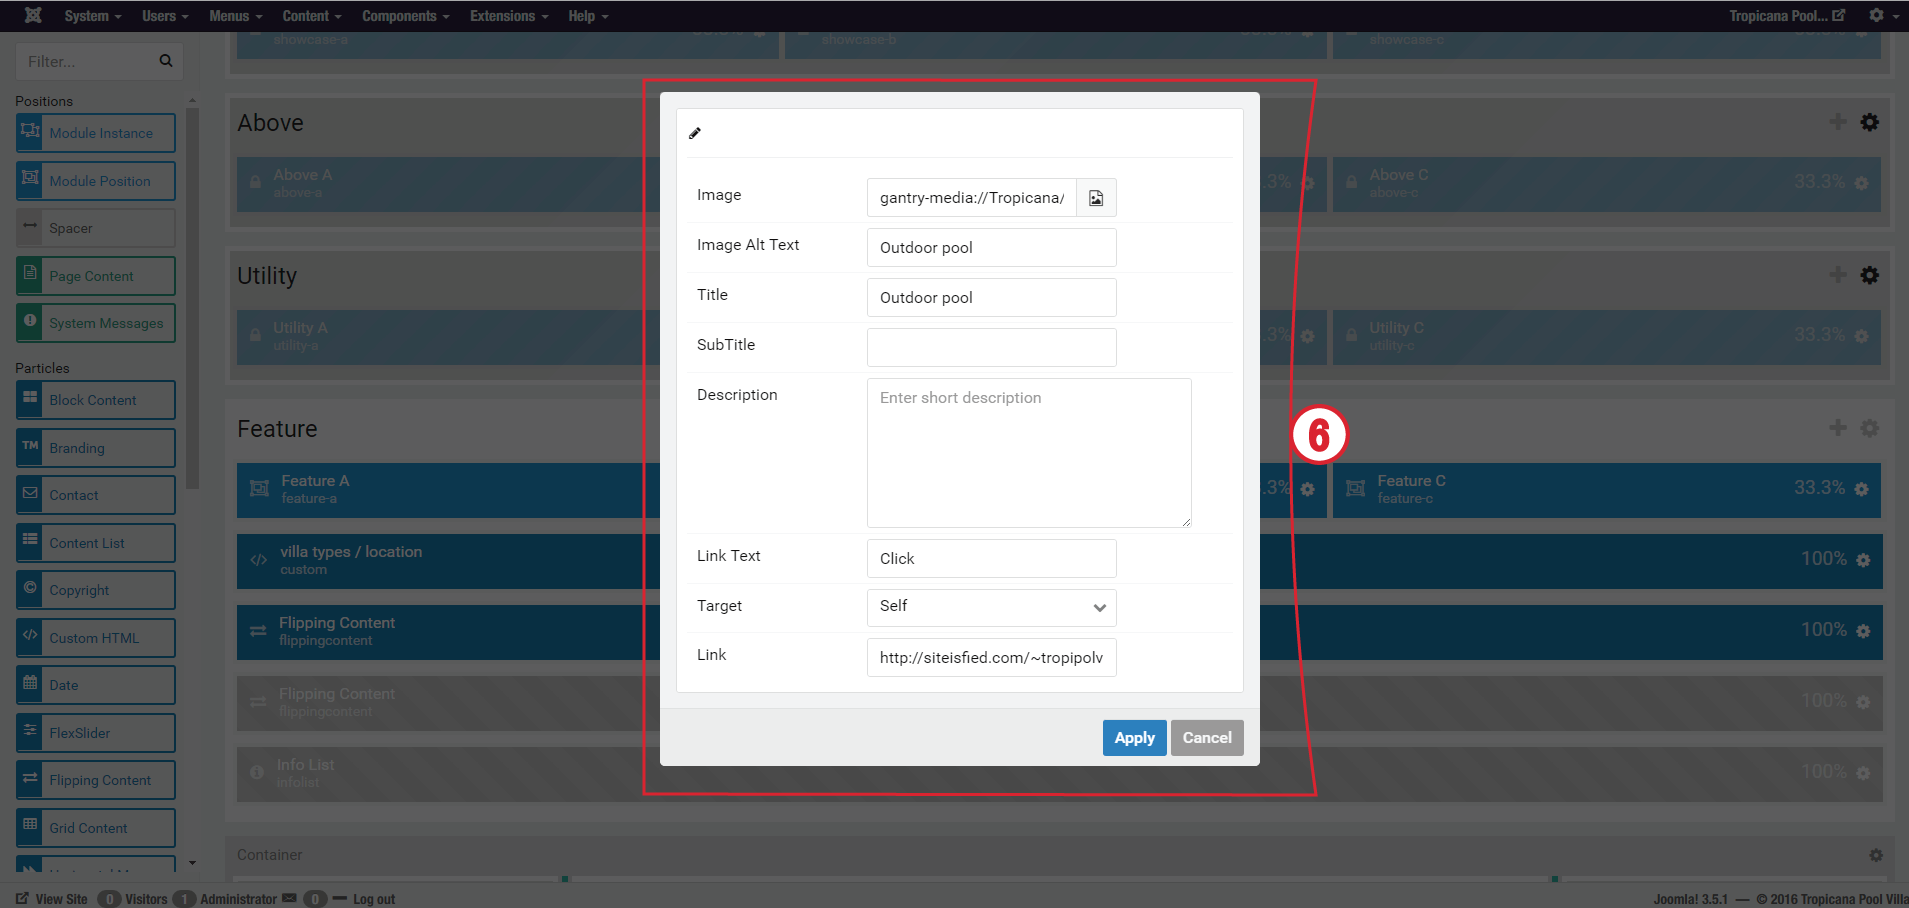
6. For editing please follow the instruction below,
- Image : Add url of the image.
- Image Alt Text : Add ALT text.
- Title : Add the image's title.
- Link Text : Add text for link.
- Link : Add url to give the link destination.
*Don't forget to click the blue button "Apply"
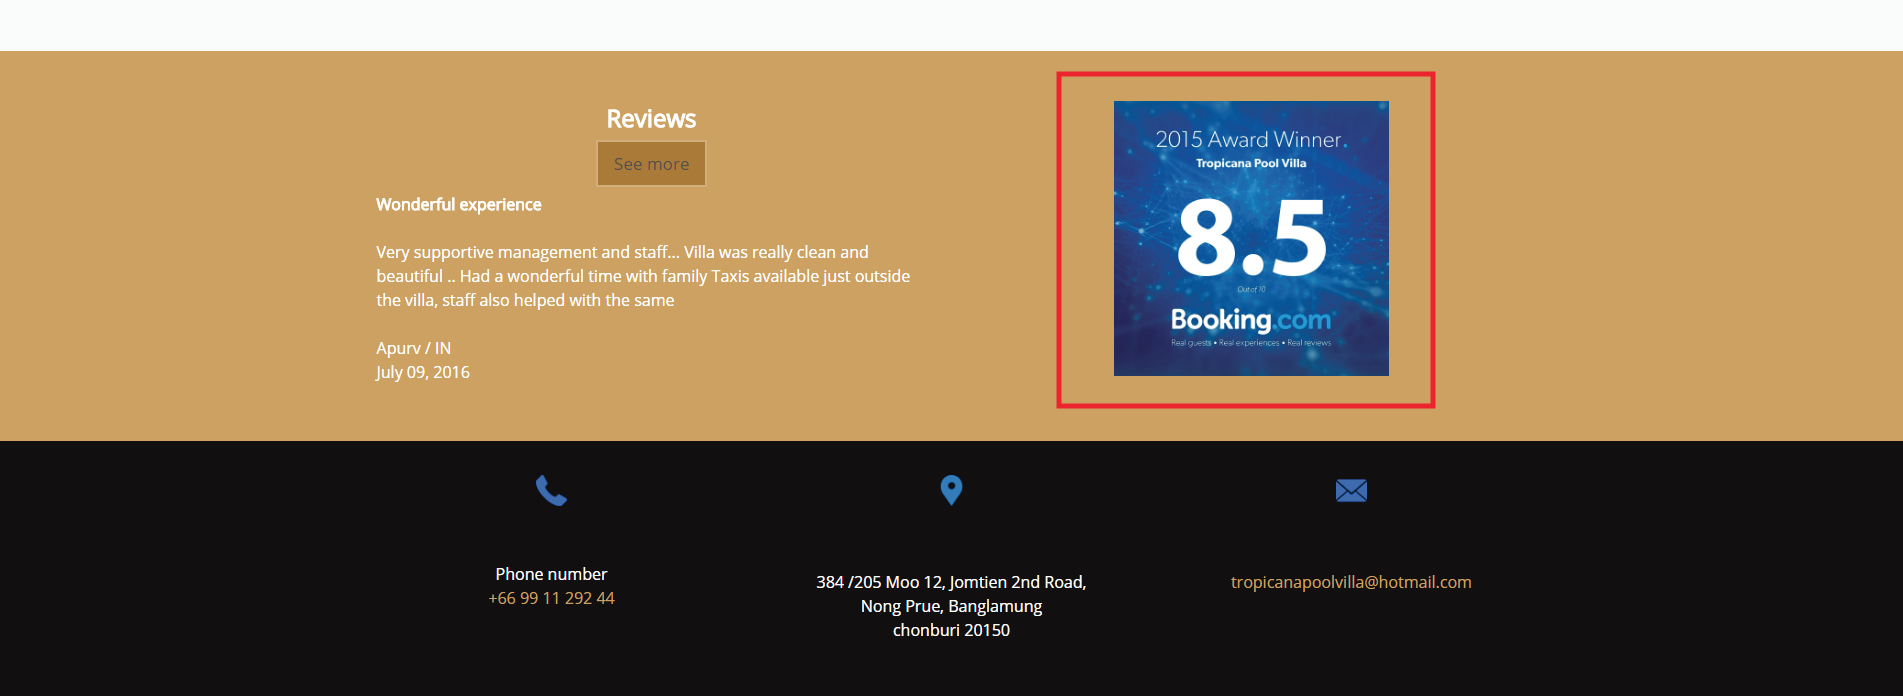
MODULE : REVIEW WONDERFUL EXPERIENCE
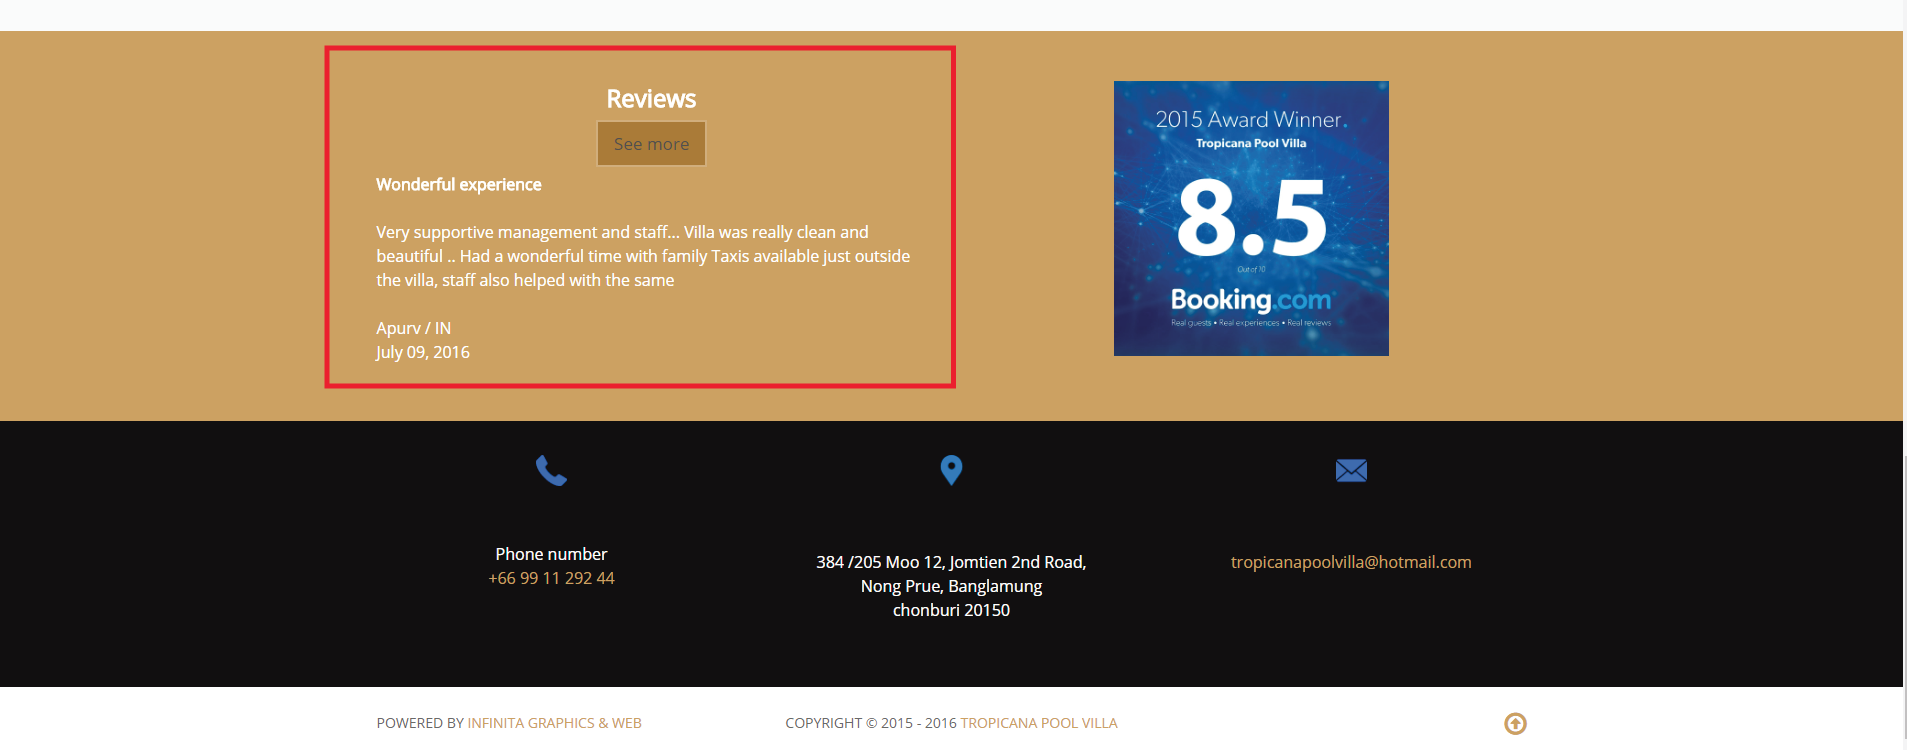
1. Click the Module menu and choose the module for editing.
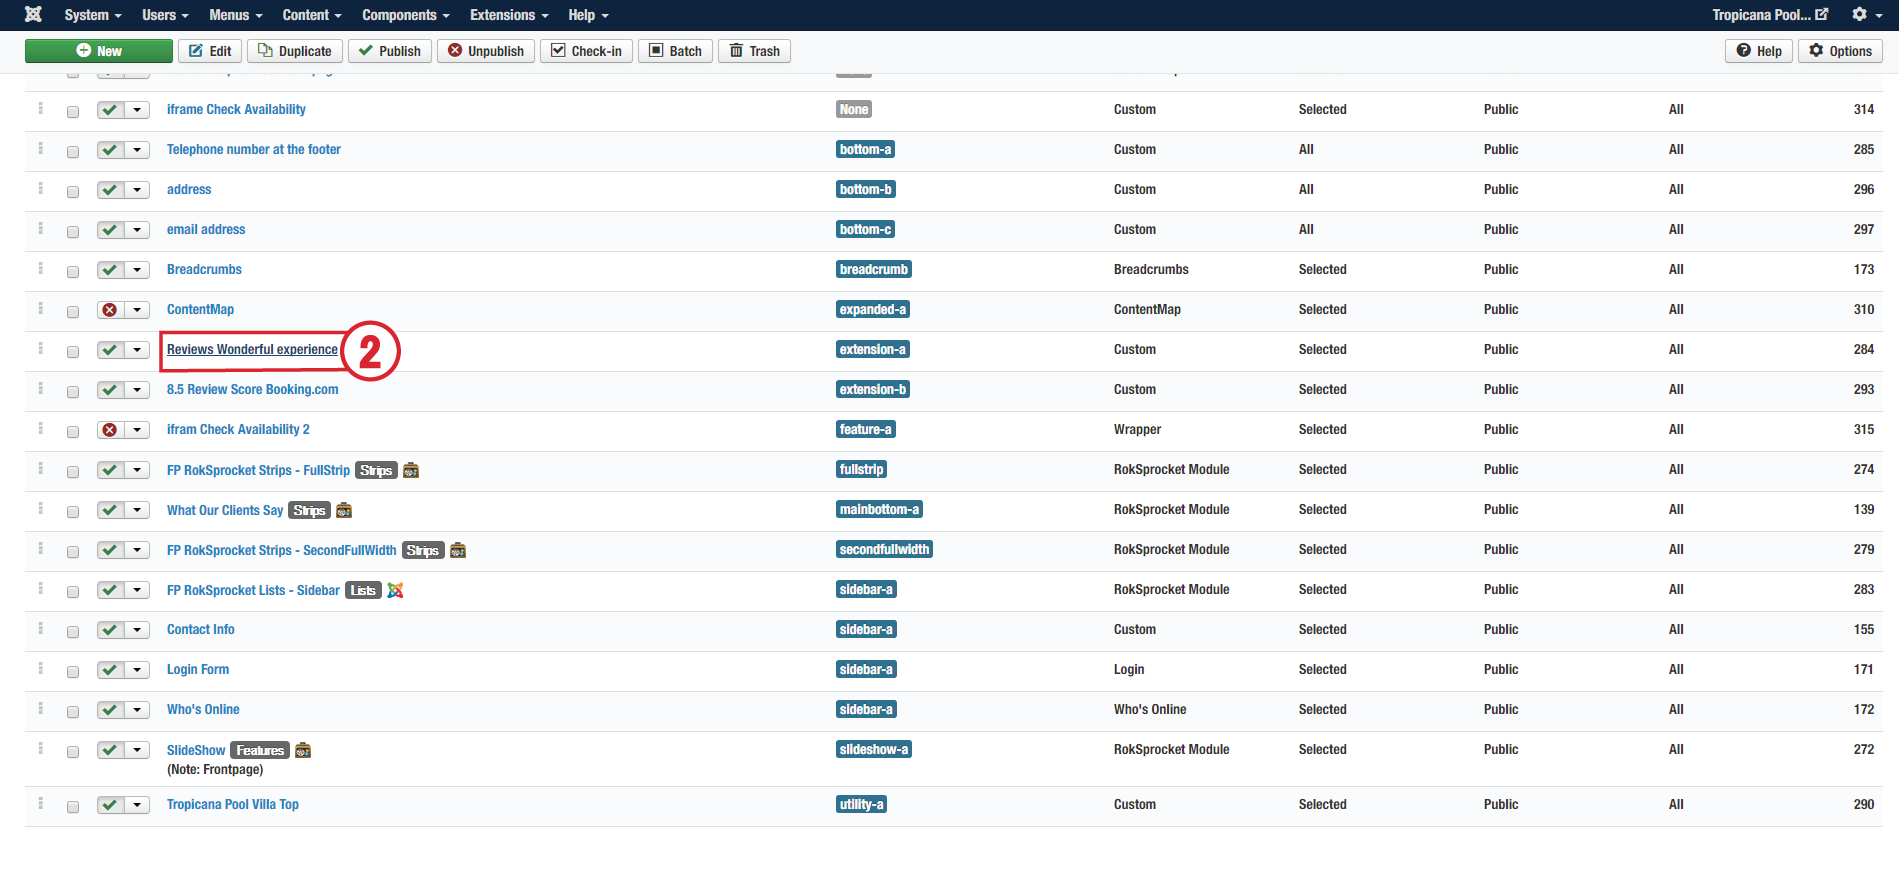
2. Choose the "Review Wonderful experience" module for editing.
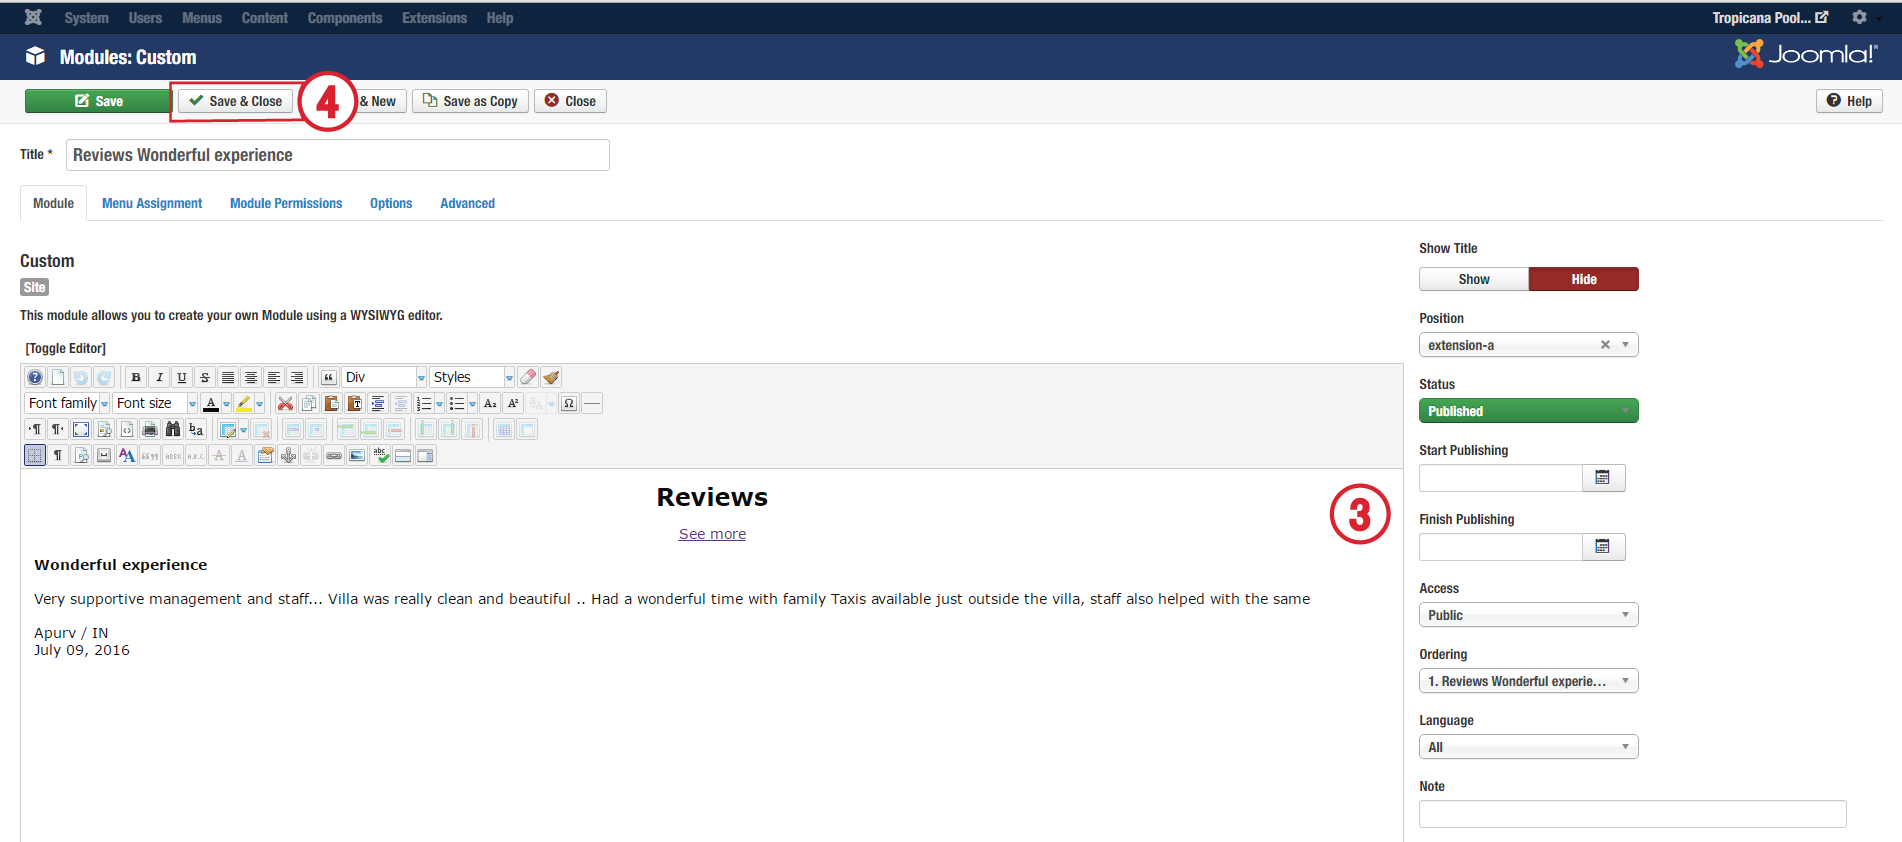
3. Edit content as you want.
4. Save & Close
MODULE : 8.5 REVIEW SCORE BOOKING.COM
1. Click the Module menu and choose the module for editing.
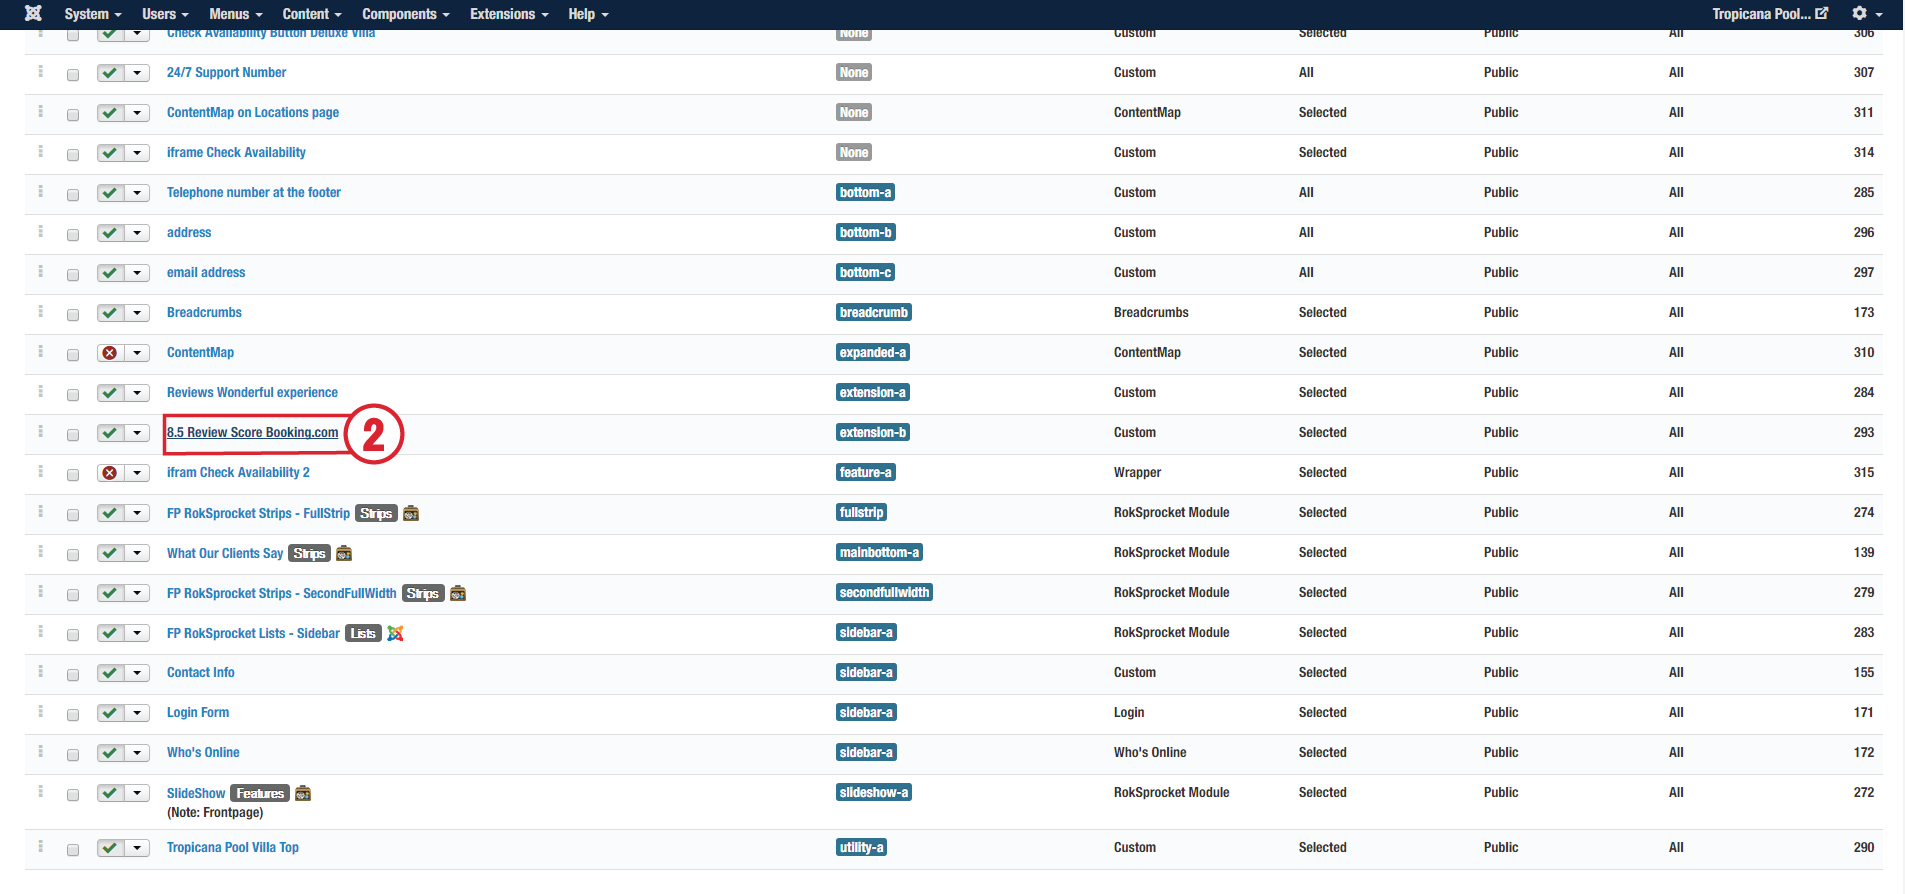
2. Choose the "8.5 Review Score Booking.com" module for editing.
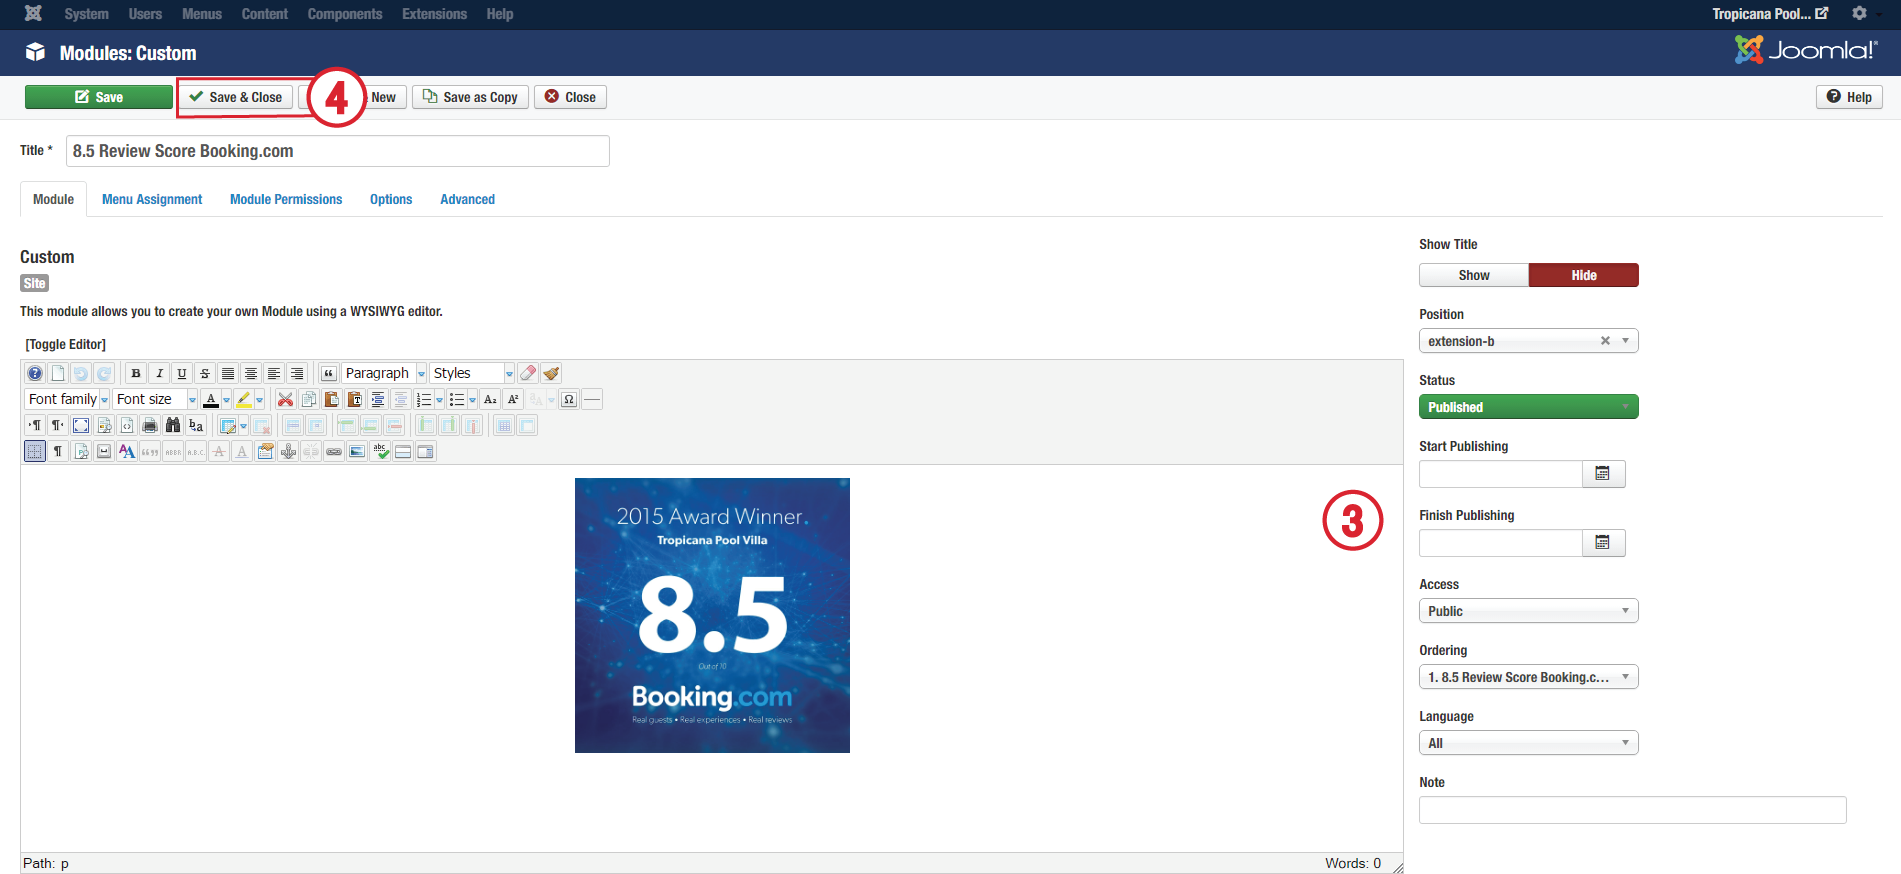
3. Edit content as you want.
4. Save & Close
MODULE : PHONE NUMBER
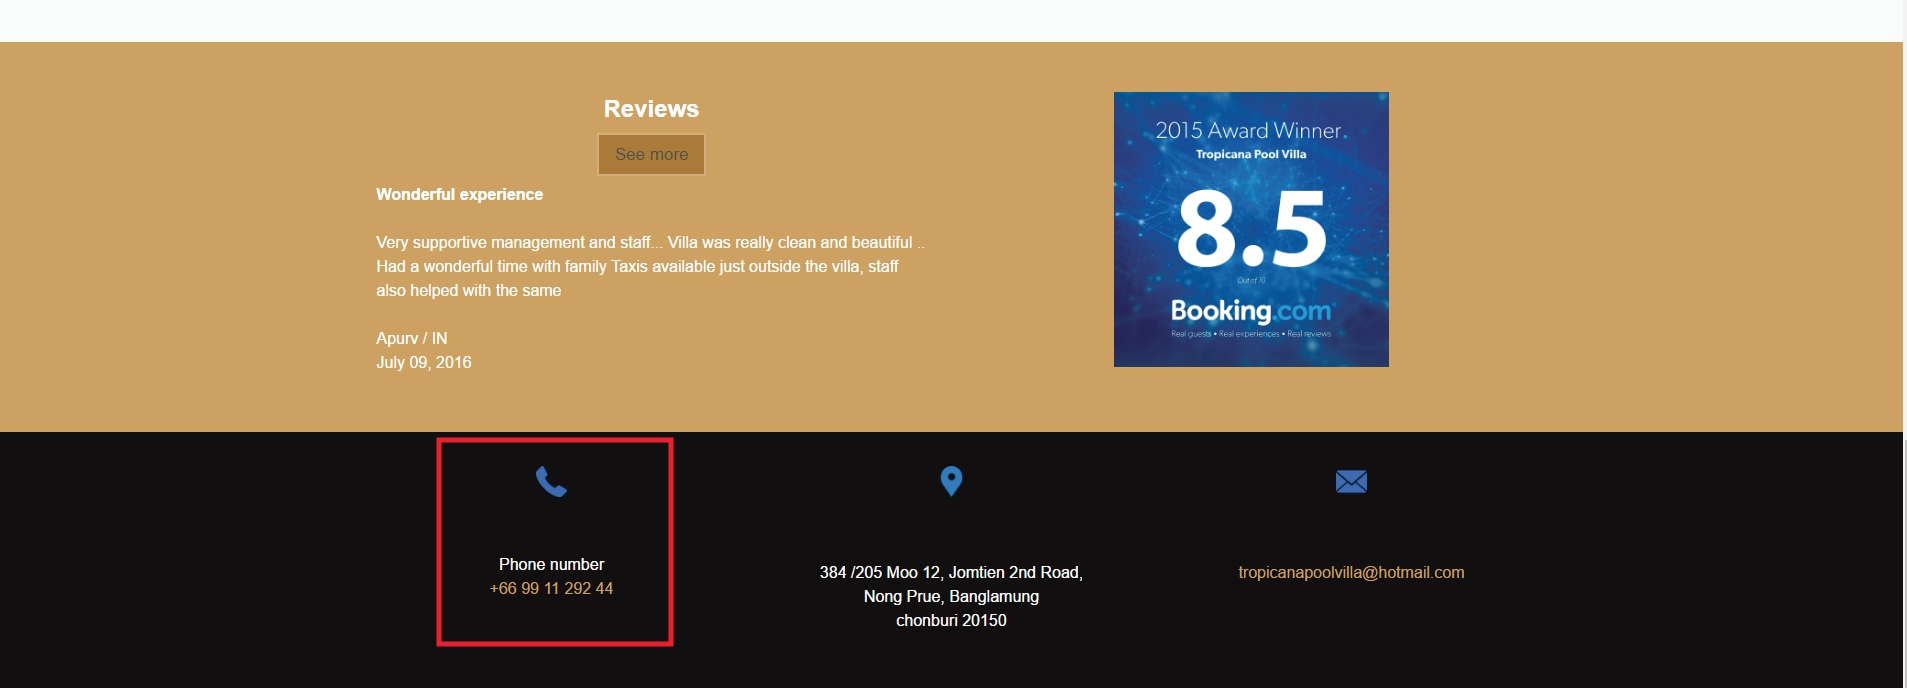
1. Click the Module menu and choose the module for editing.
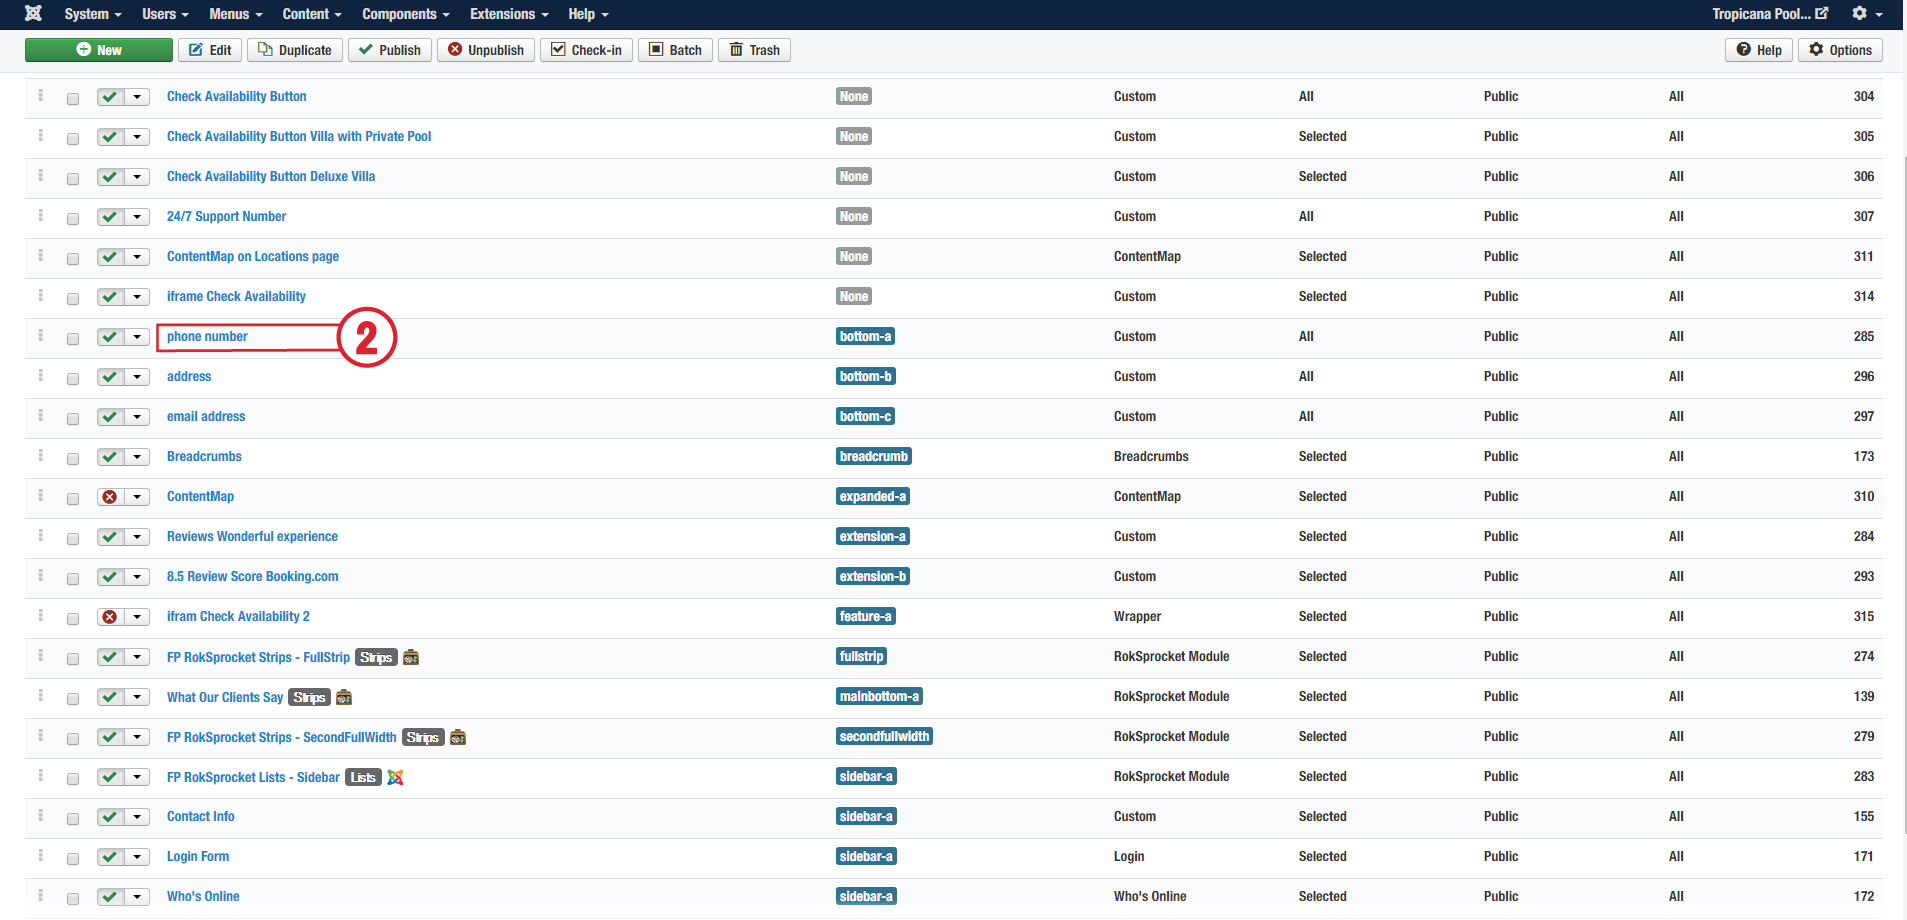
2. Choose the "phone number" module for editing.

3. Edit content as you want.
4. Save & Close.
MODULE : ADDRESS
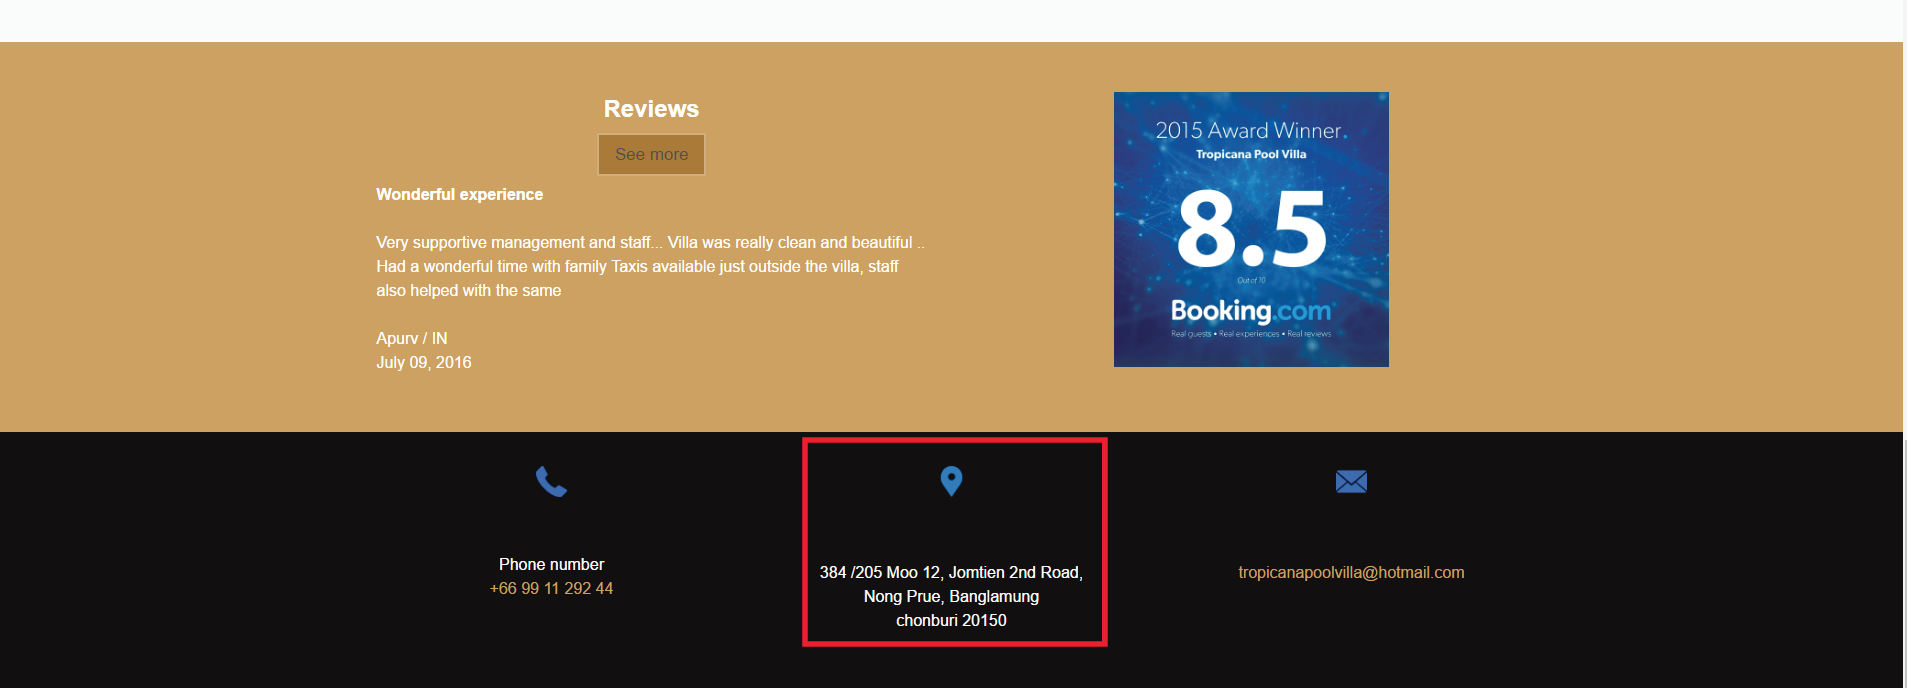
1. Click the Module menu and choose the module for editing.
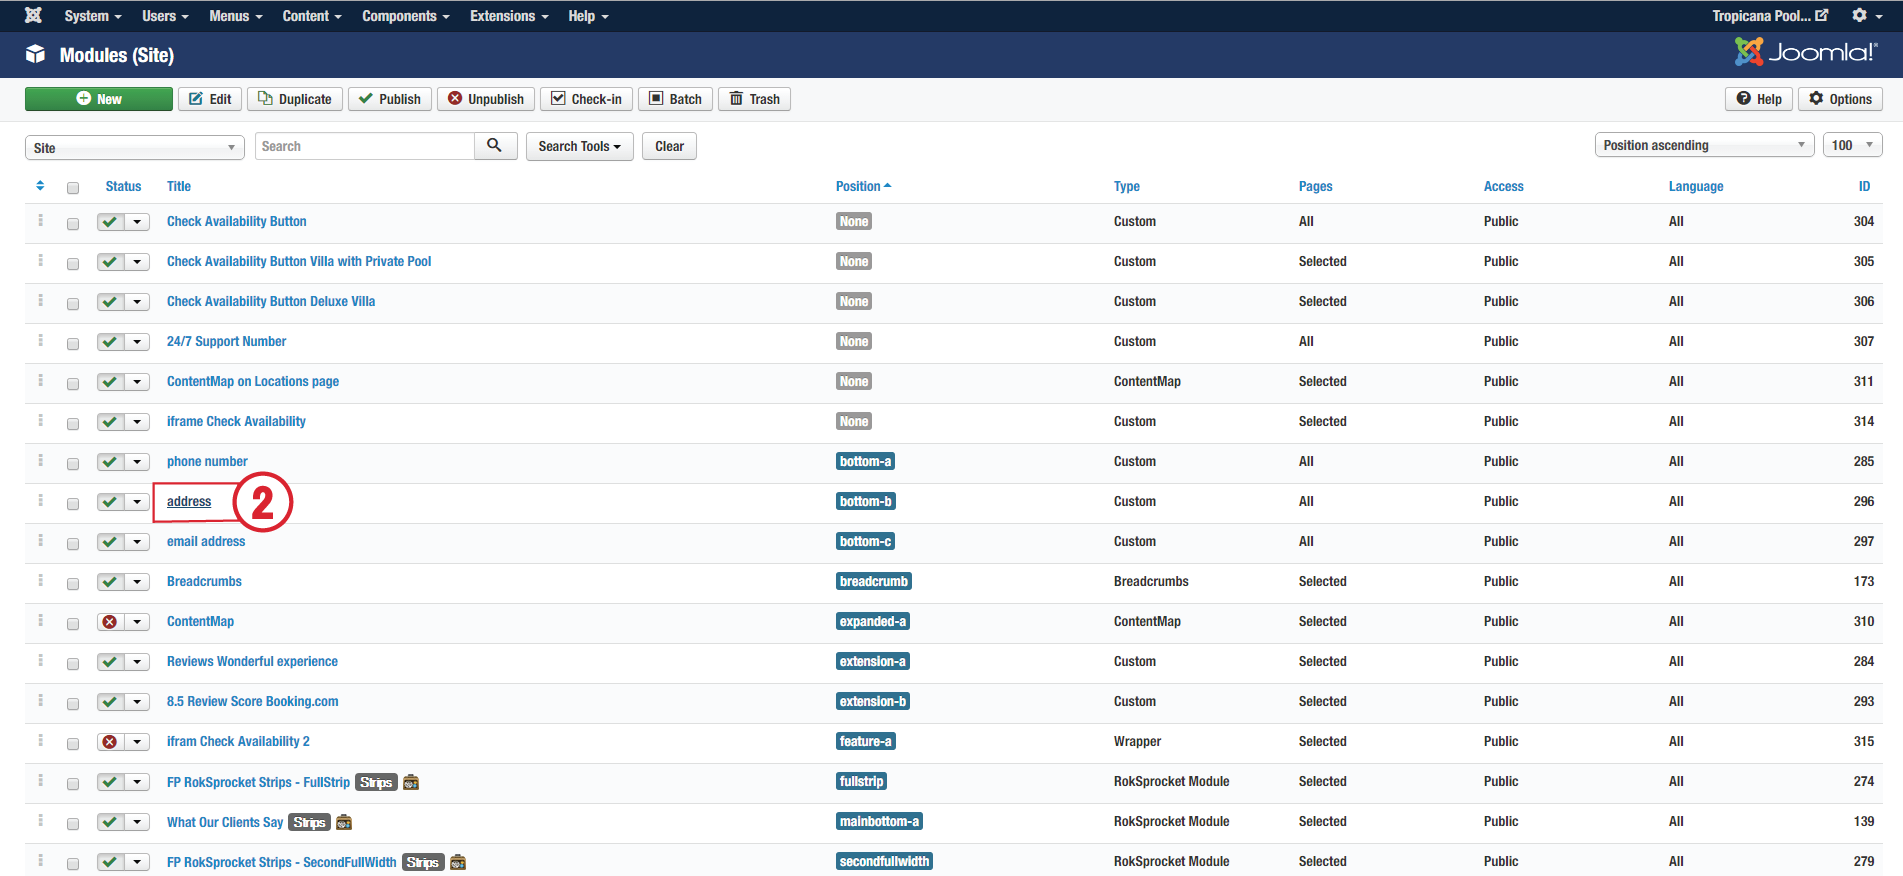
2. Choose the "address" module for editing.

3. Edit content as you want.
4. Save & Close.
MODULE : EMAIL ADDRESS
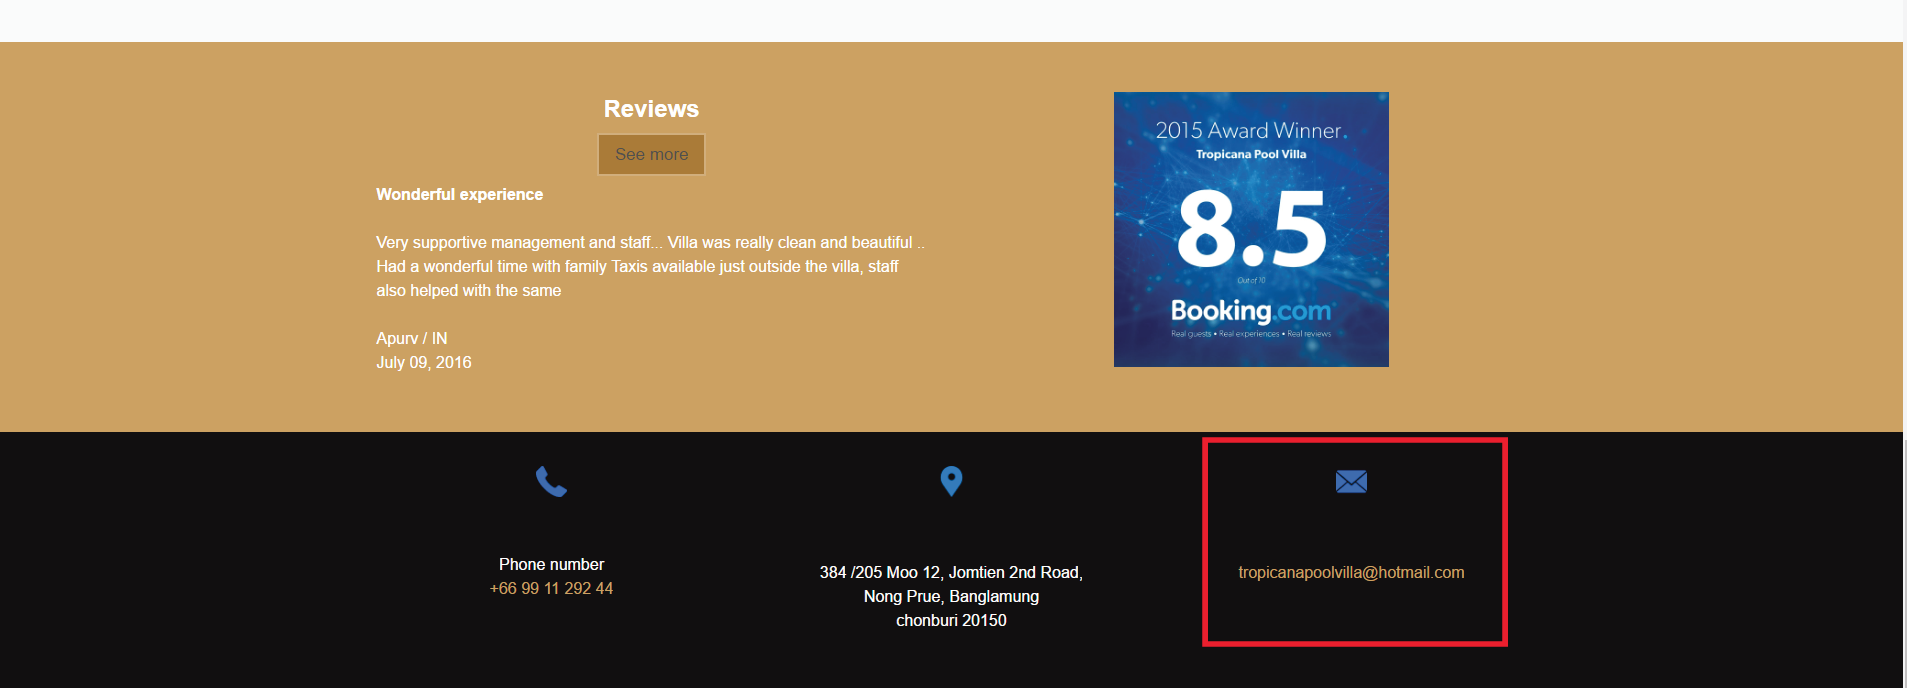
1. Click the Module menu and choose the module for editing.

2. Choose the "email address" module for editing.
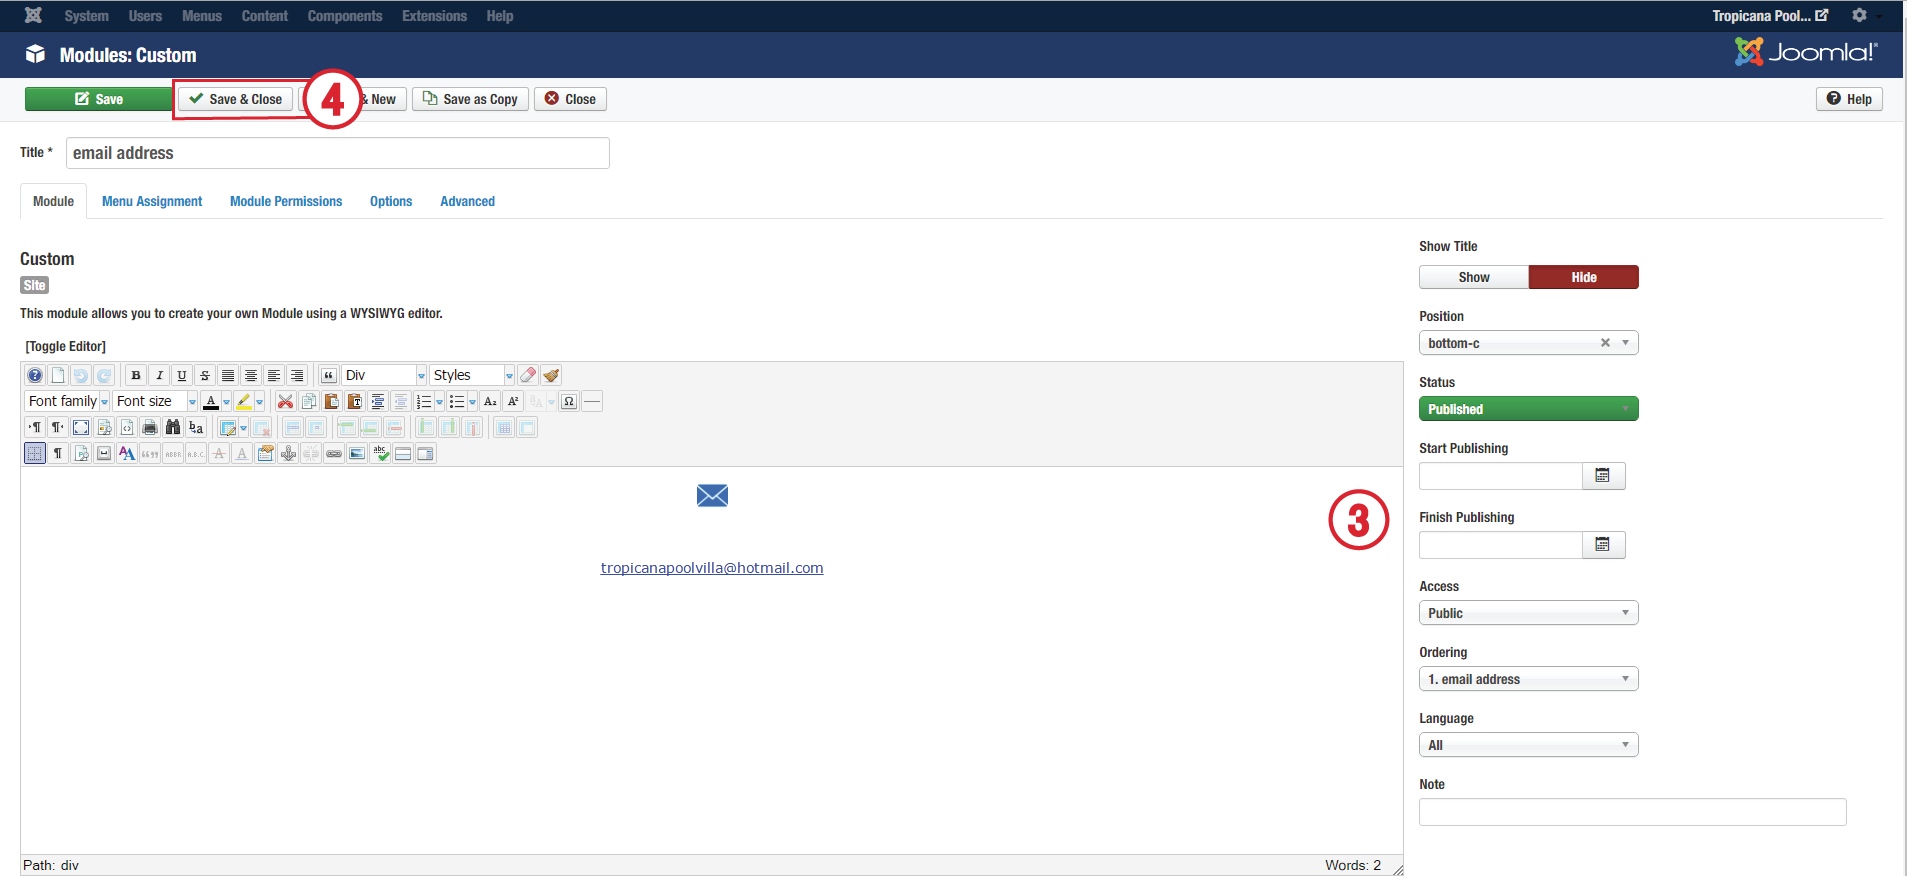
3. Edit content as you want.
4. Save & Close.
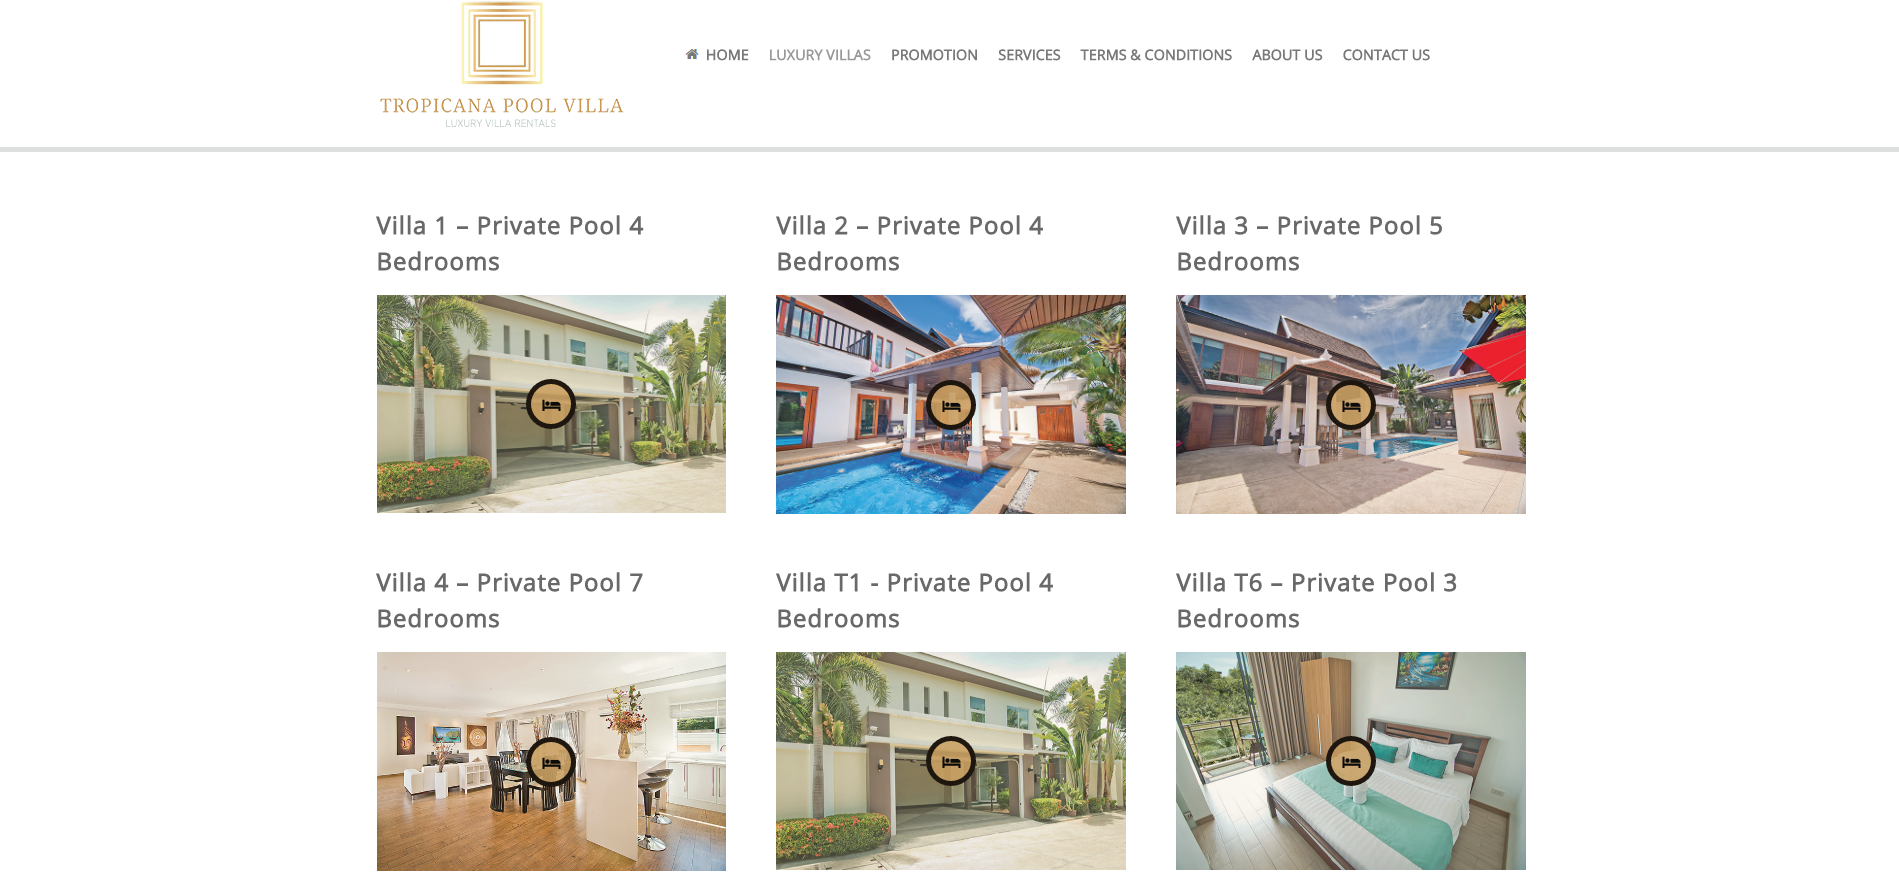
LUXURY VILLAS
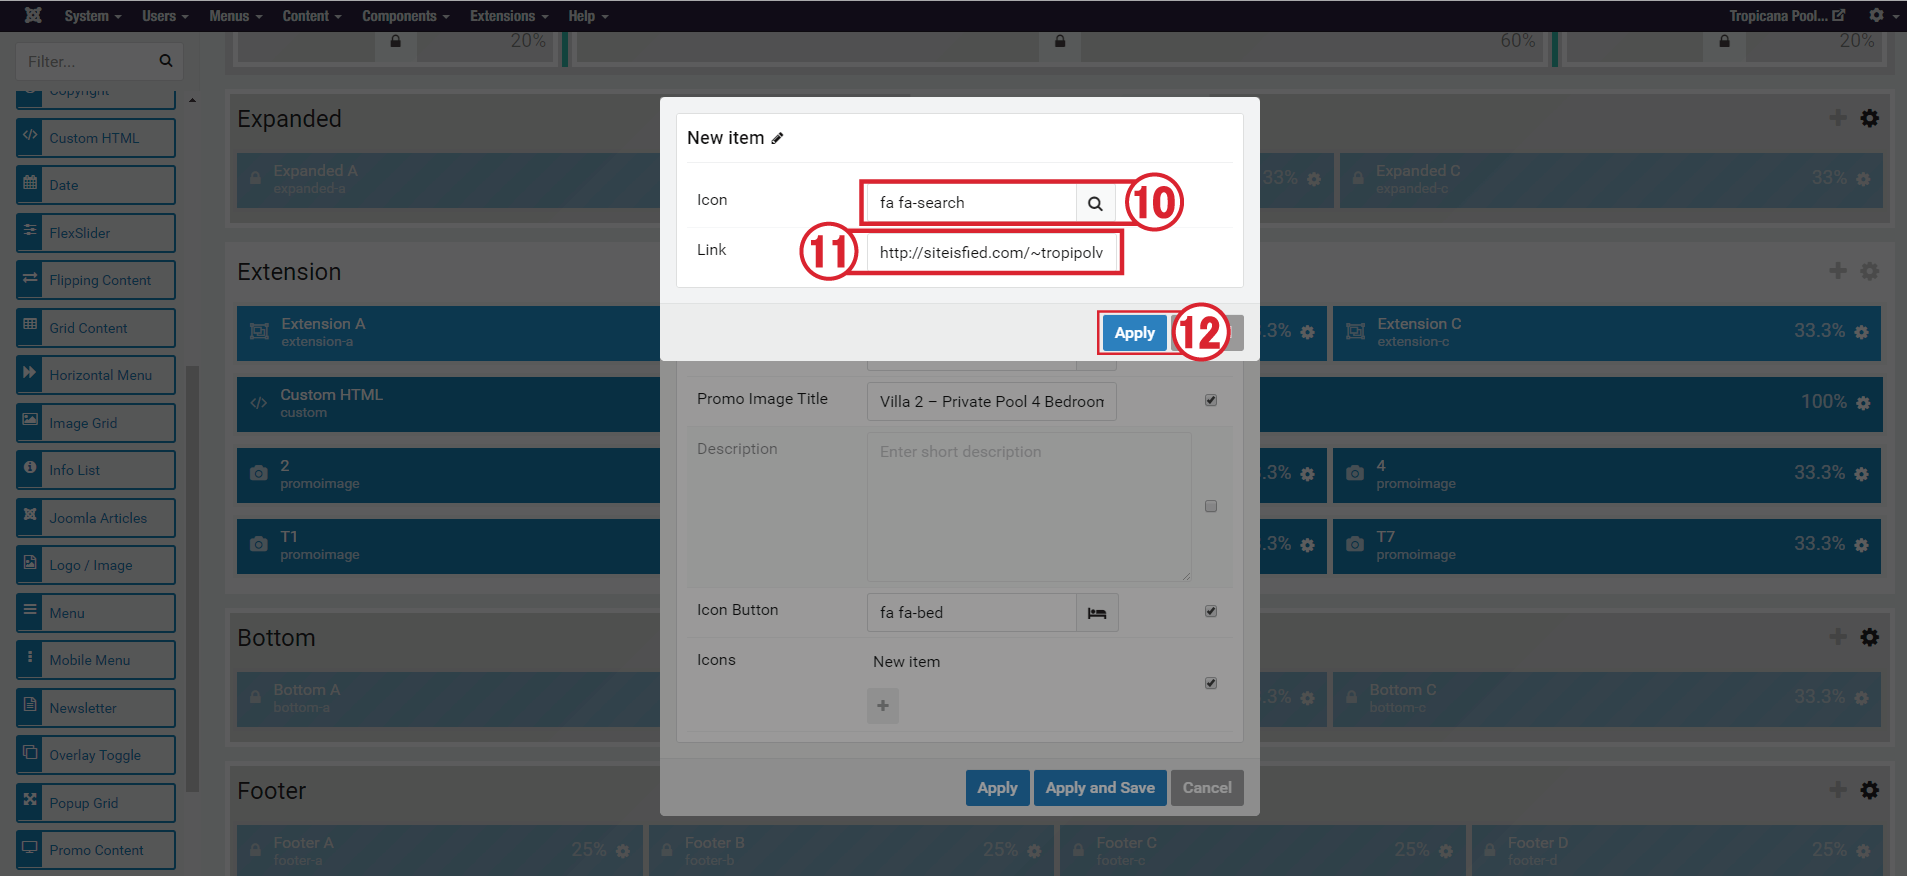
PARTICLE : PROMO IMAGE
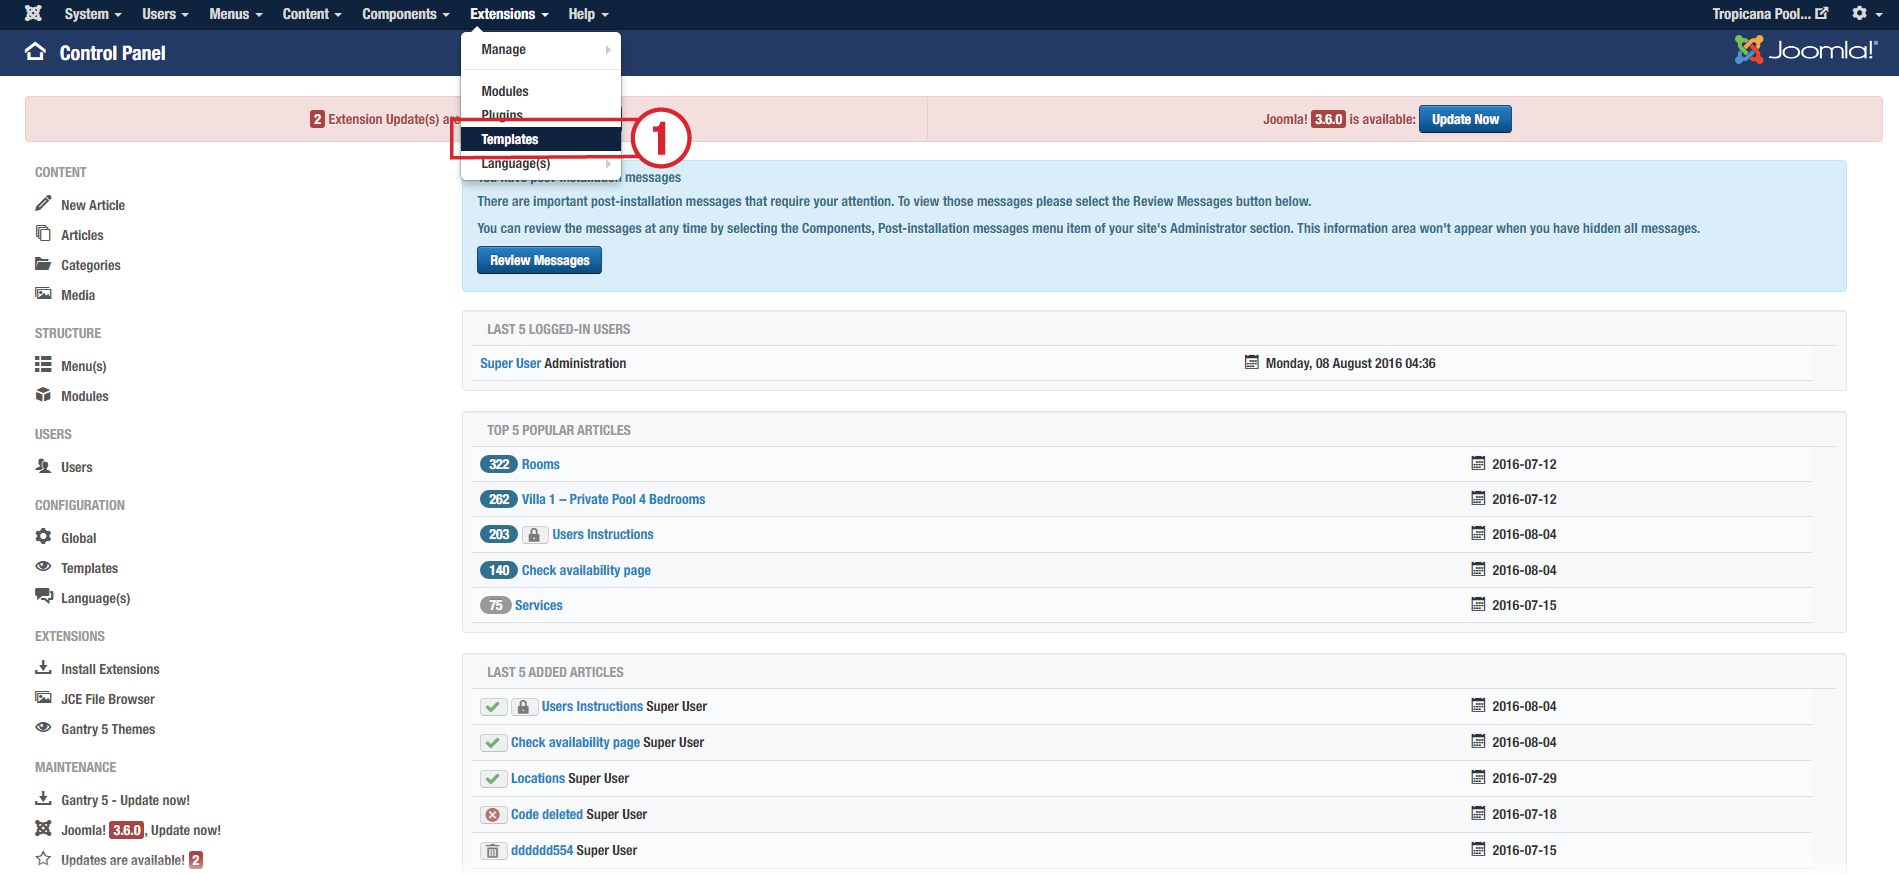
1. Click the Template menu and choose the template for editing.
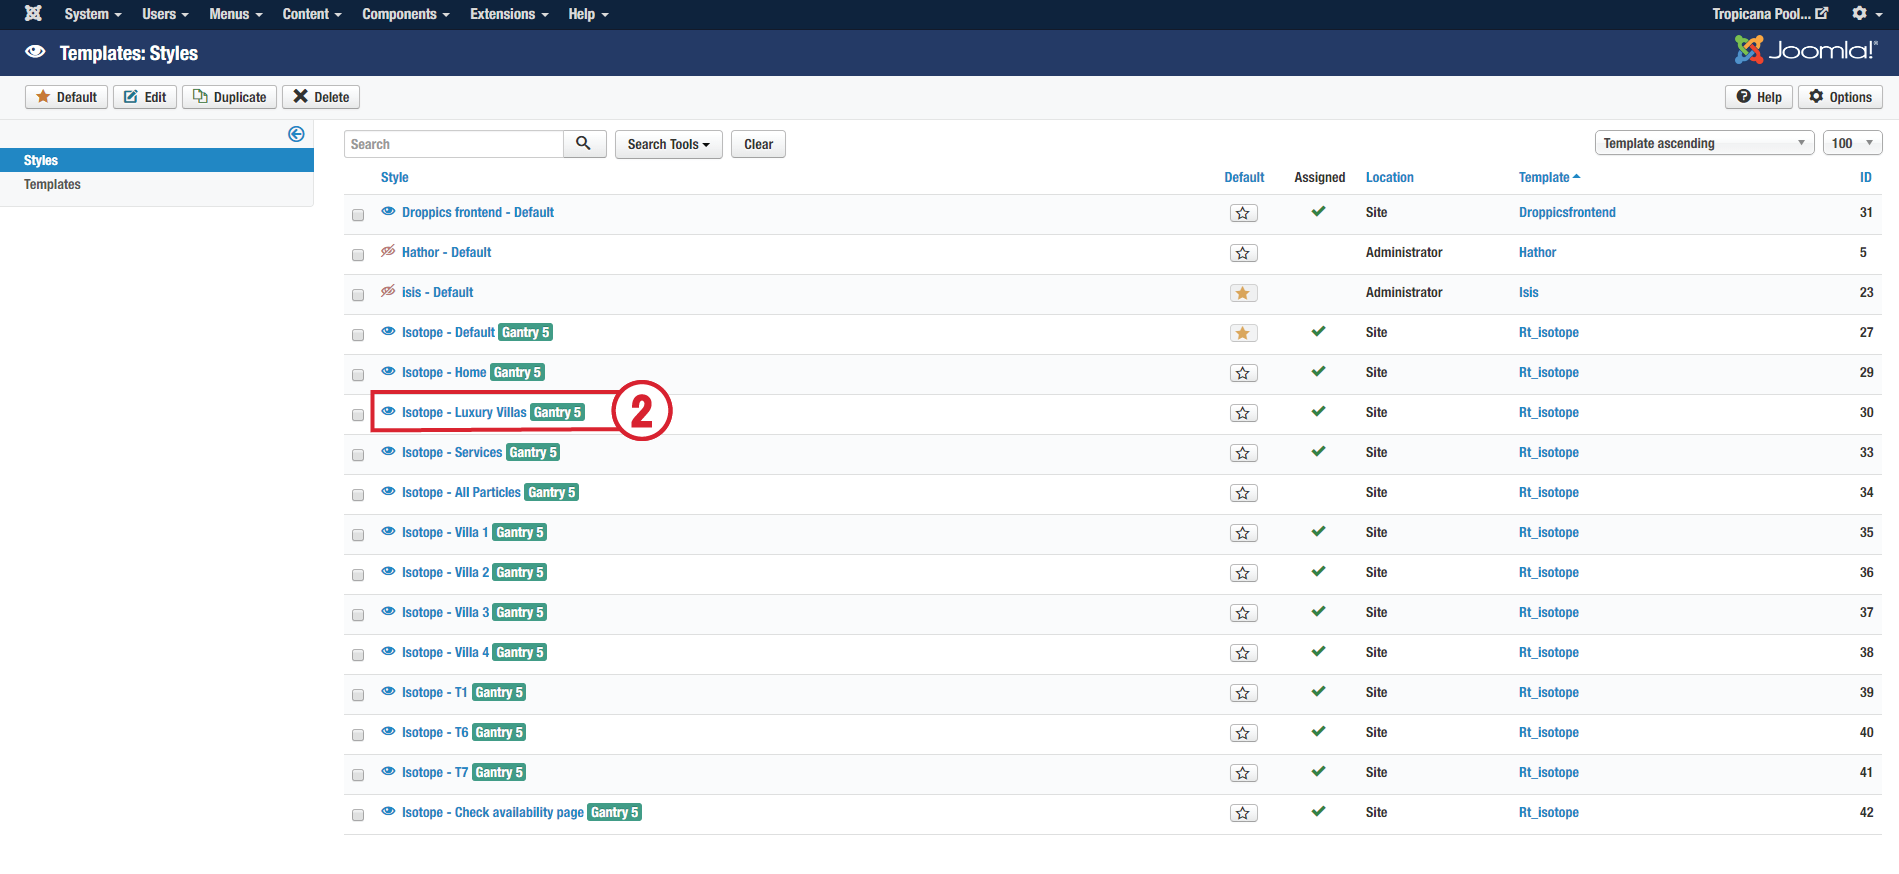
2. Choose the "Luxury Villas" template for editing.
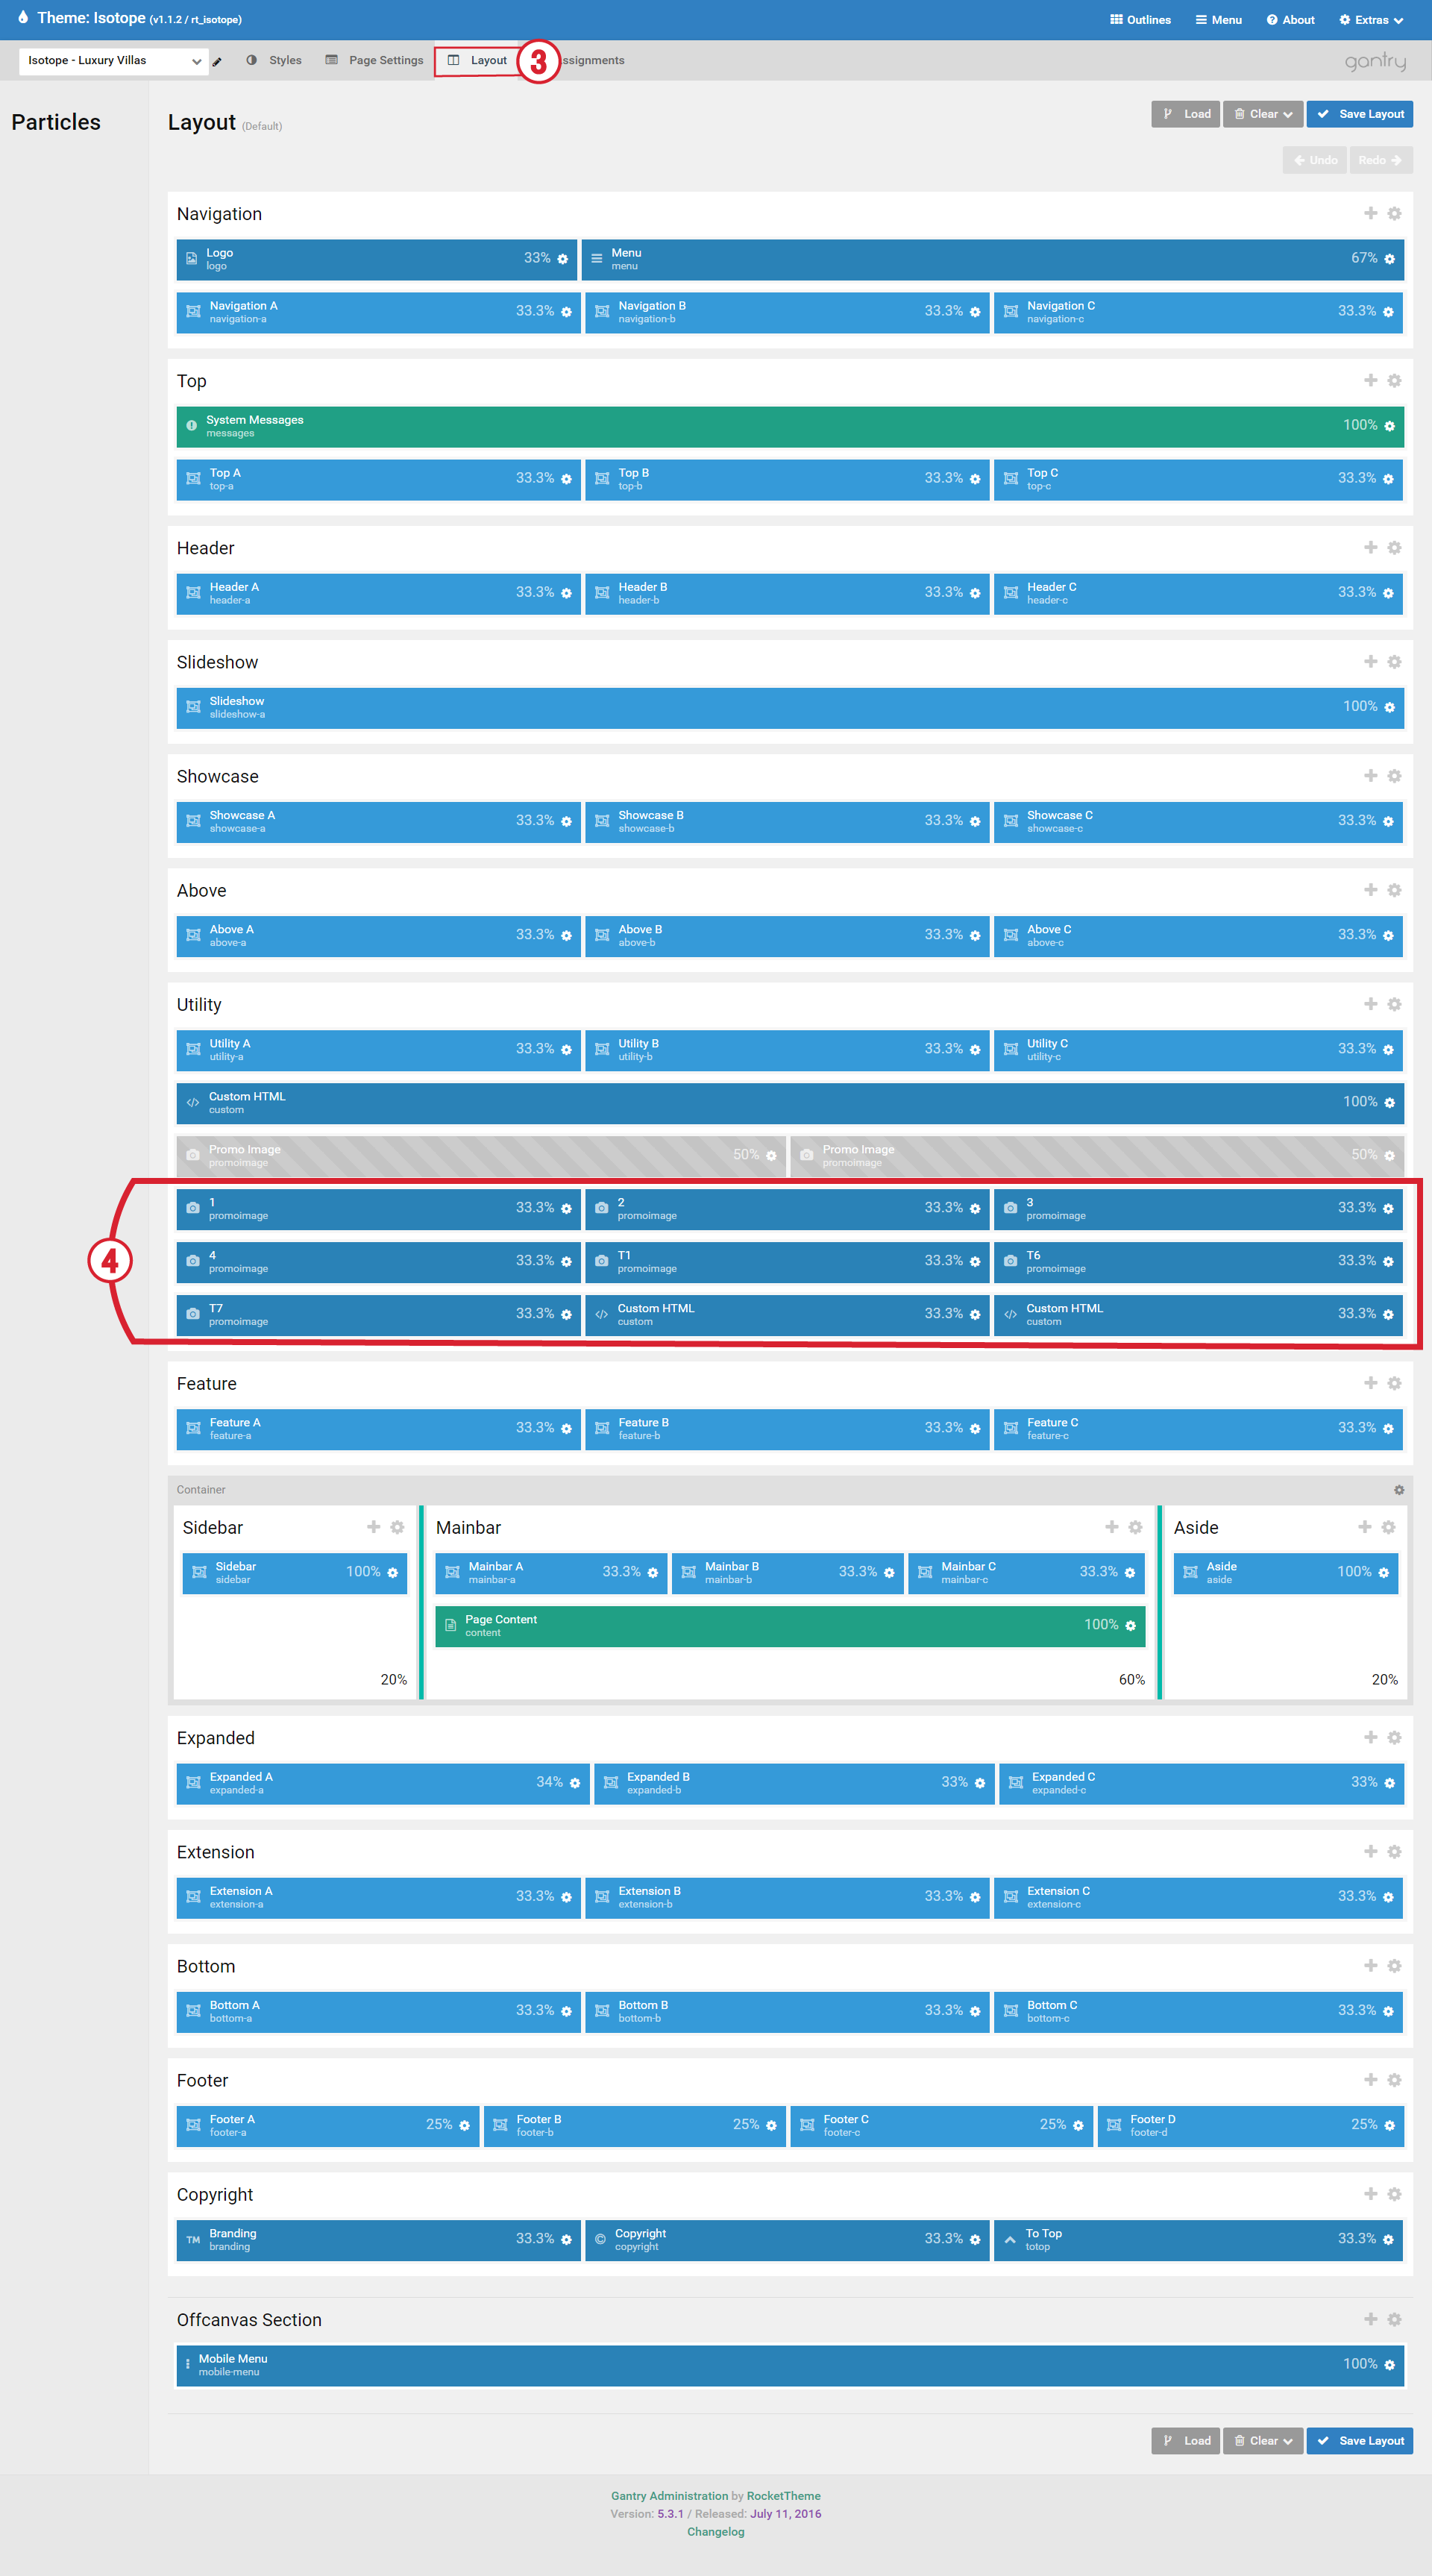
3. Click the "Layout" tab for editing the layout and positions.
4. Click at the machine cog to get inside the editor.
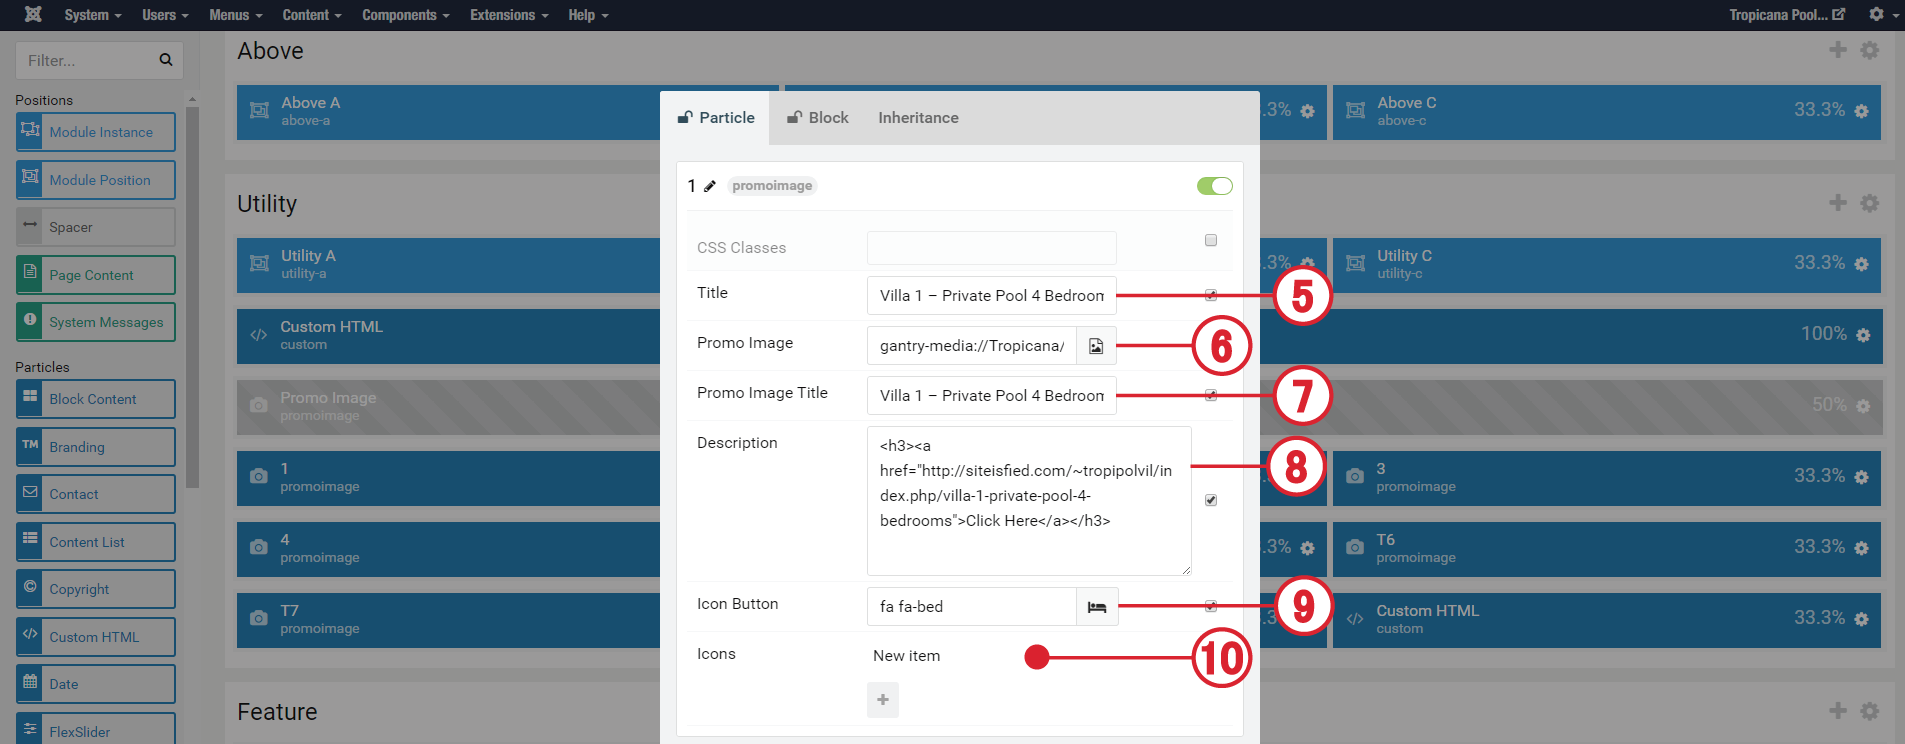
5. Title : Add a particle's title.
6. Promo Image : Add new image.
7. Promo Image Title : Add an image's title.
8. Description : Add image's details and information.
9. Icon Button : Add an icon's picture.
10. Icons : Click at the Red Dot to get inside the editor.
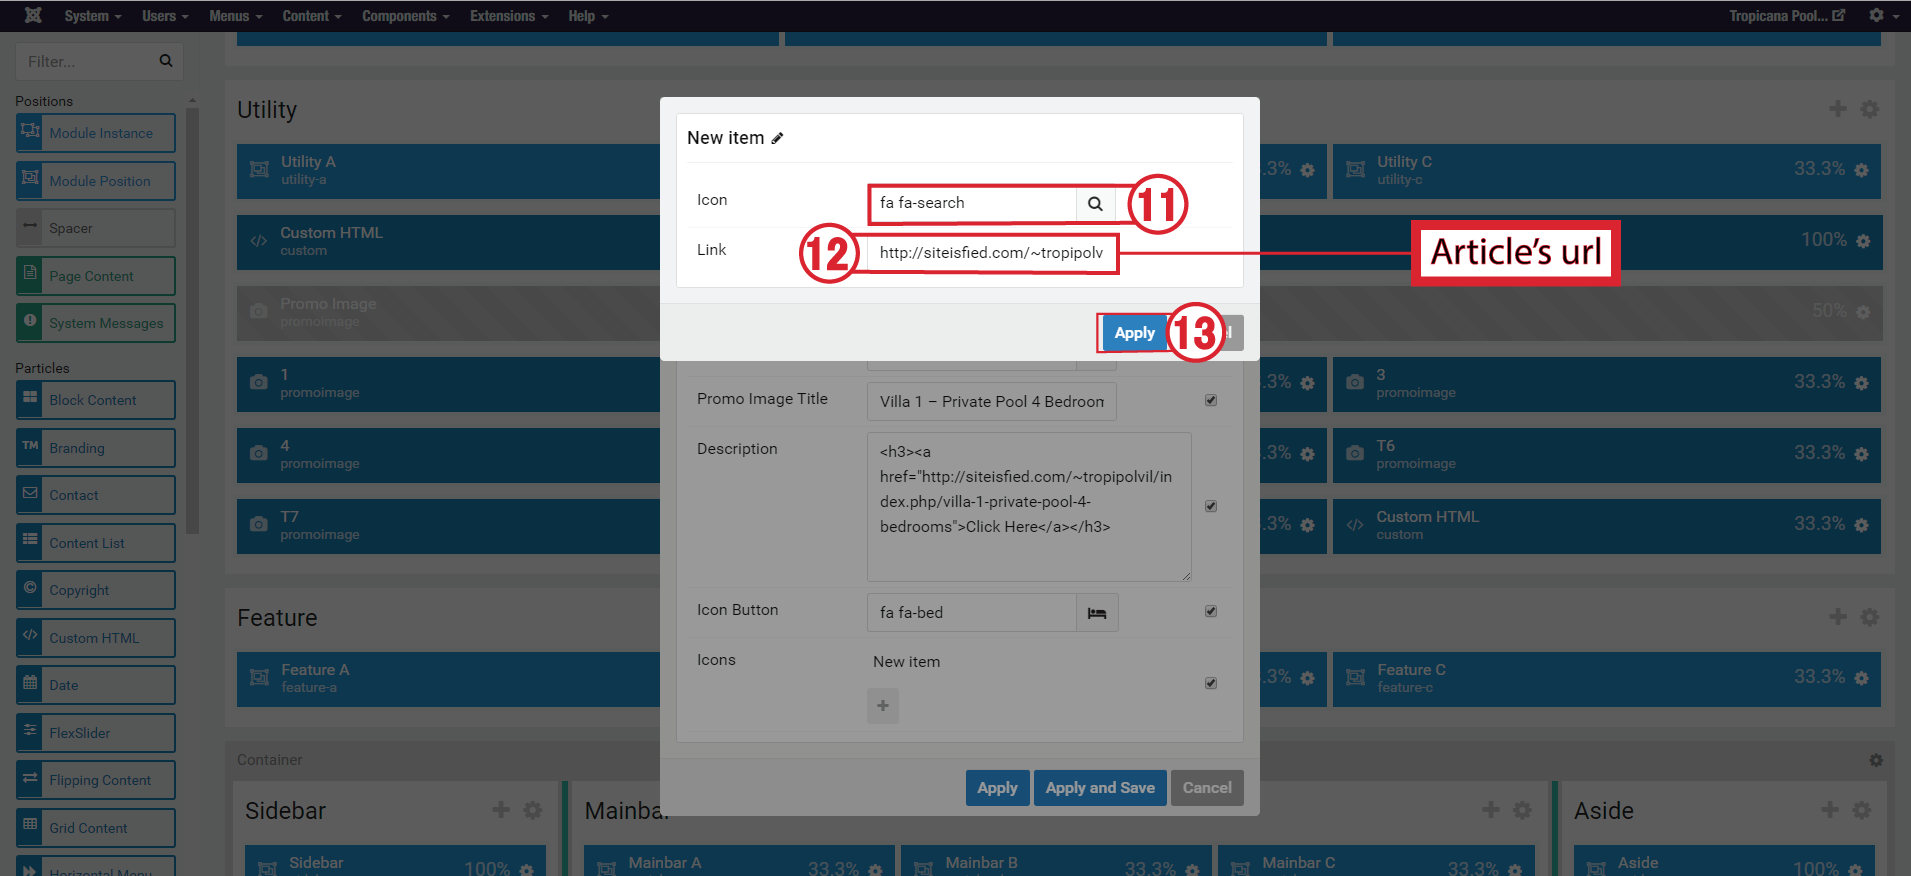
11. Icon : Add an image to the icon.
12. Link : Add an article's link(url) to the icon above.
13. Click the Apply button.
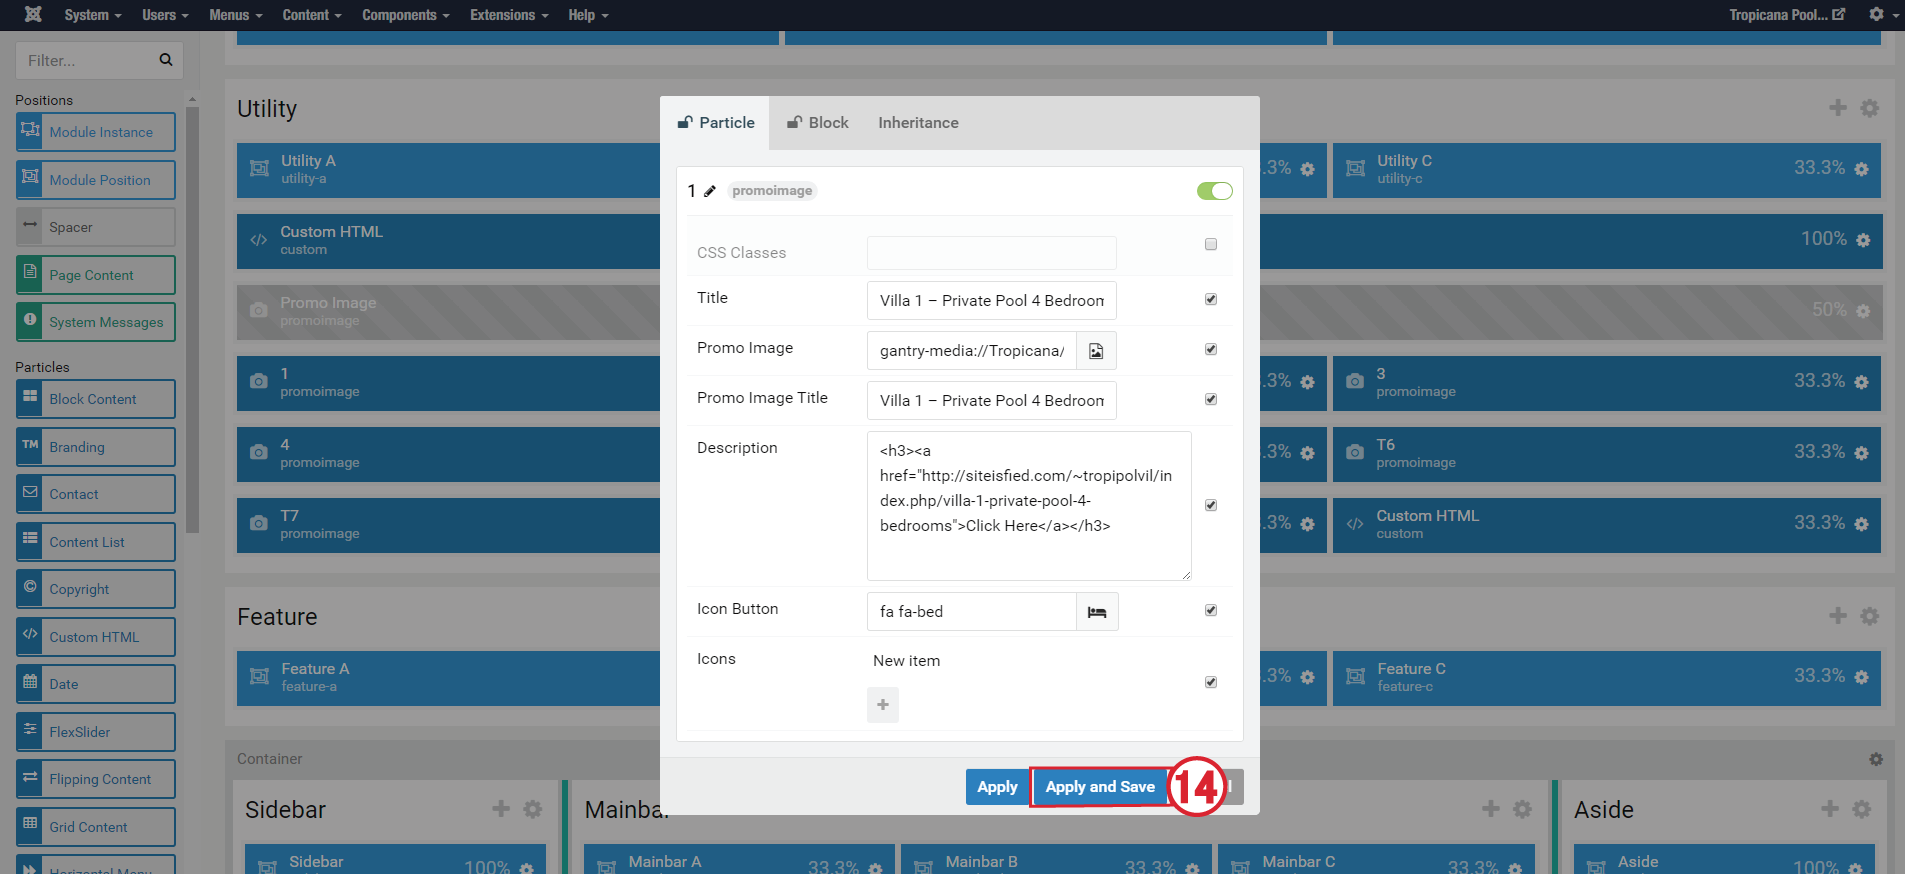
14. Click Apply and Save.
ARTICLE'S URL
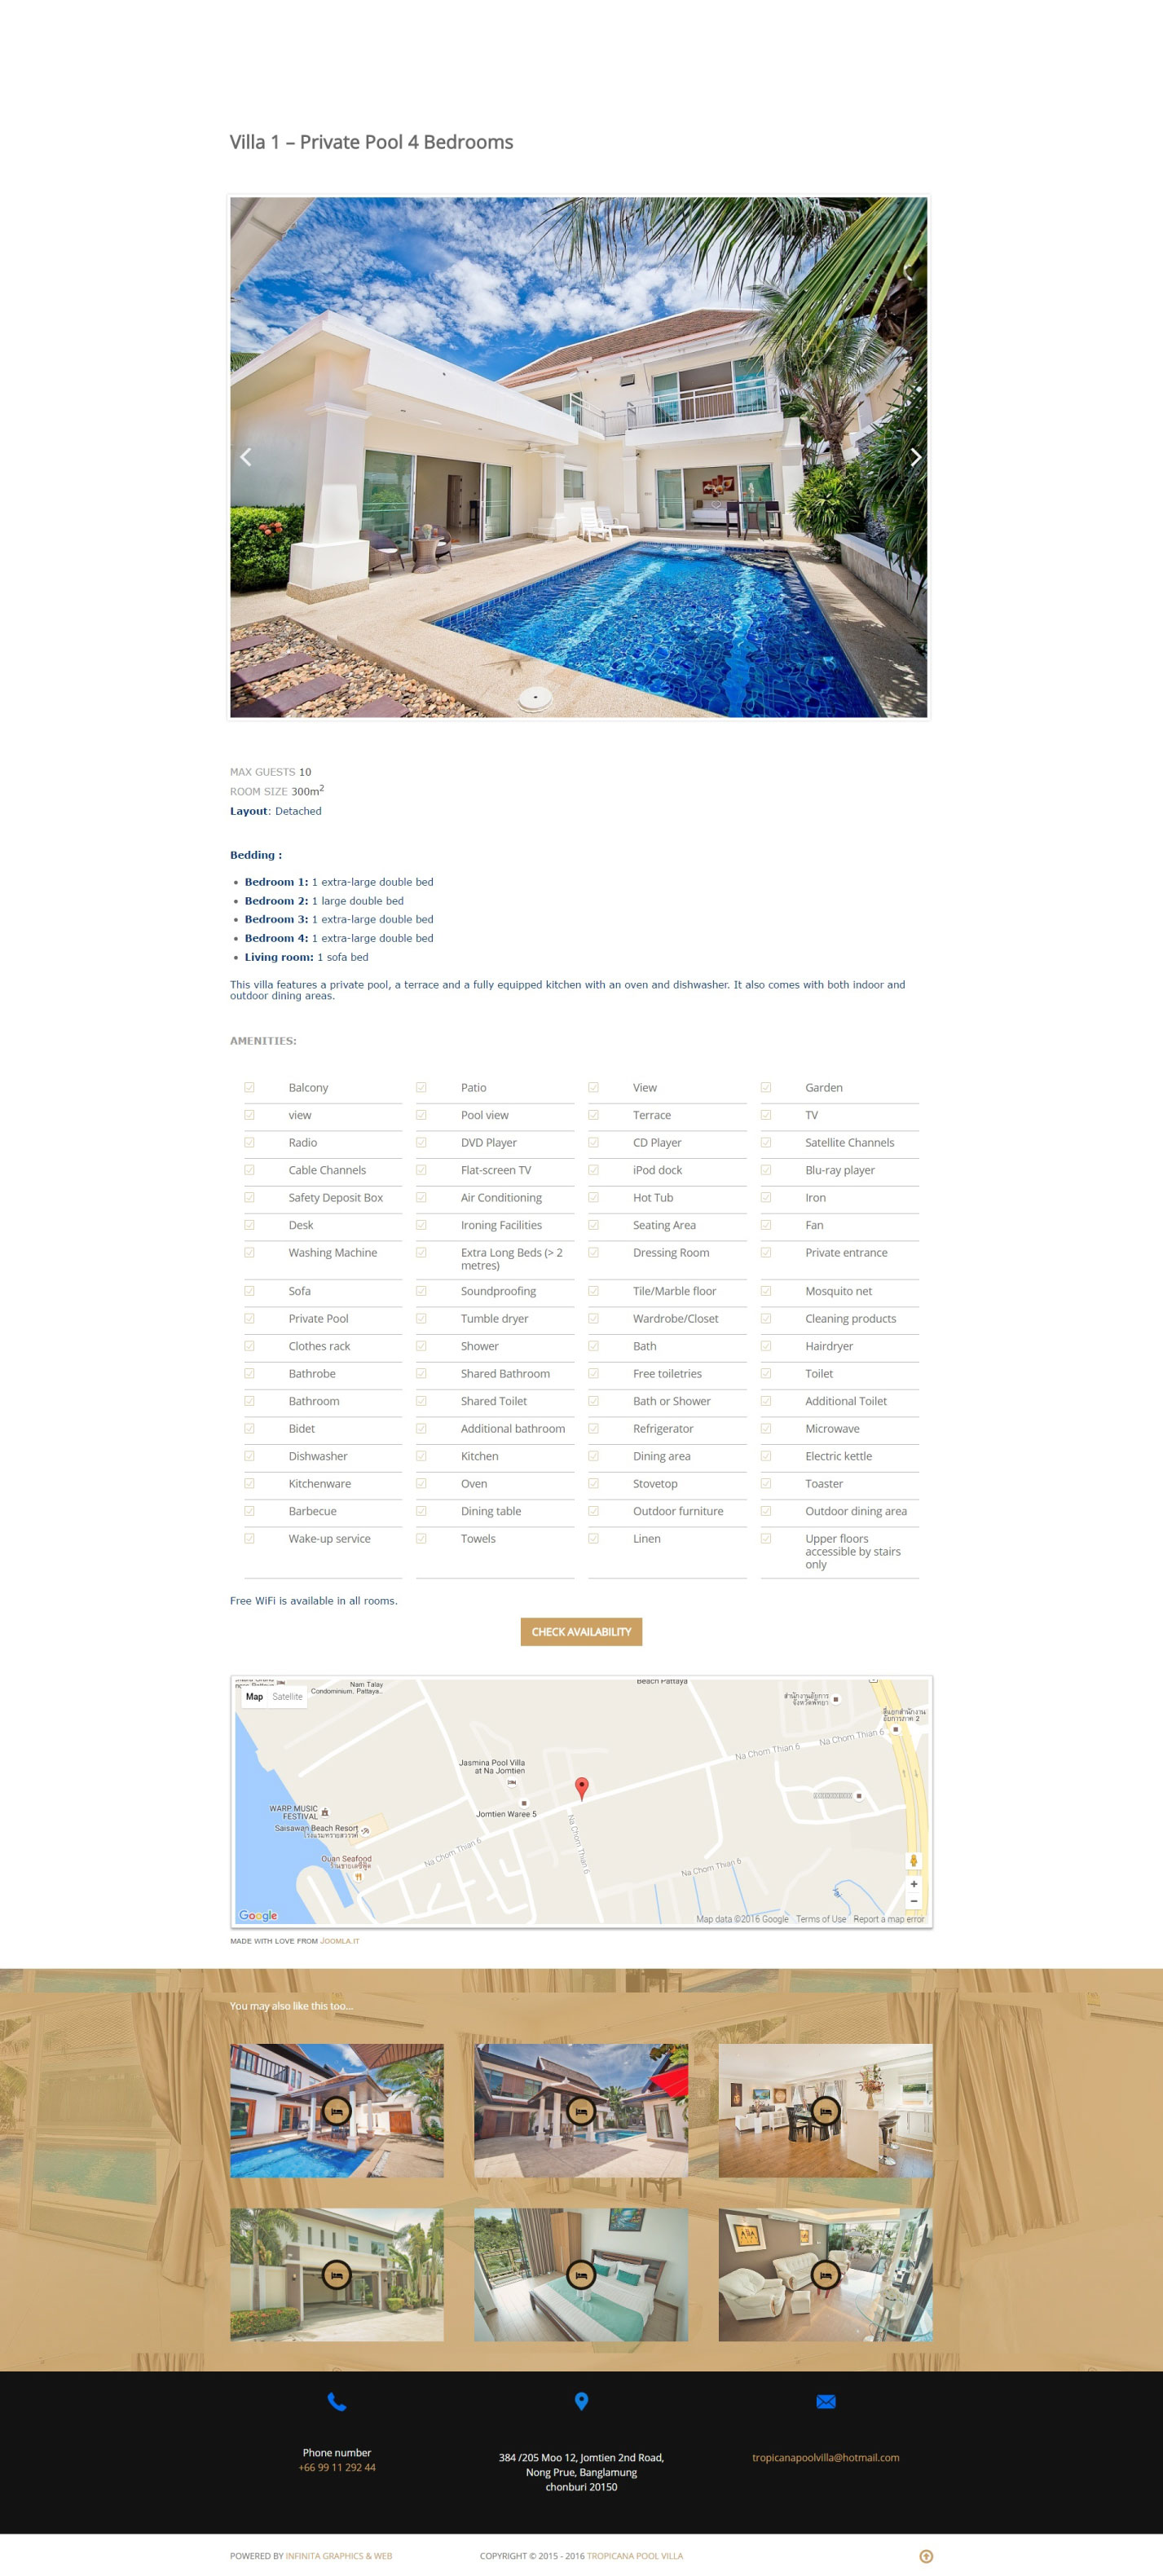
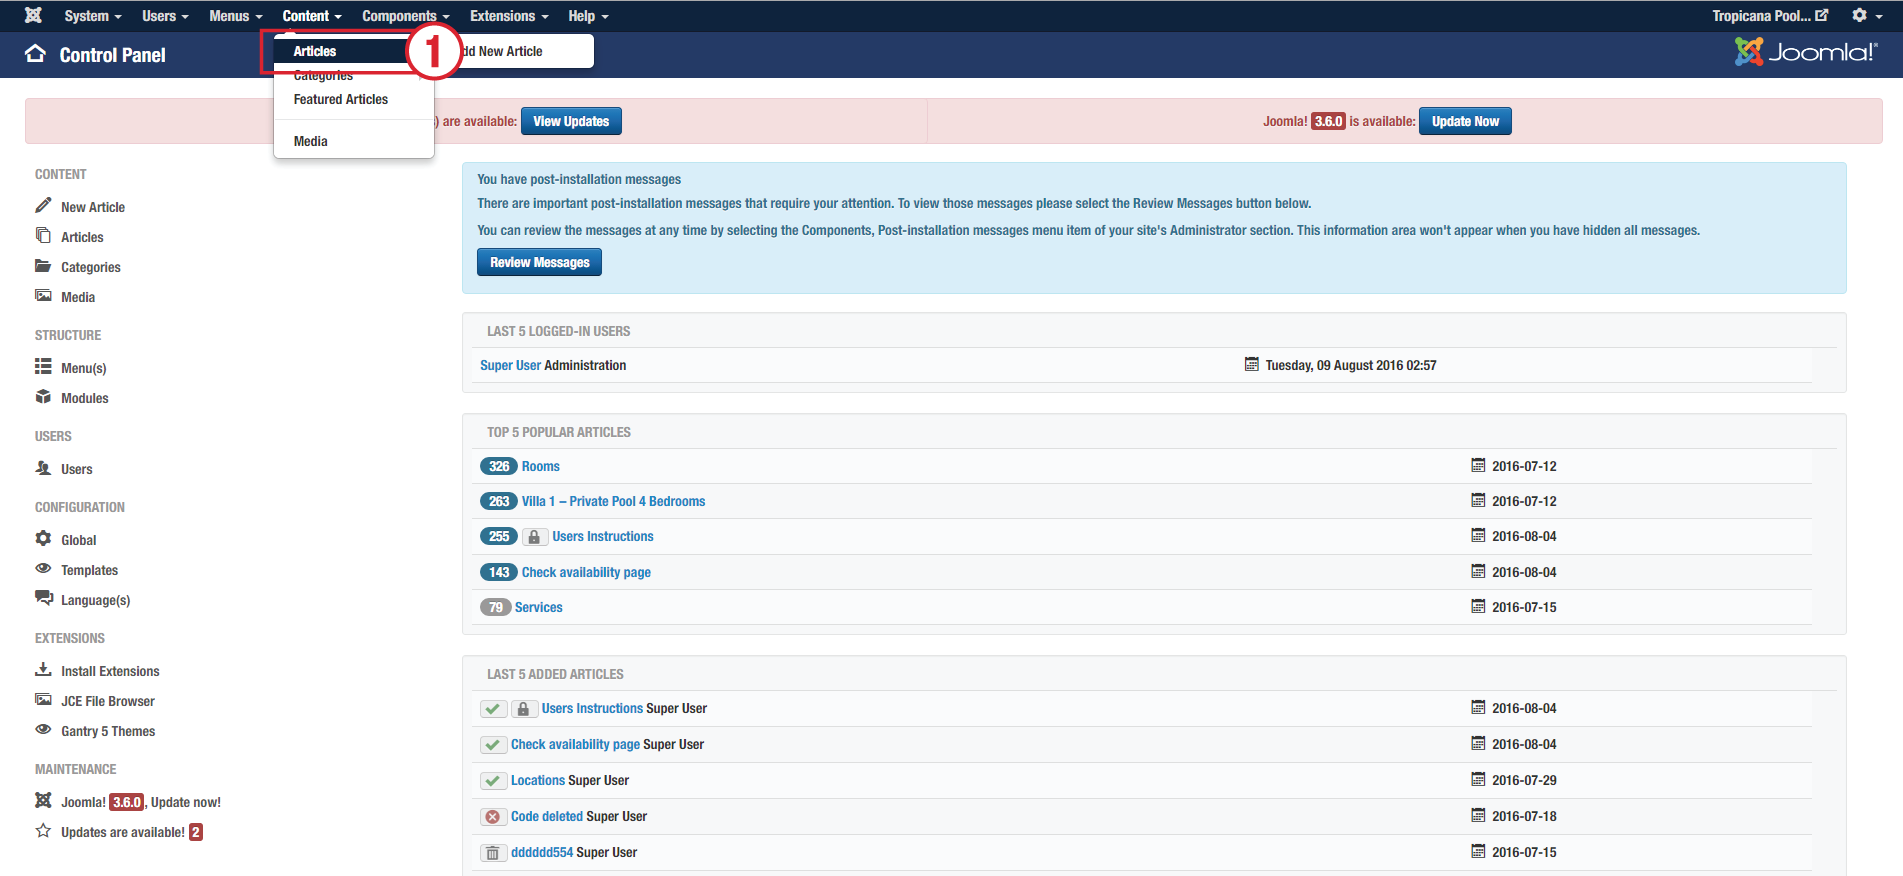
1. Click the Articles menu and choose the article for editing.
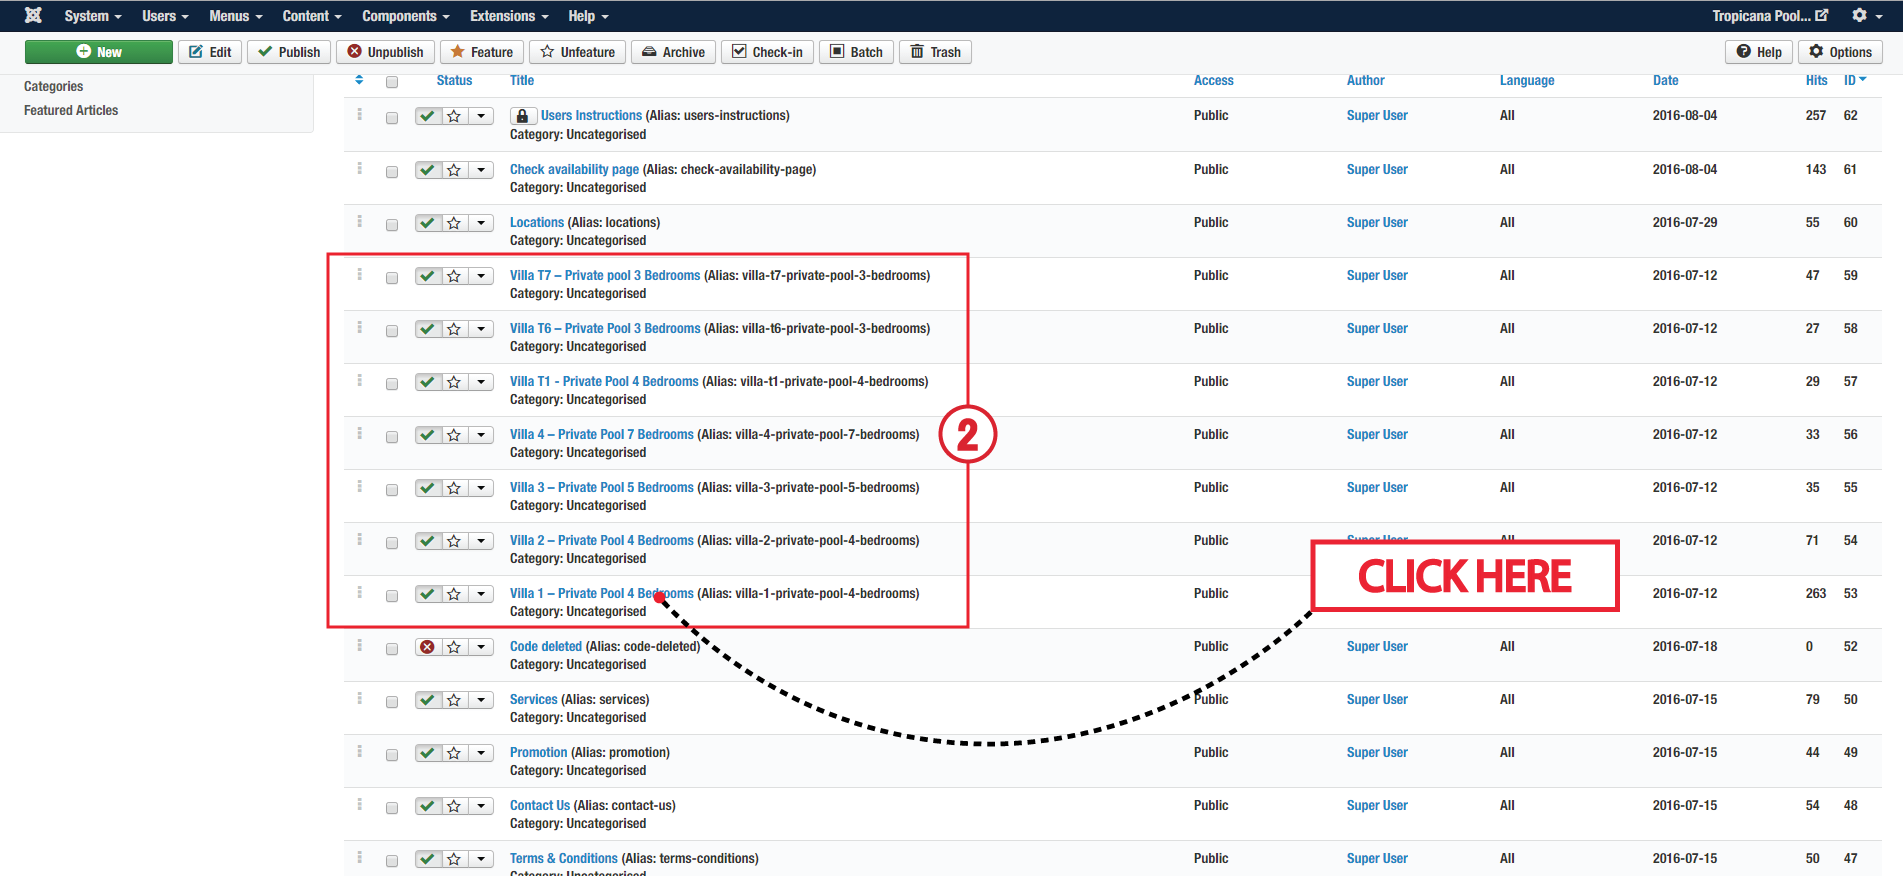
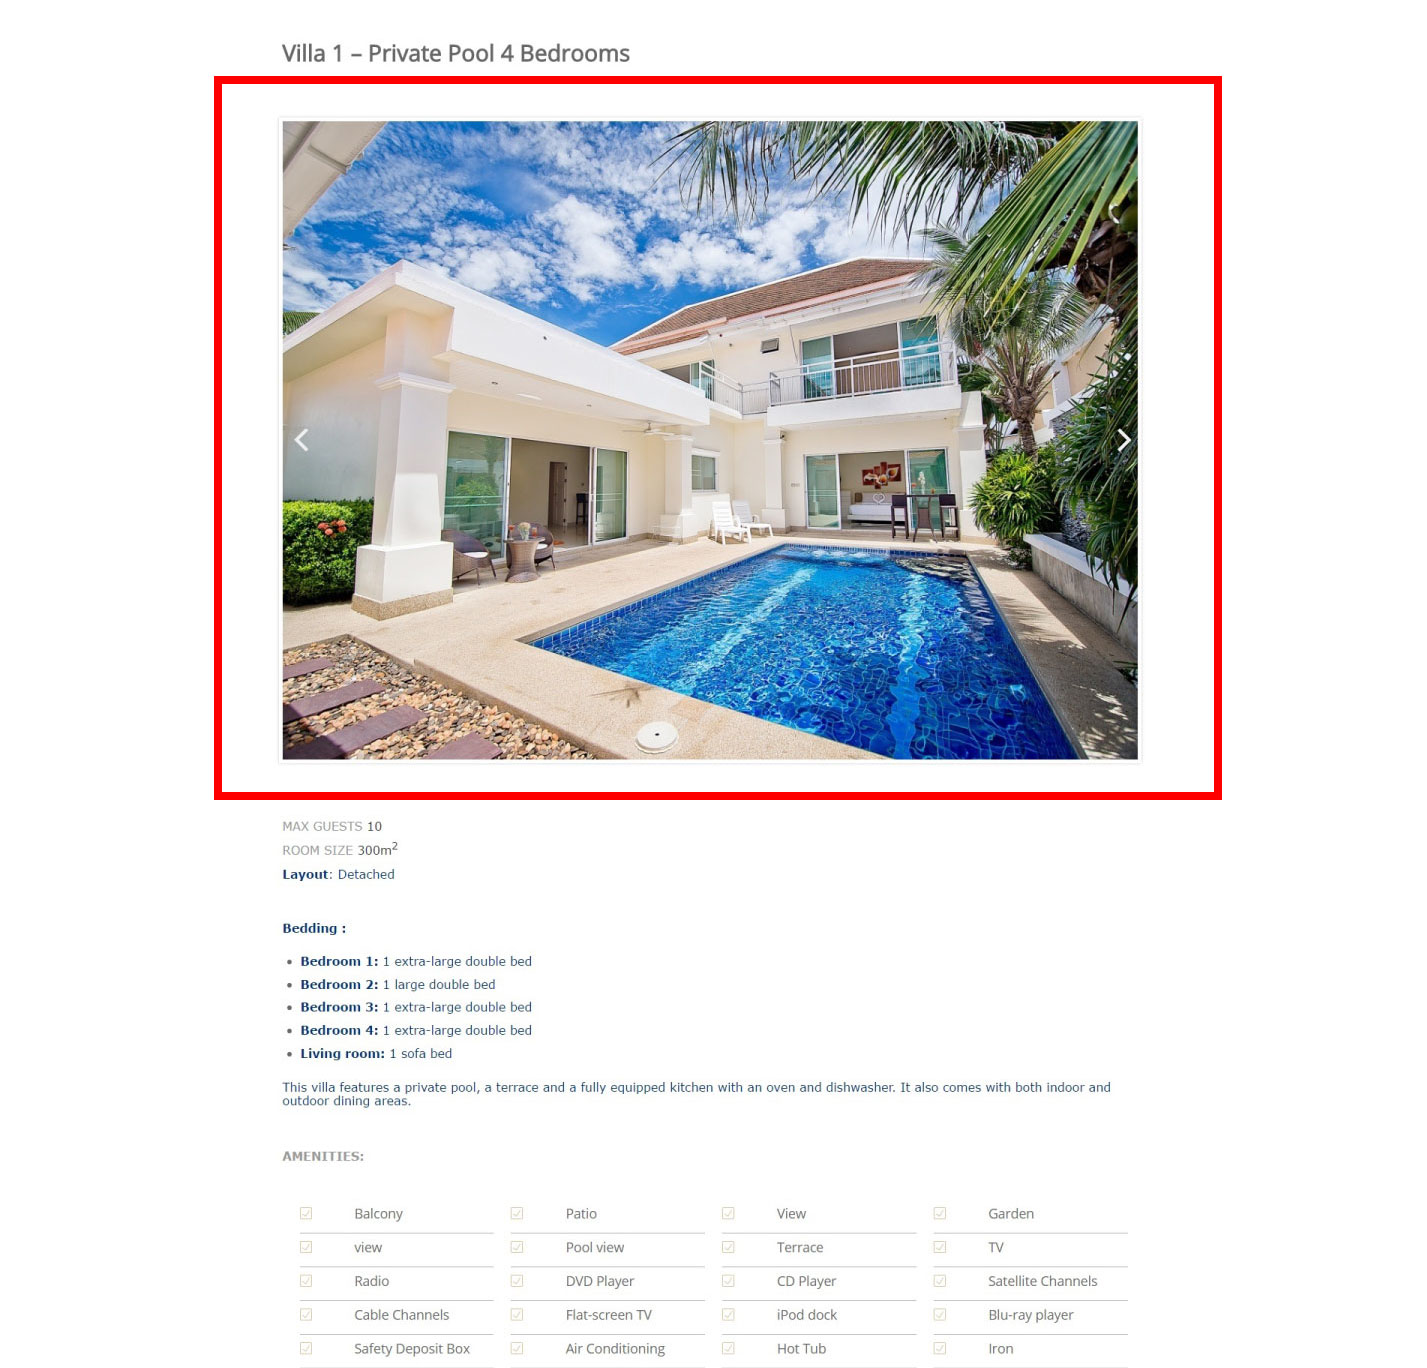
2. Choose the article you like to edit. For this tutorial, we have selected "Villa 1 - Private Pool 4 Bedrooms" as an example.
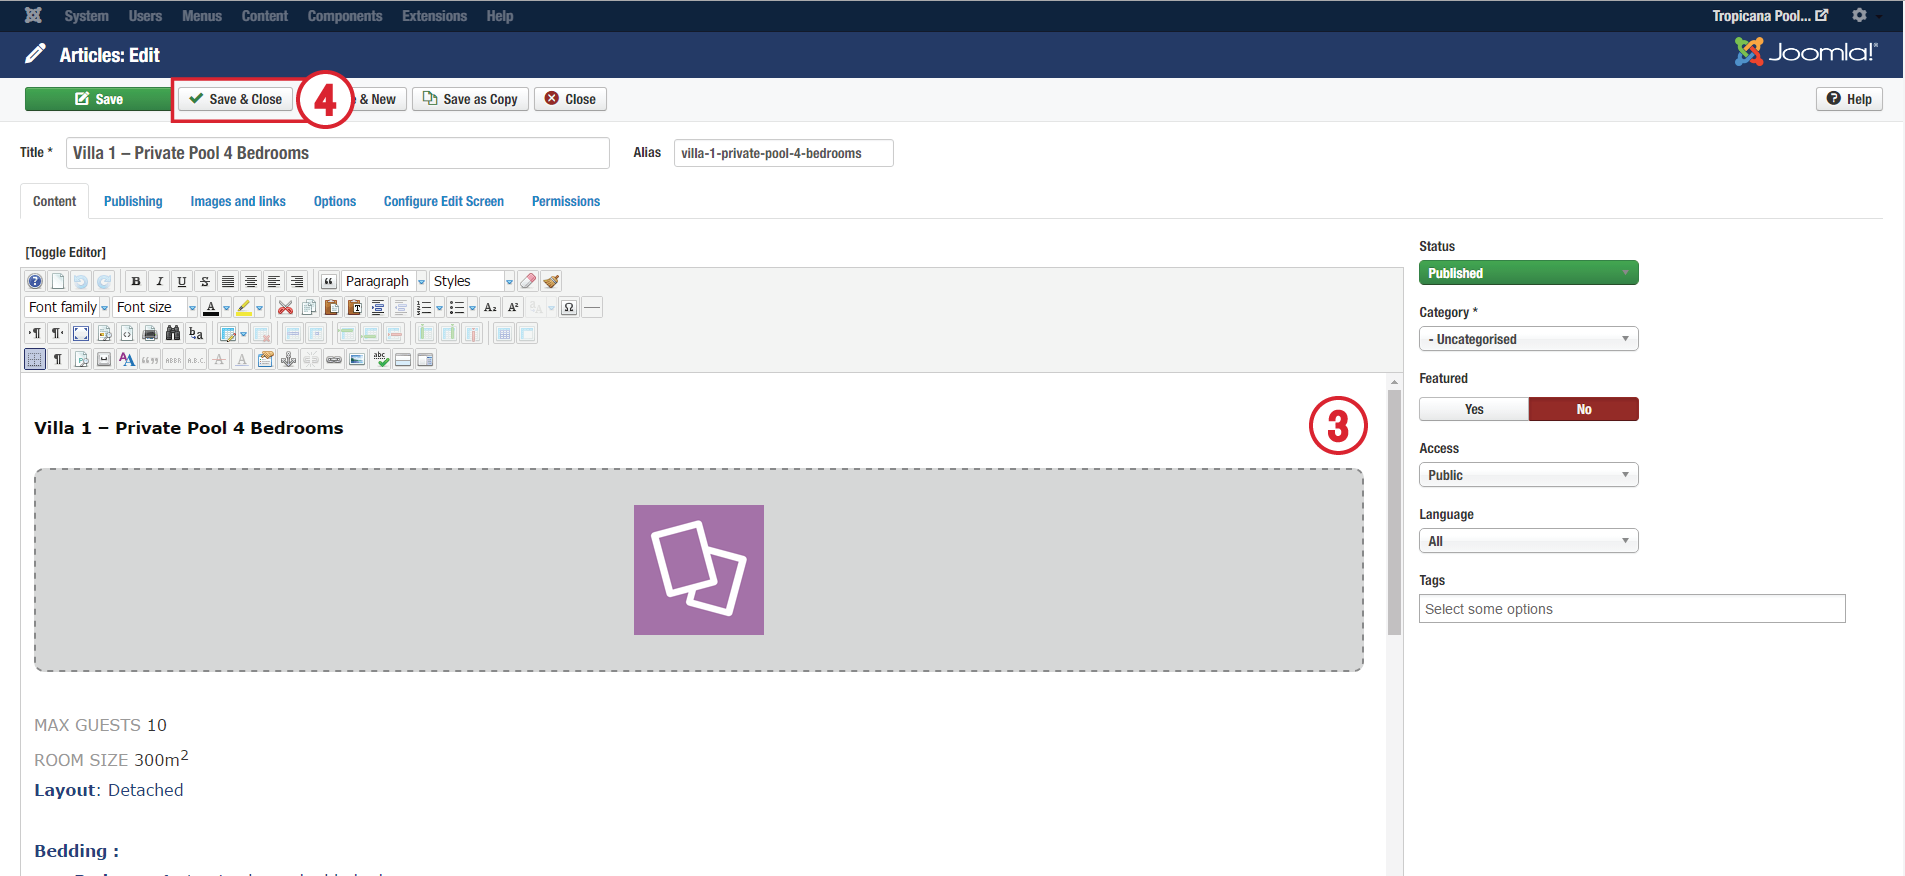
3. Edit content as you want.
4. Save & Close.
DROPPICS

1. Click the Articles menu and choose the article for editing.
2. Choose the article you like to edit. For this tutorial, we have selected "Villa 1 - Private Pool 4 Bedrooms" as an example.

3. At the bottom menu, choose "Images - Droppics" and after that choose the right gallery you need.
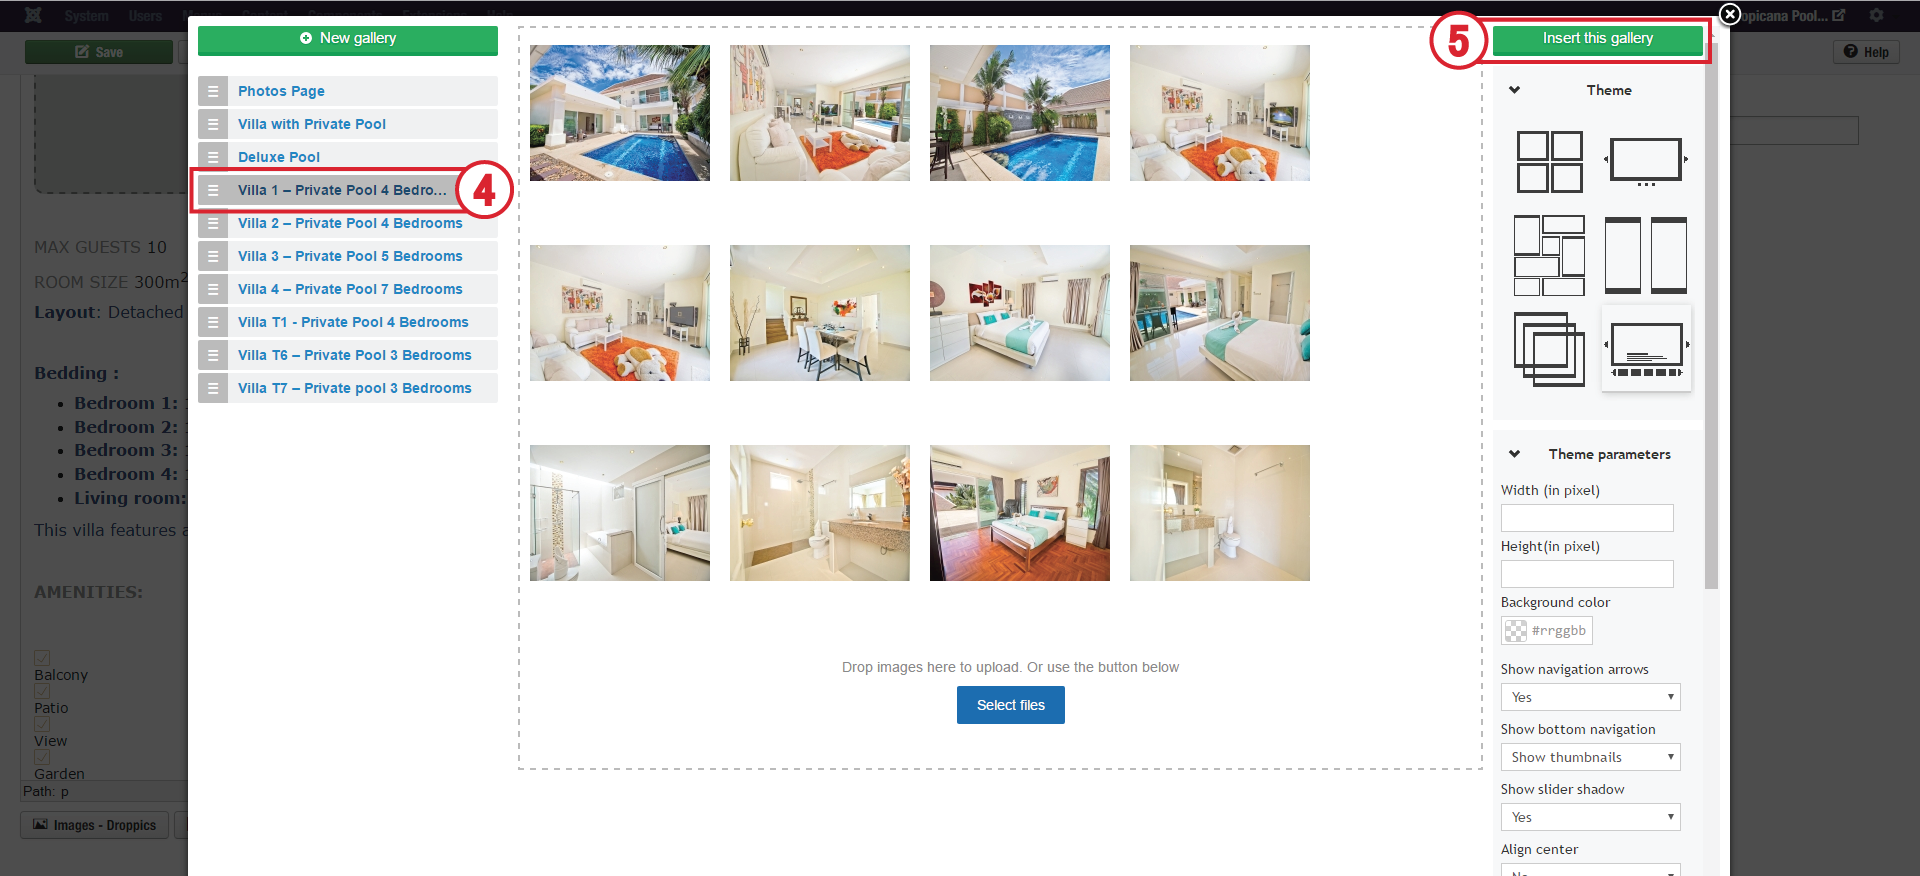
4. Select the image gallery you'd like it to to be showing in the article.
5. Click the button "Insert this gallery"
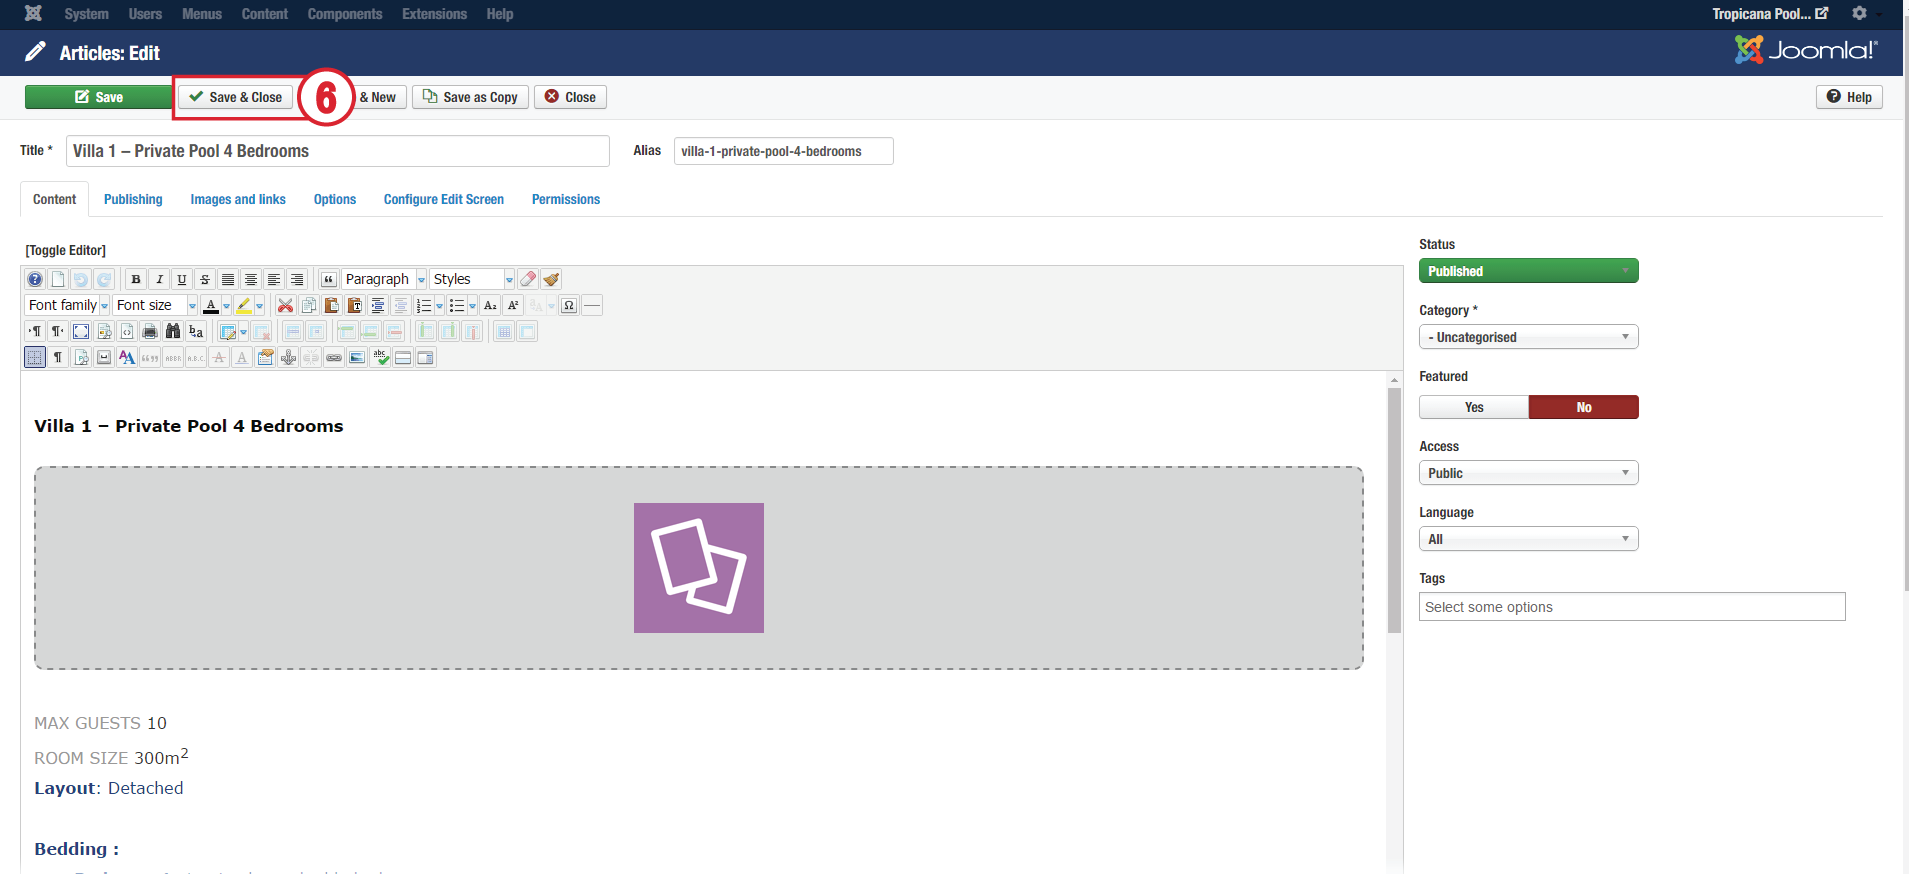
6. Save & Close.
CONTENT MAP
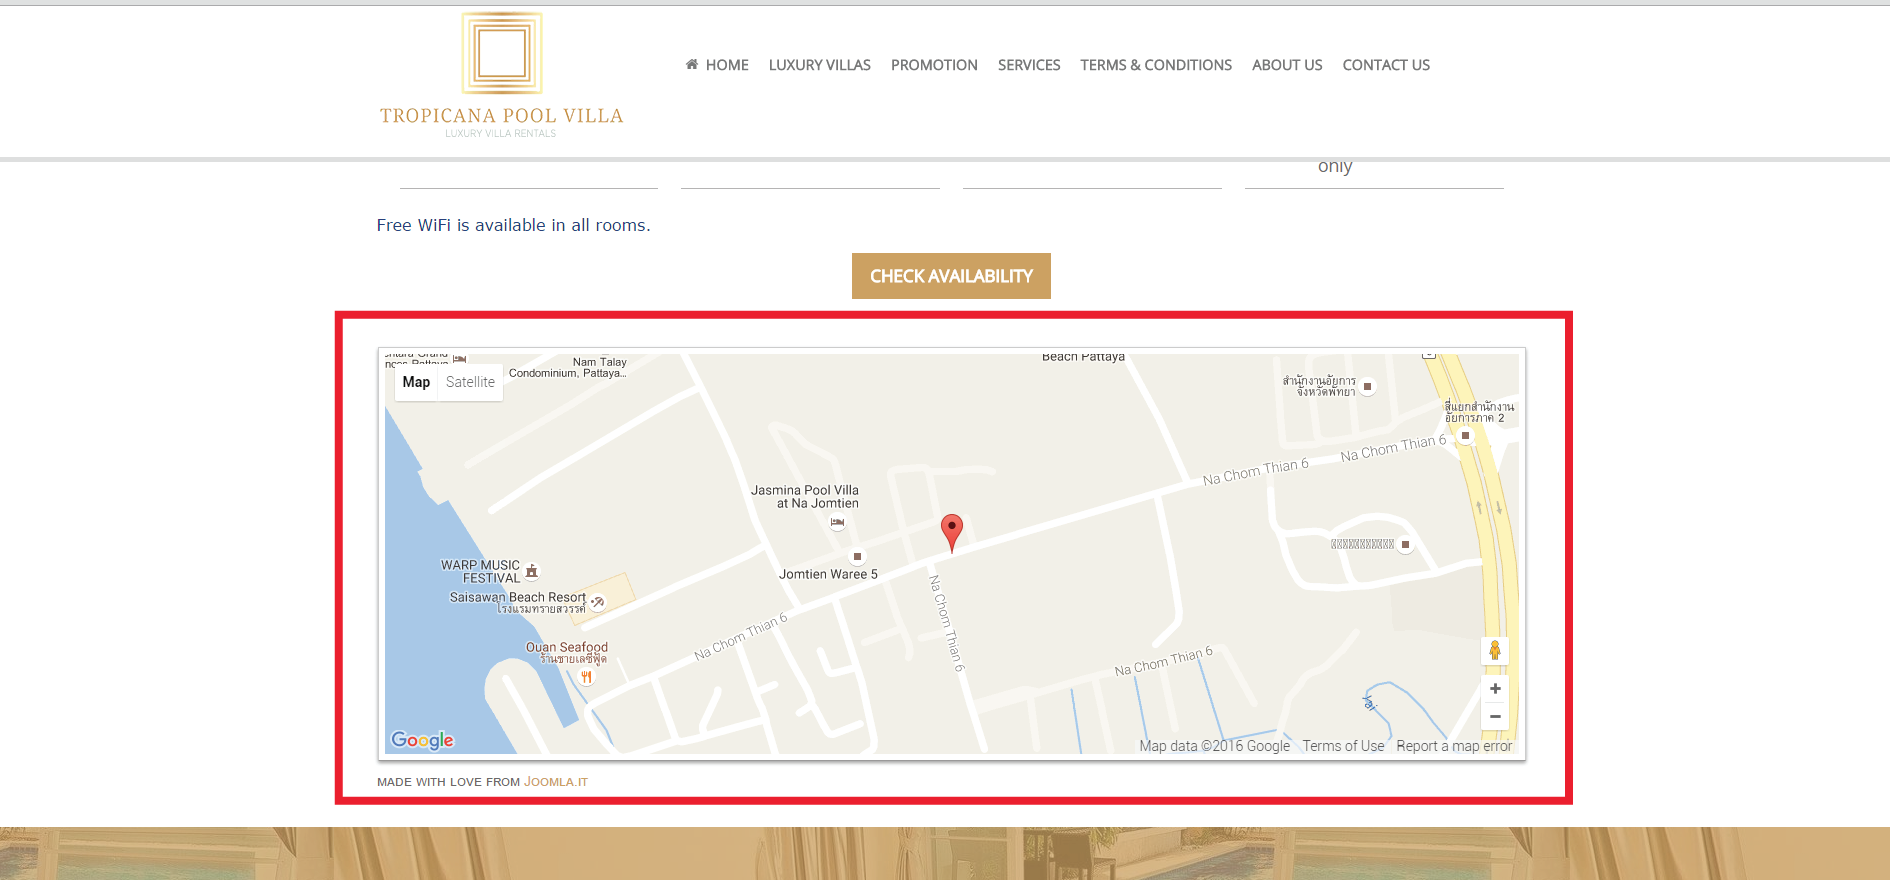
1. Click the Articles menu and choose the article for editing.
2. Choose the article you like to edit. For this tutorial, we have selected "Villa 1 - Private Pool 4 Bedrooms" as an example.
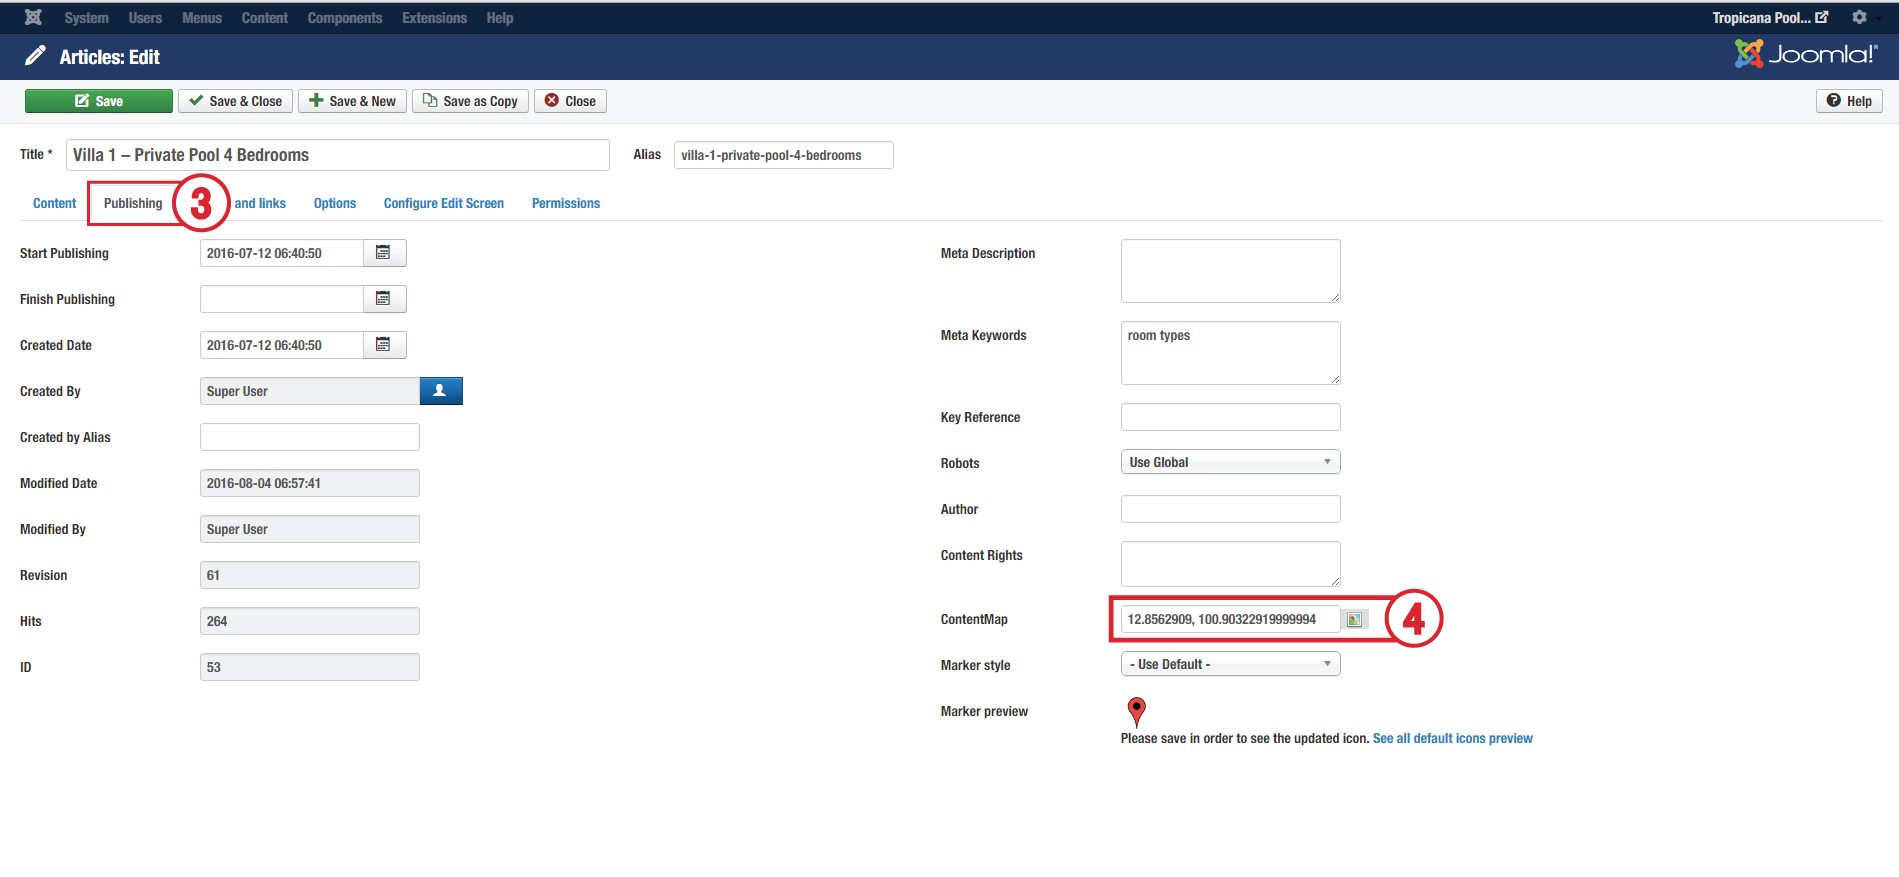
3. Click at the "Publishing" tab.
4. click at the green map icon.
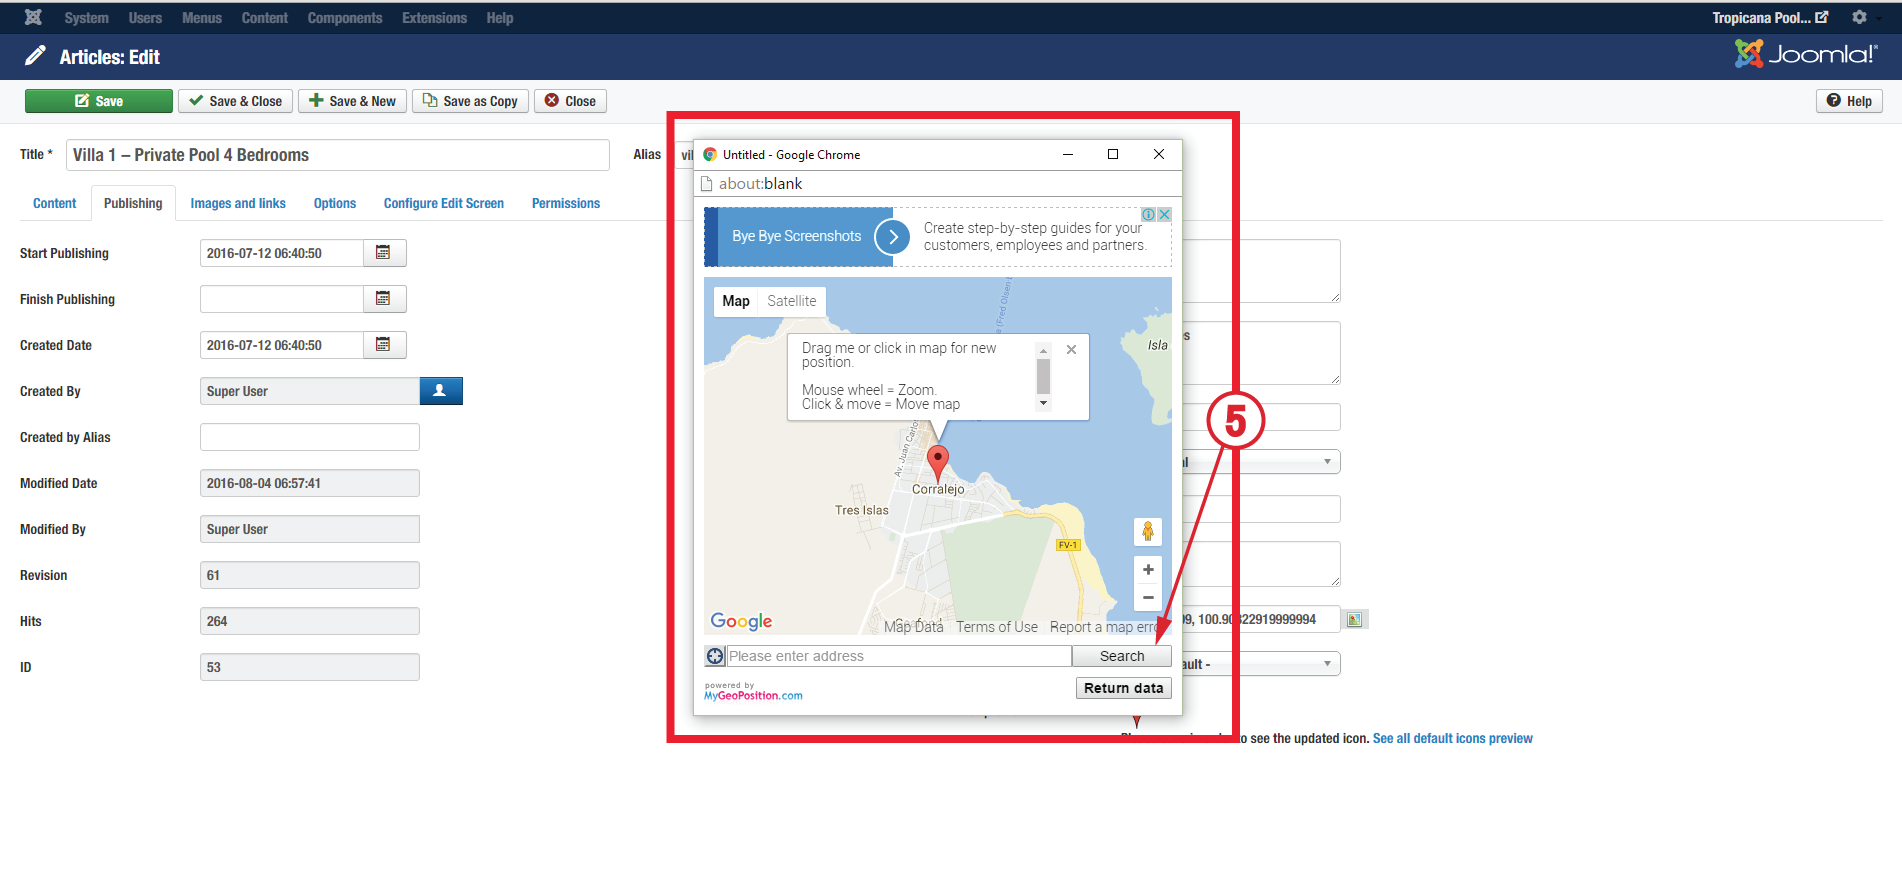
5. Click at the "Search" button or drag the marker to the your property located.
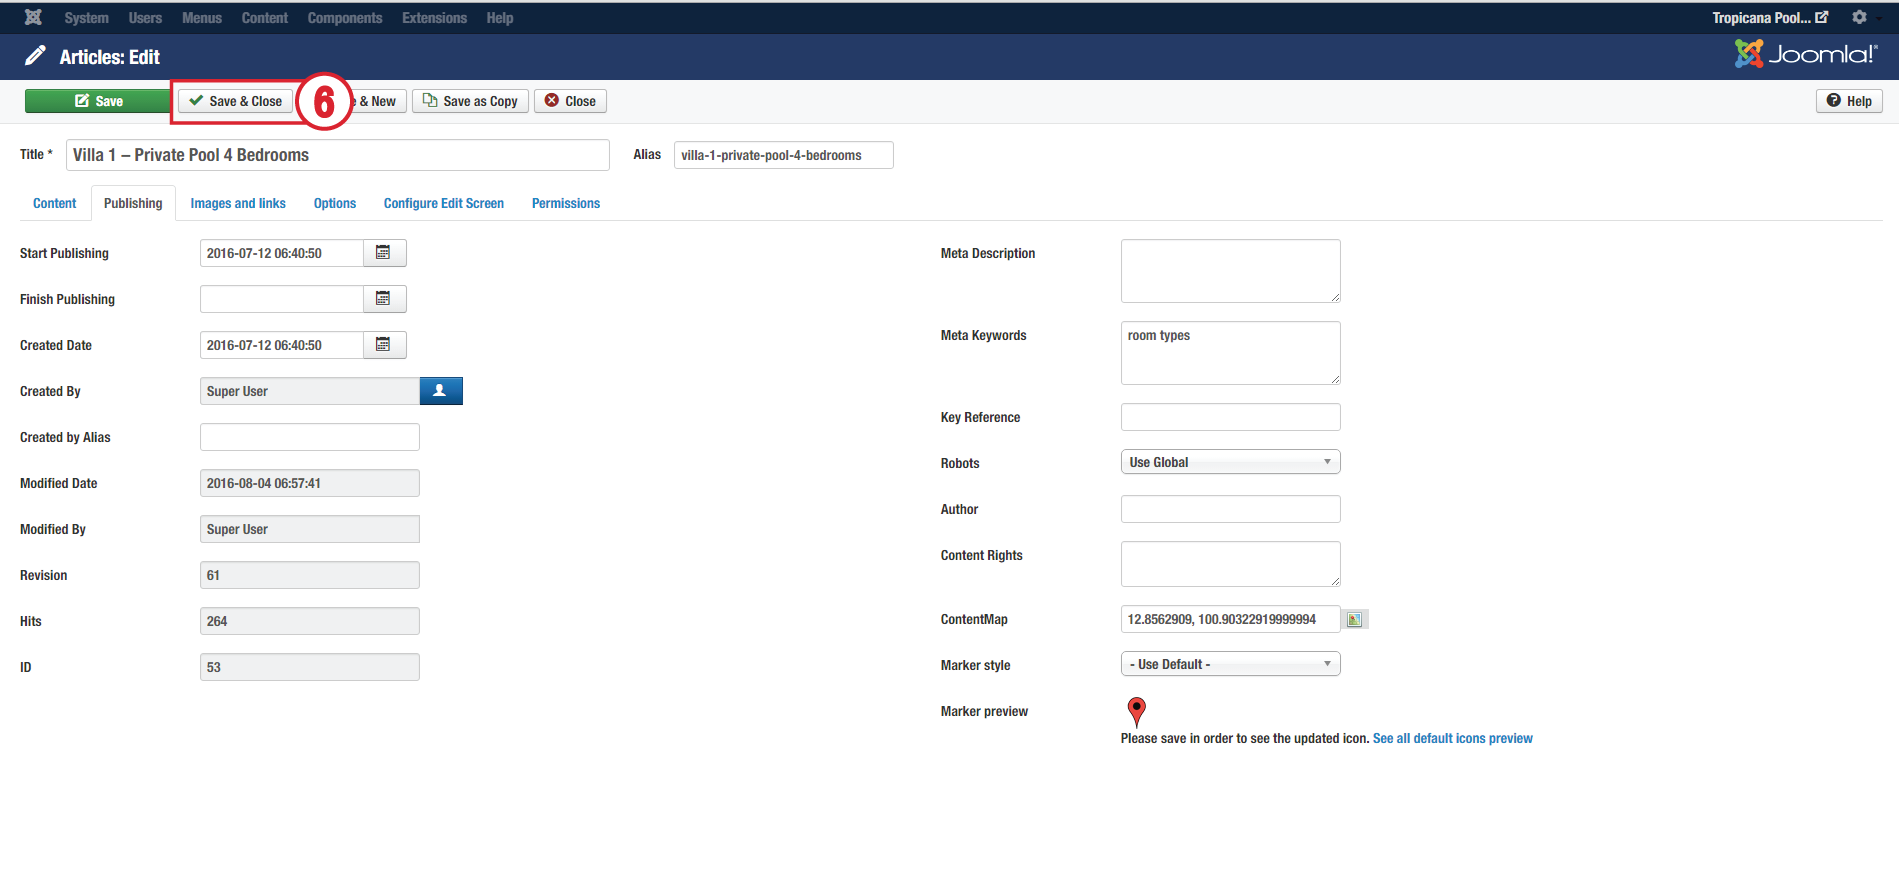
6. Save & Close.
PARTICLE

1. Click the Templates menu and choose the template for editing.
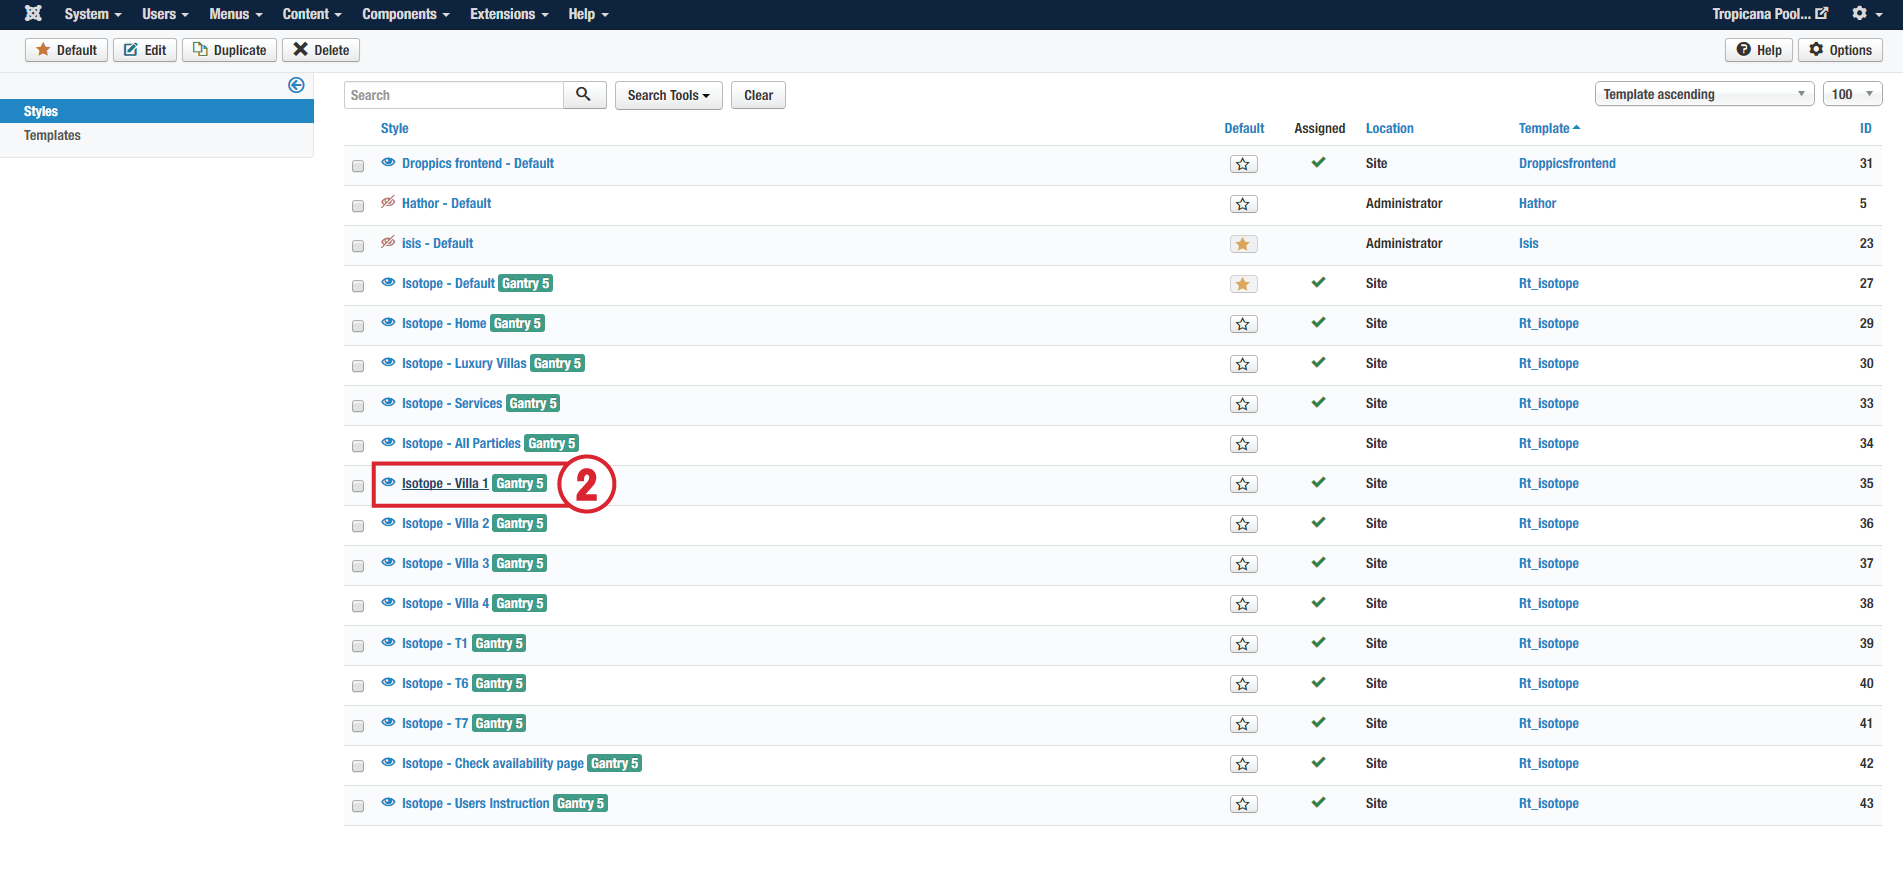
2. Choose the "Isotope - Villa 1" particle for editing.
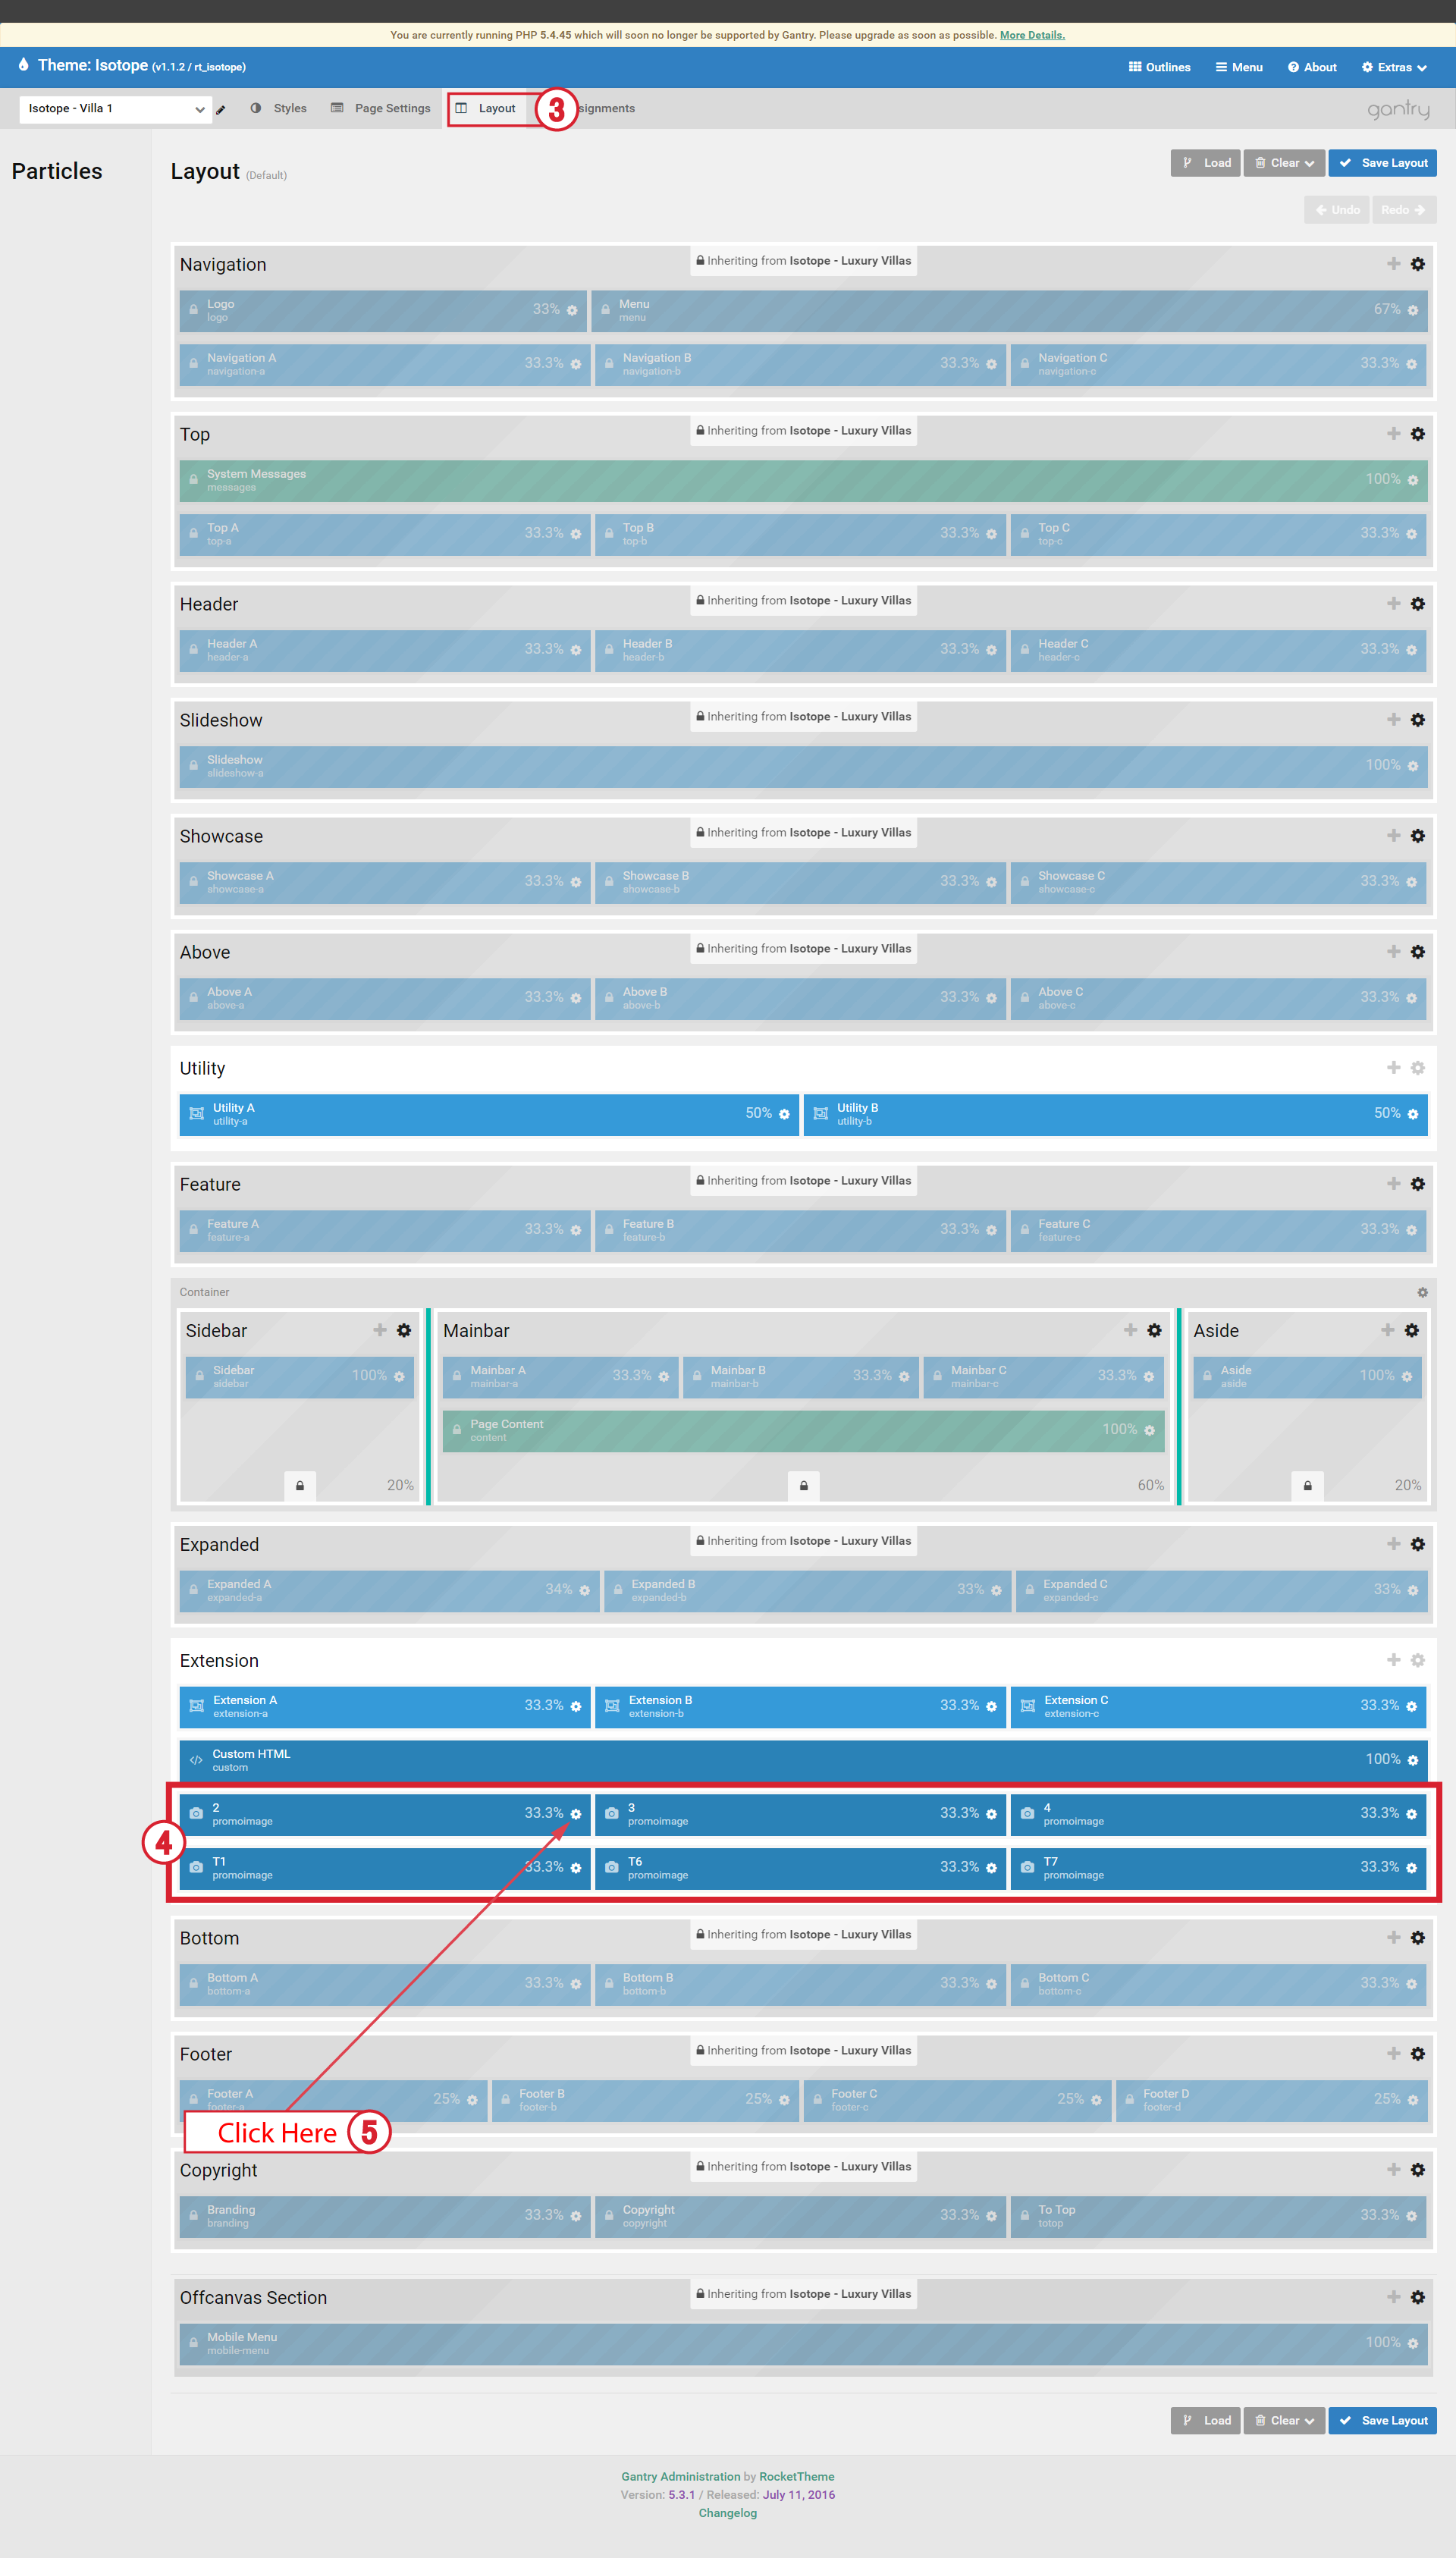
3. Click the "Layout" tab for editing the layout and positions.
4. Choose the particle that you like to work with.
5. Click at the machine cog to get inside the editor.
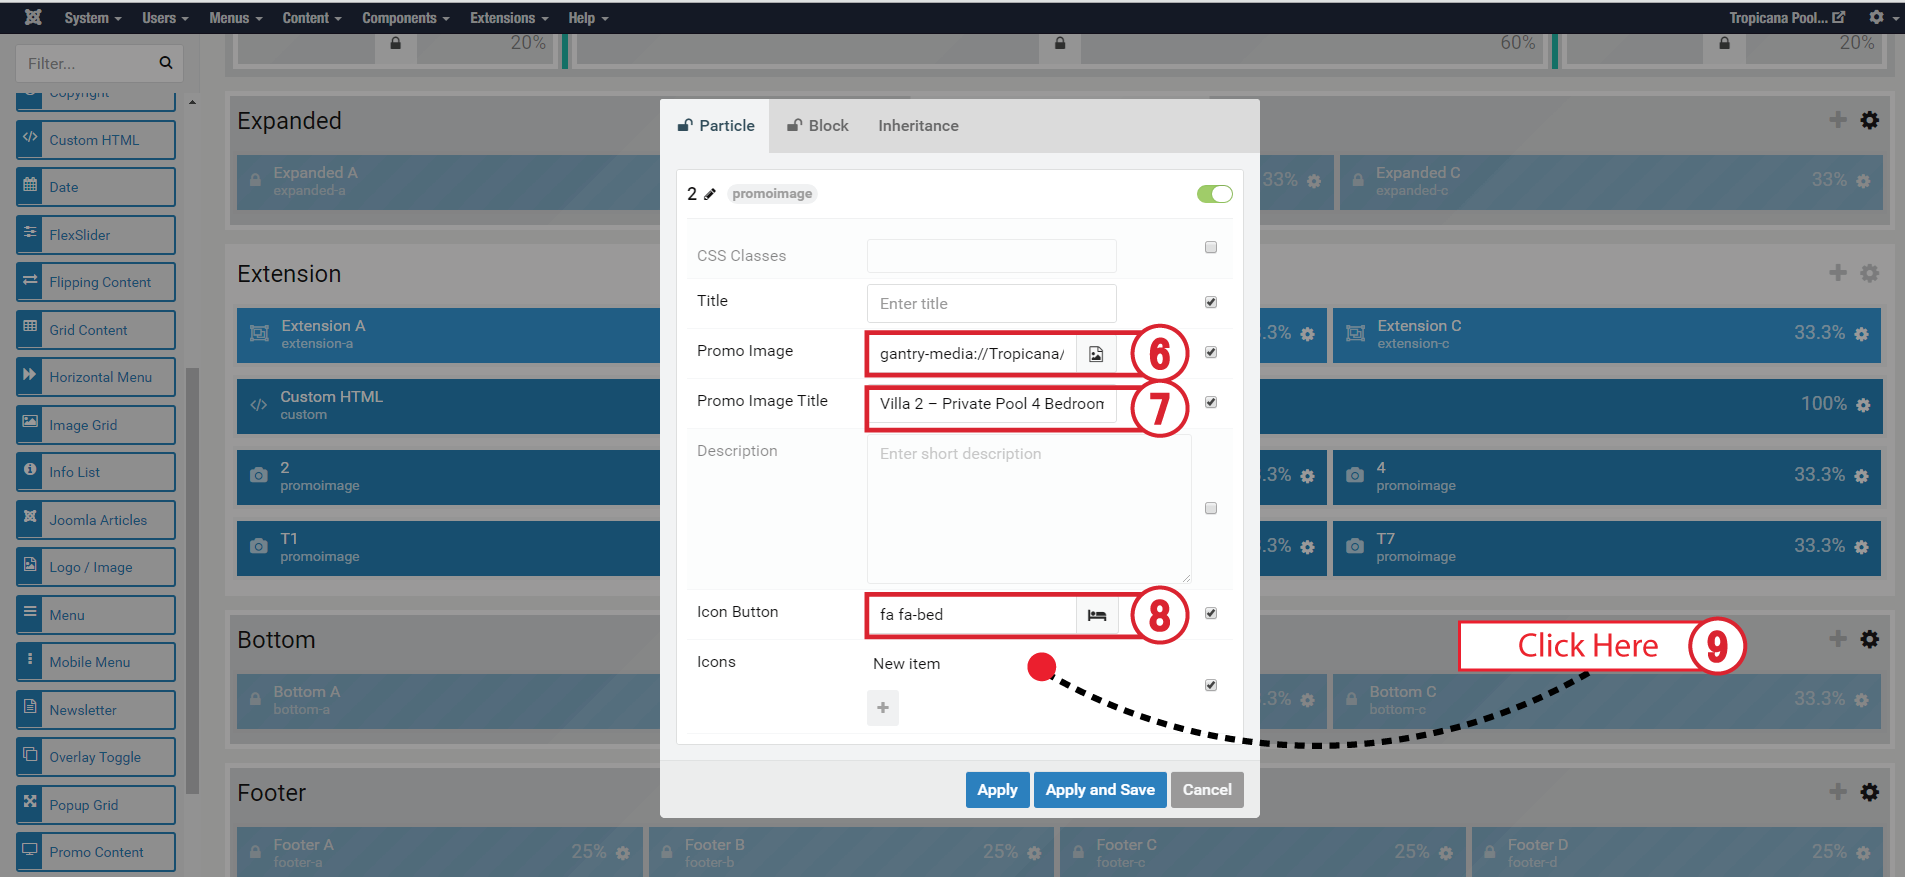
6. Add Image to the particle.
7. Give the Promo Image Title.
8. Give an image to the icon.
9. Click at the Red Dot to get in the editor.
10. Add an image to the icon.
11. Give them a link for the icon above.
12. Click the Apply button.

13. Click Apply and Save.
SERVICES
PARTICLE : INFO LIST
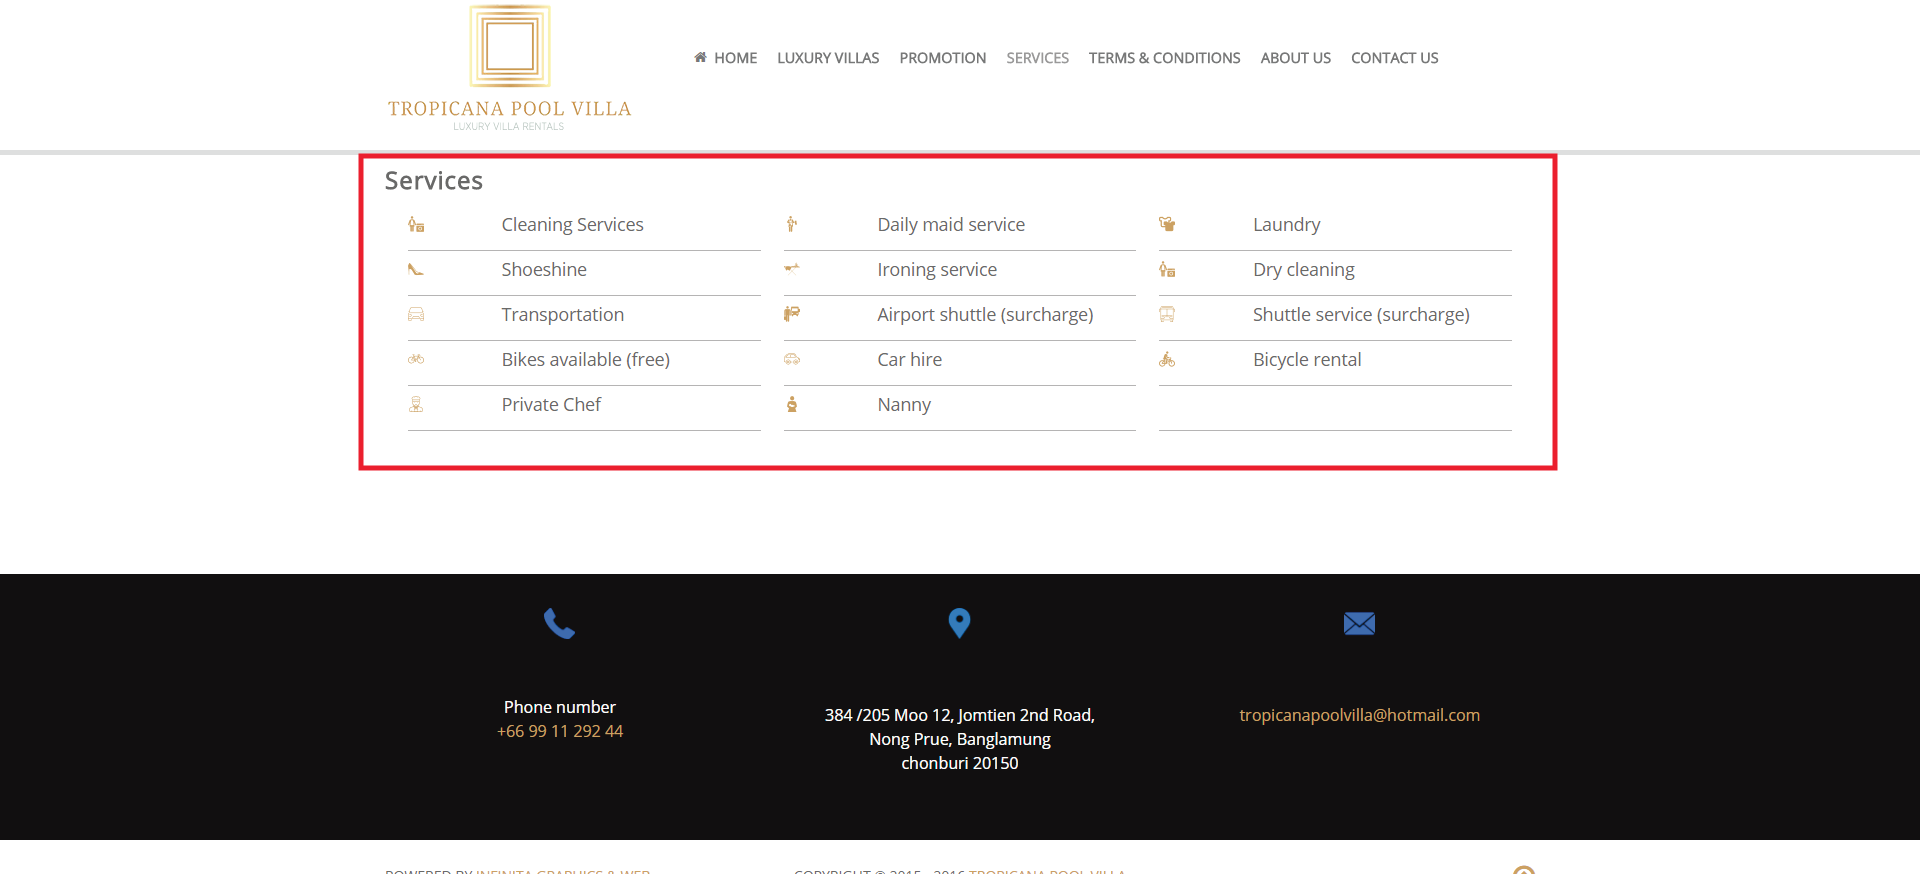
1. Click the Template menu and choose the template for editing.
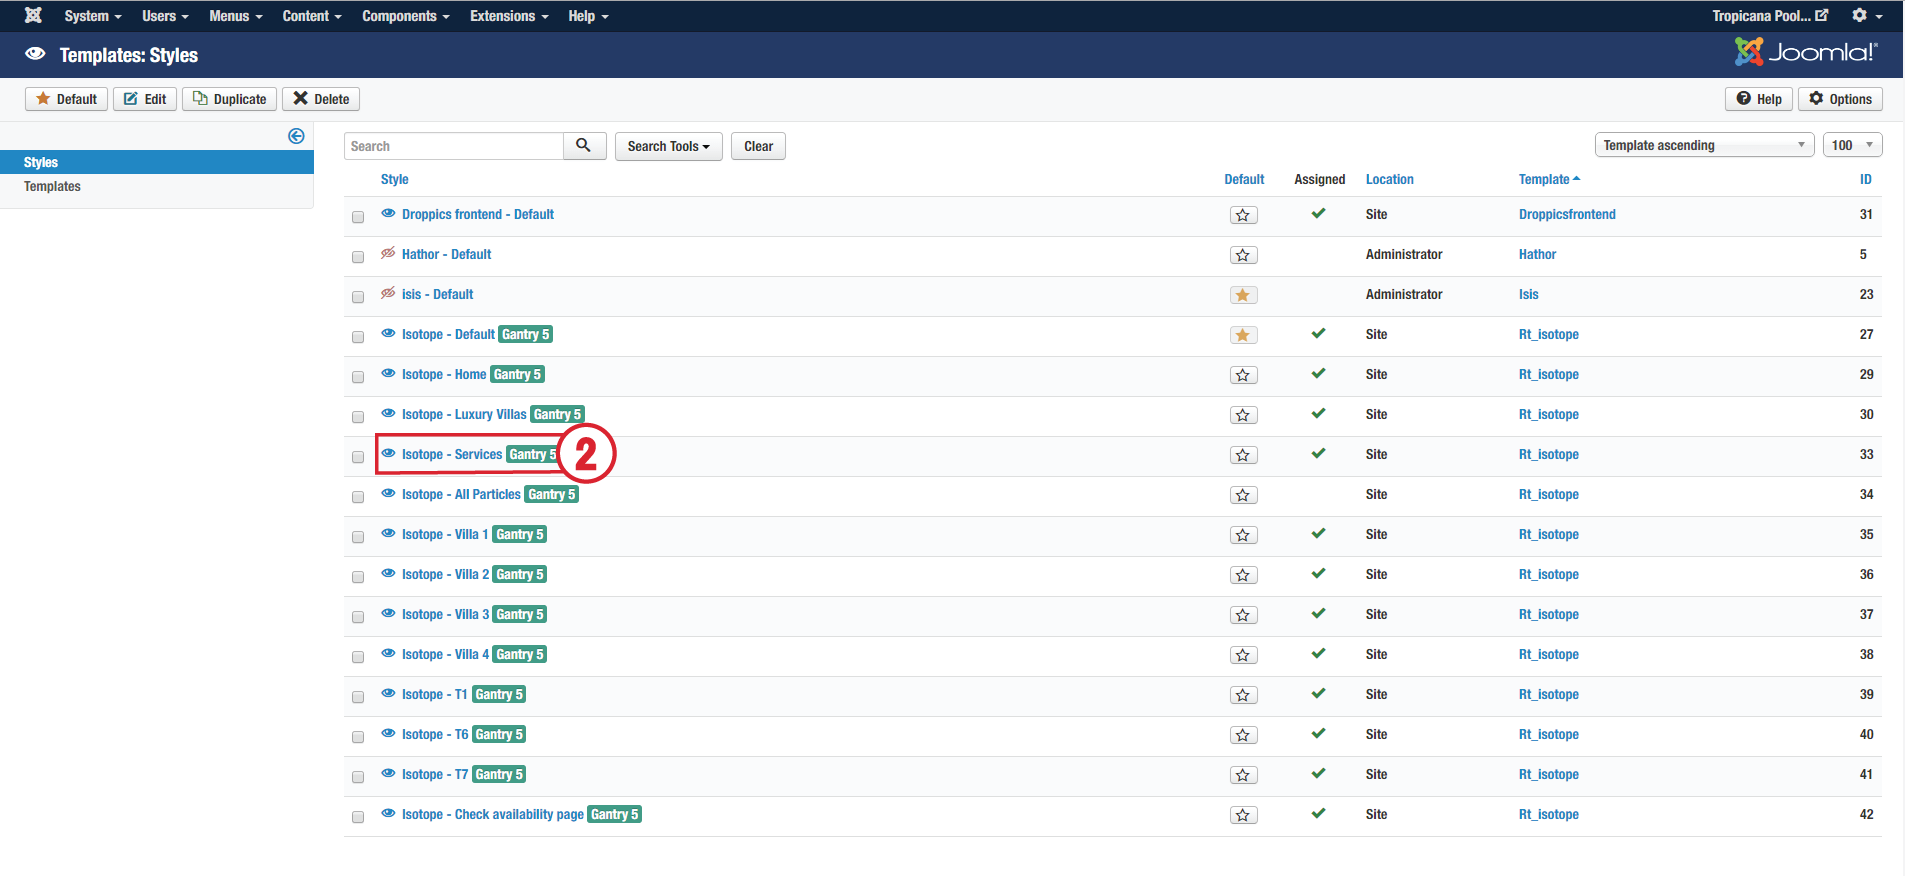
2. Choose the "Services" template for editing.
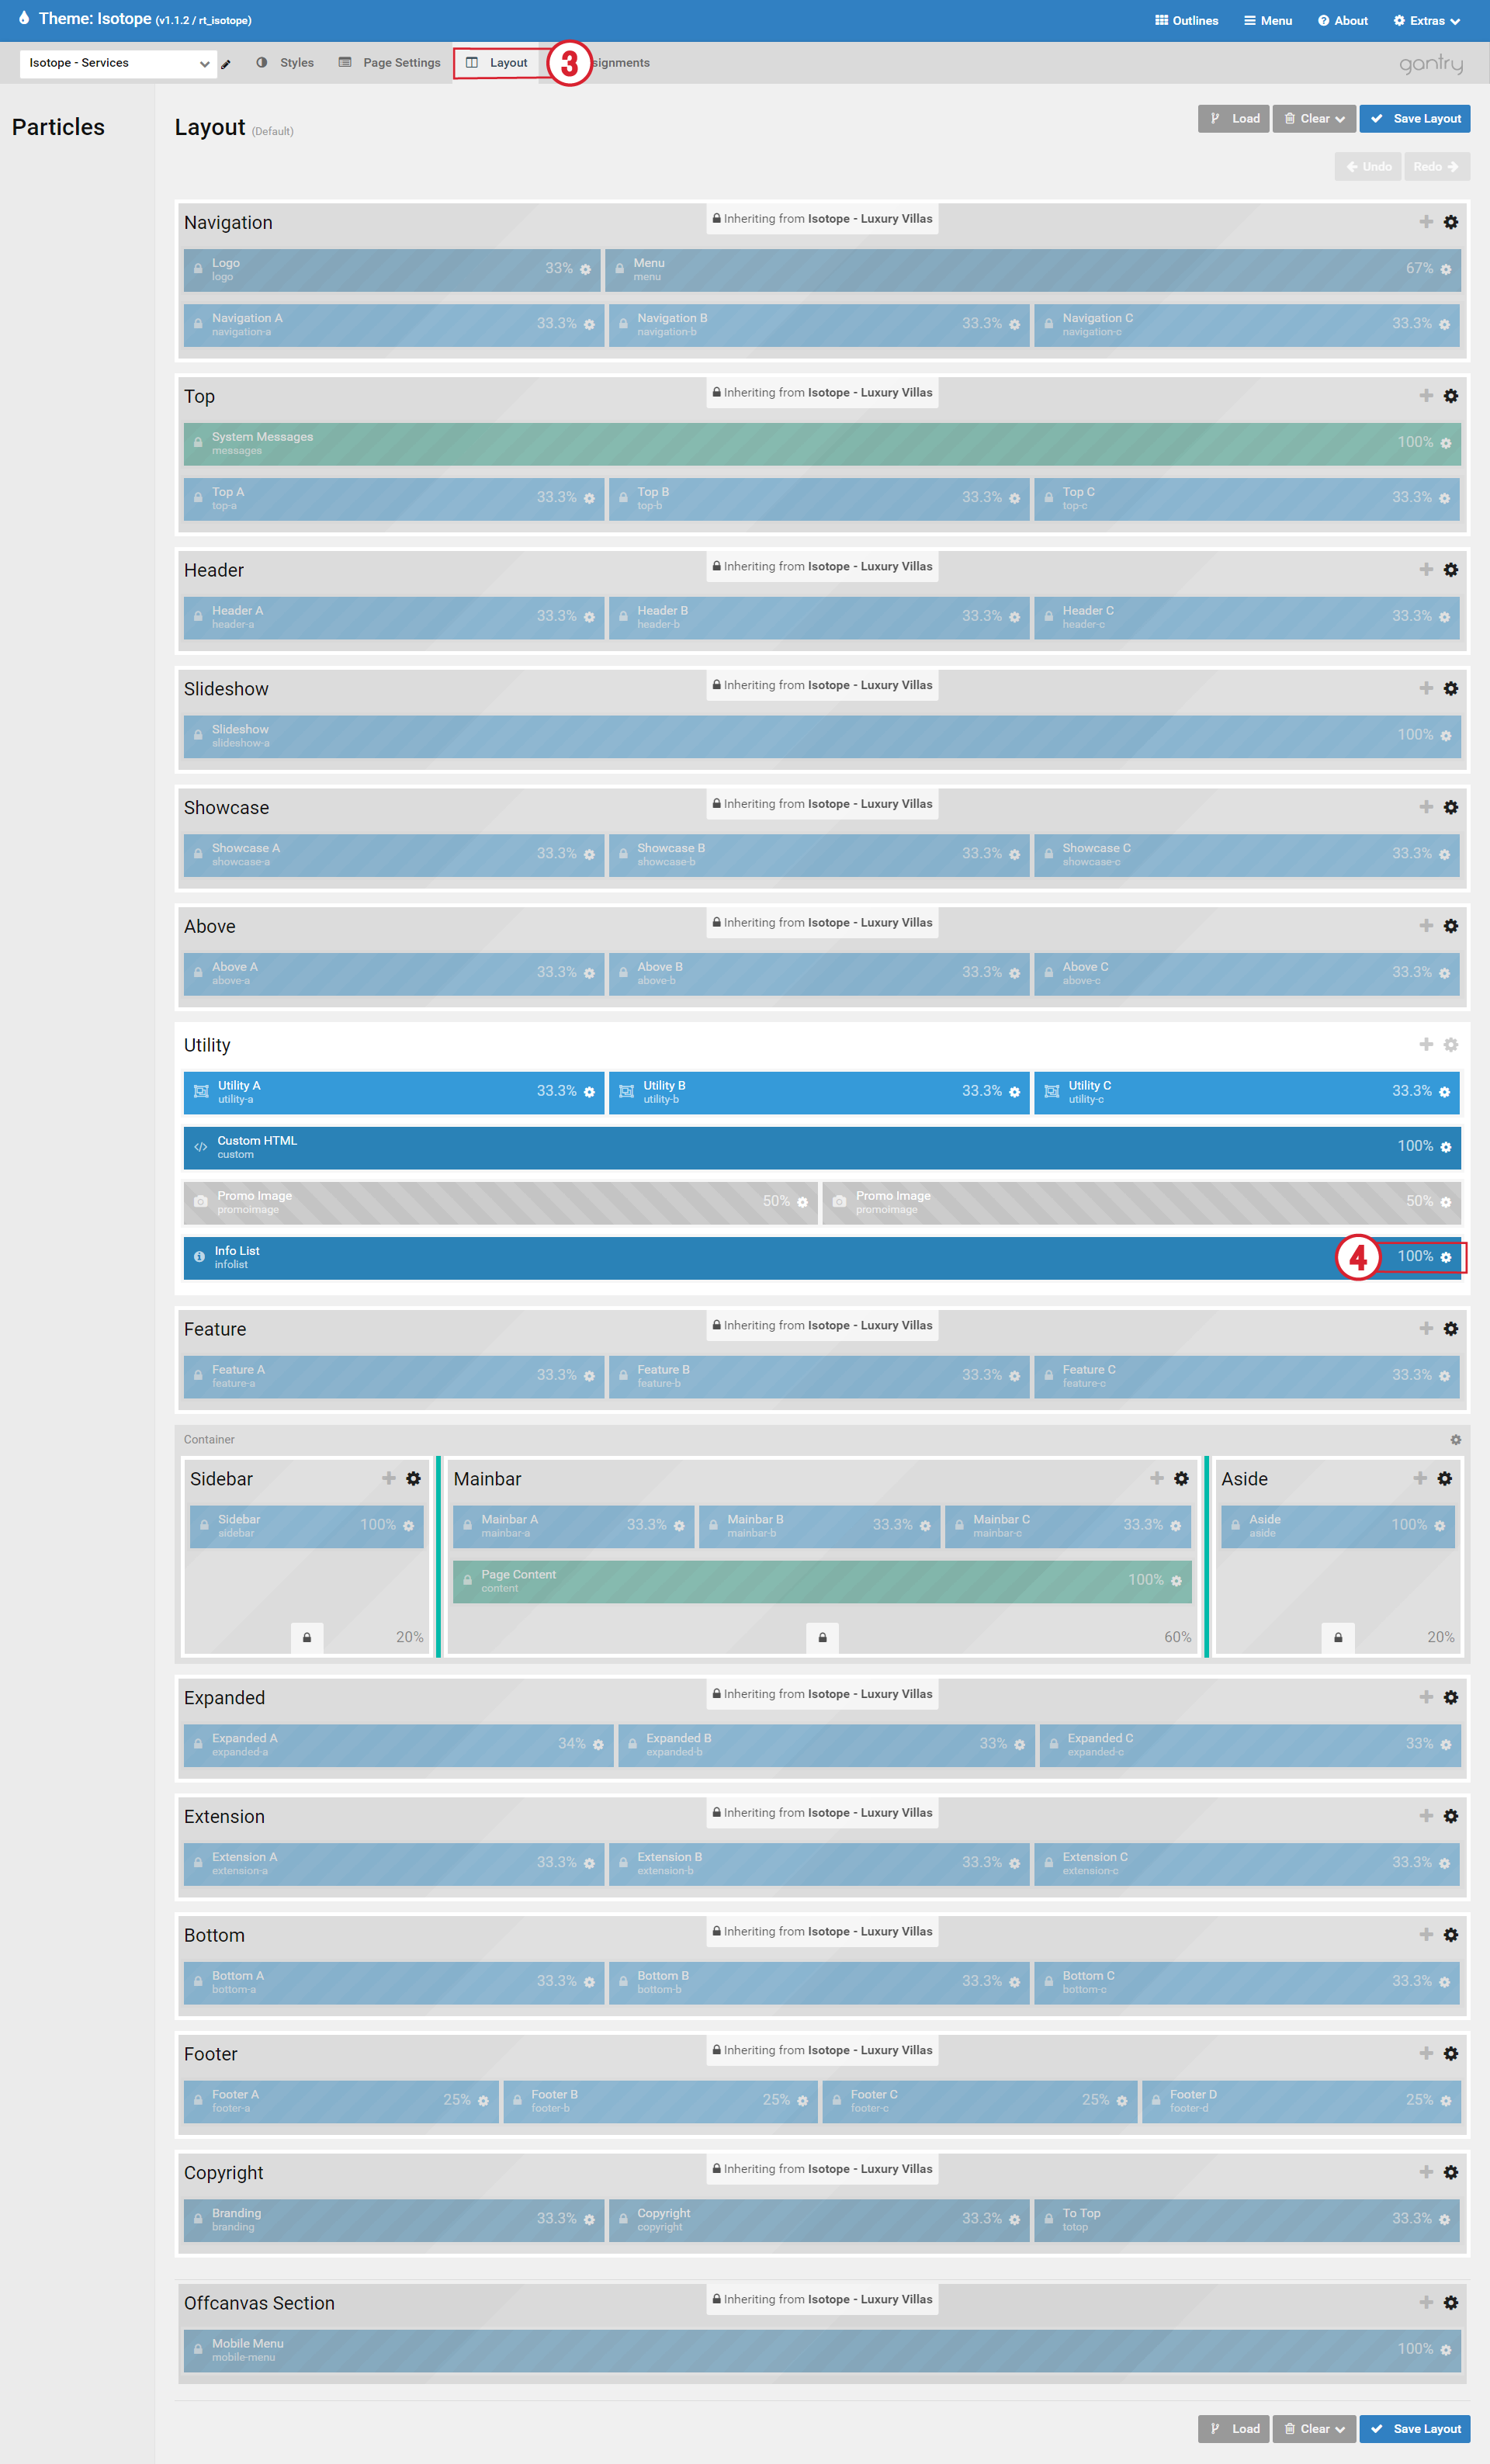
3. Click the "Layout" tab for editing the layout and positions.
4. Click at the machine cog to get inside the editor.
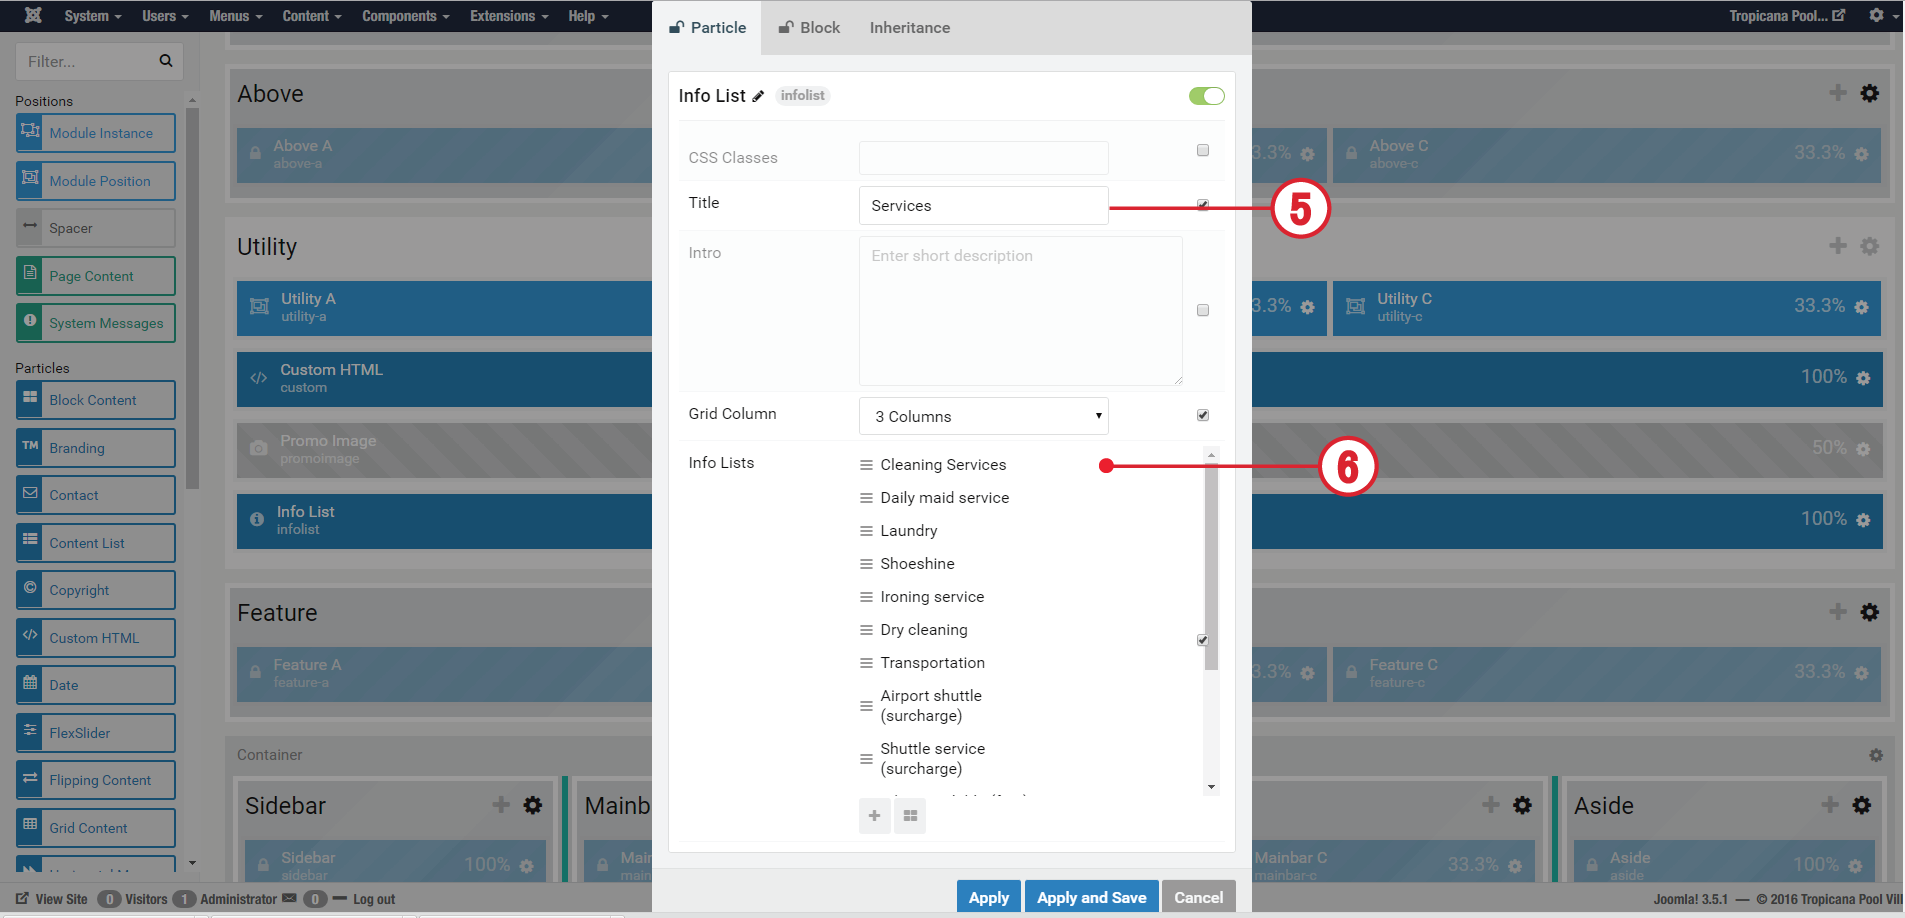
5. Title : Add the particle's title.
6. Click at the Red Dot to get in the editor.
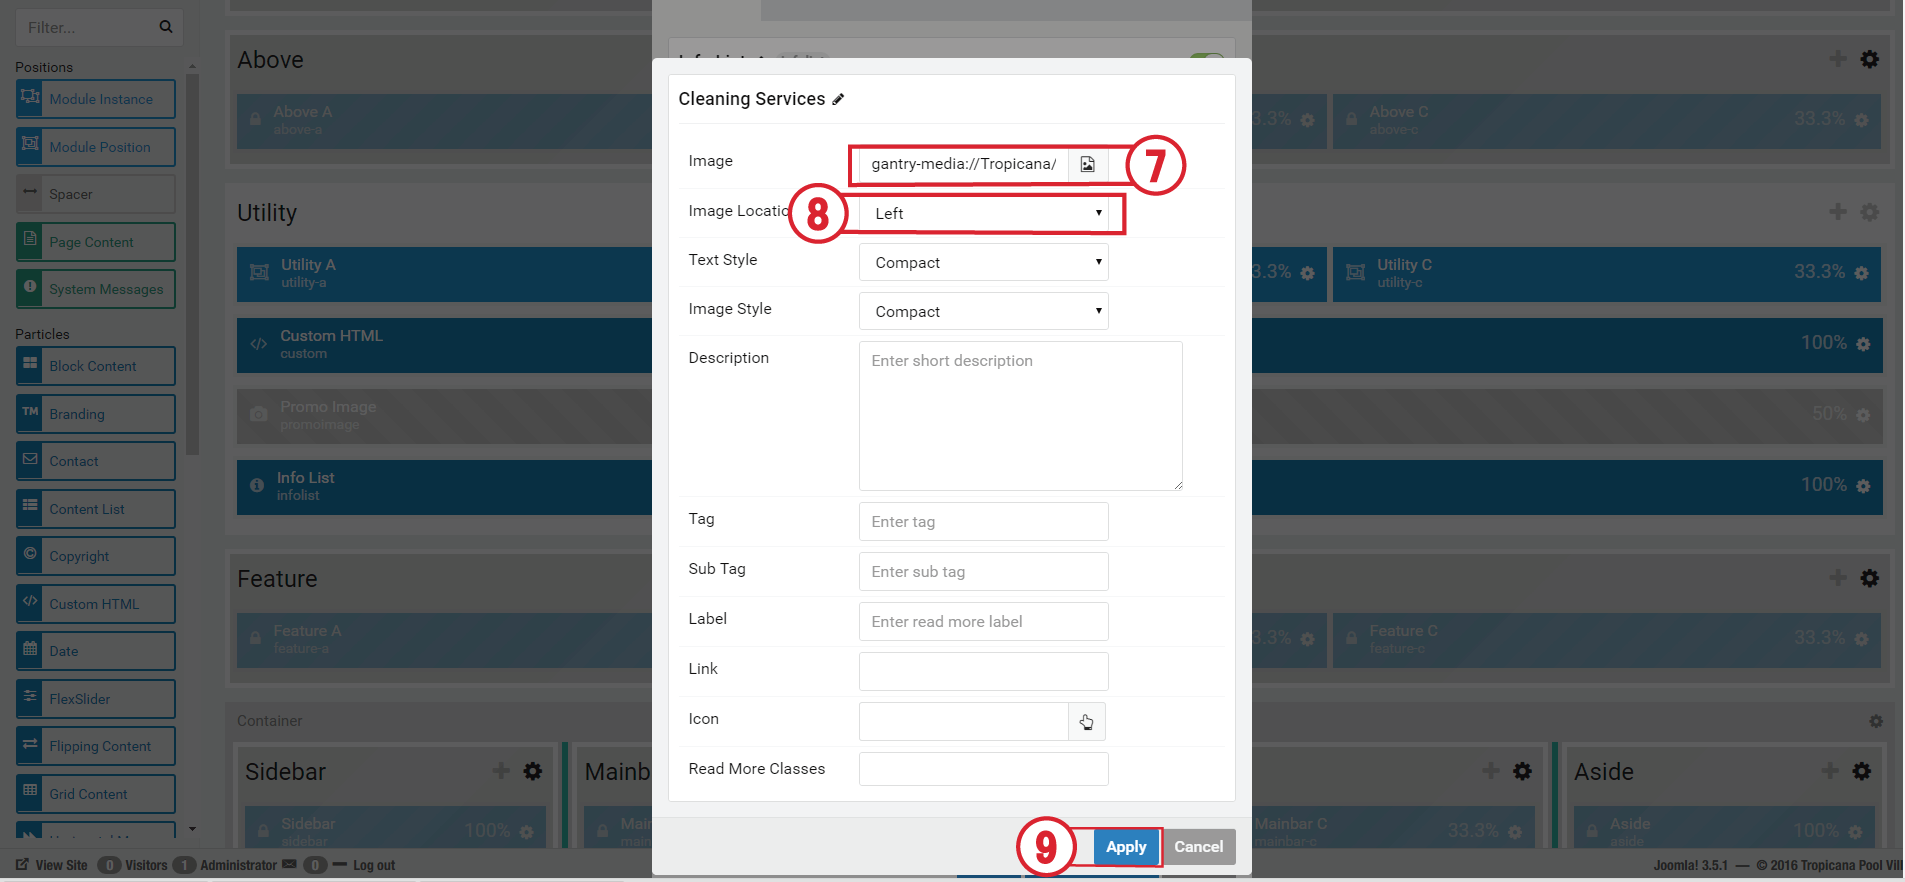
7. Image : Add a link for the particle's image.
8. Image Location : Set the position to show your image.
9. Click Apply.
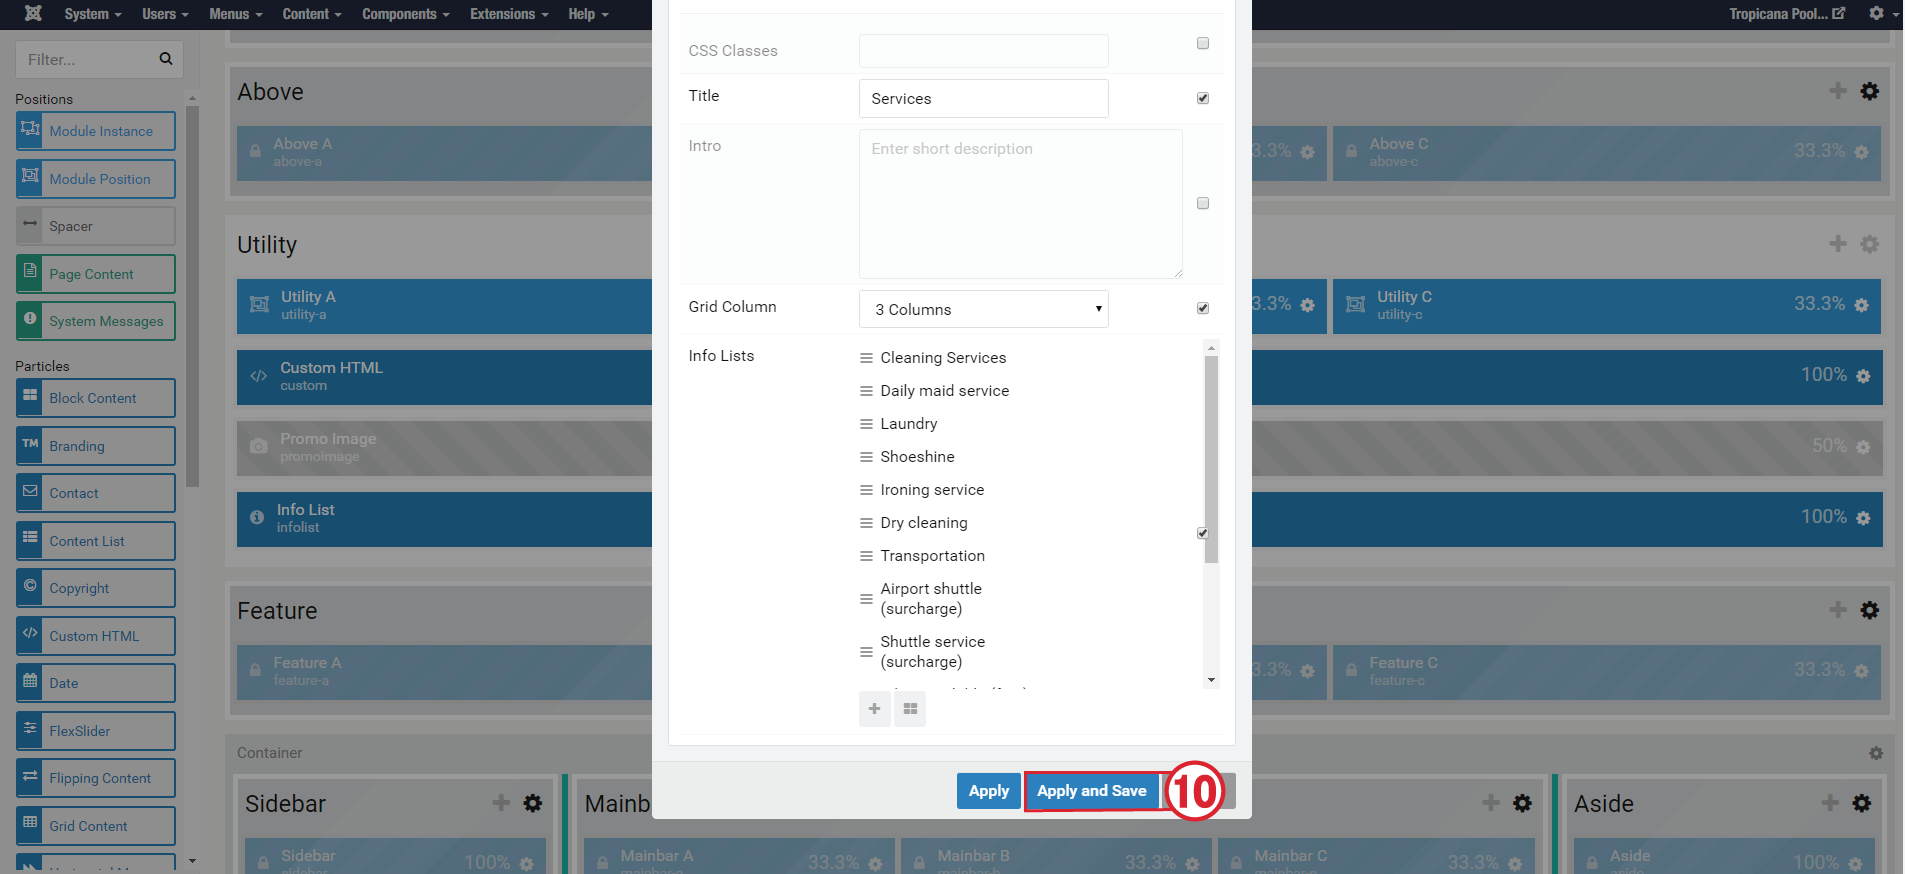
10. Click Apply and Save
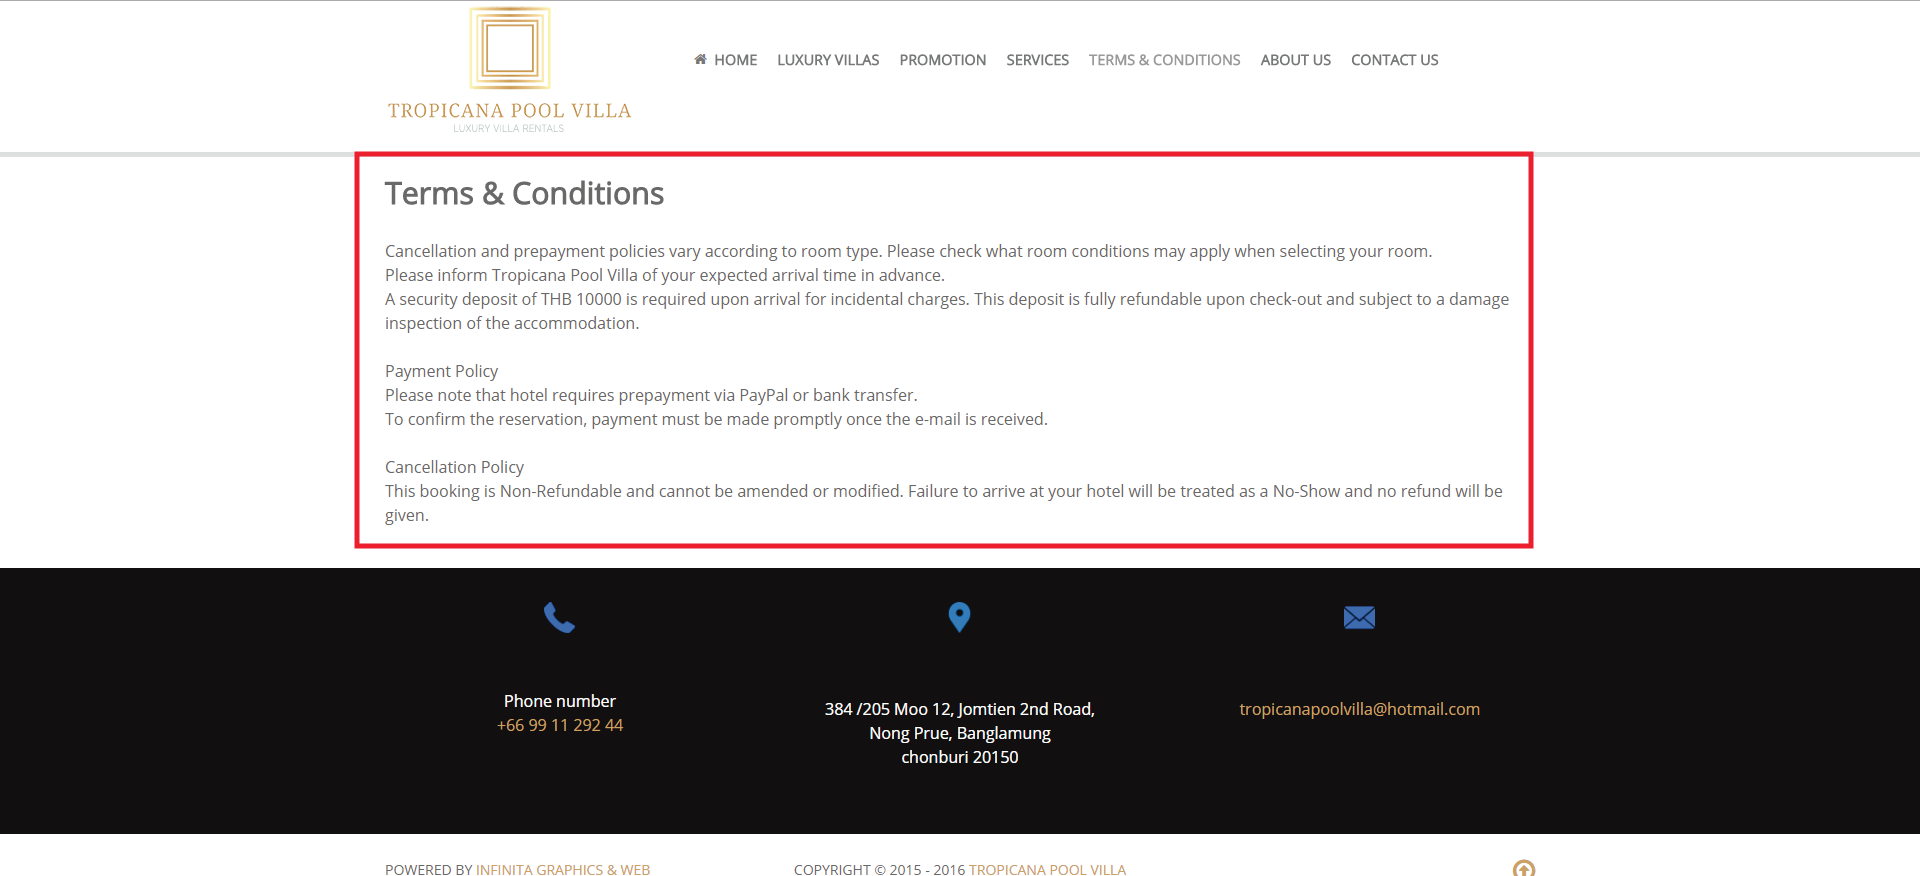
TERMS & CONDITIONS
ARTICLE : TERMS & CONDITIONS
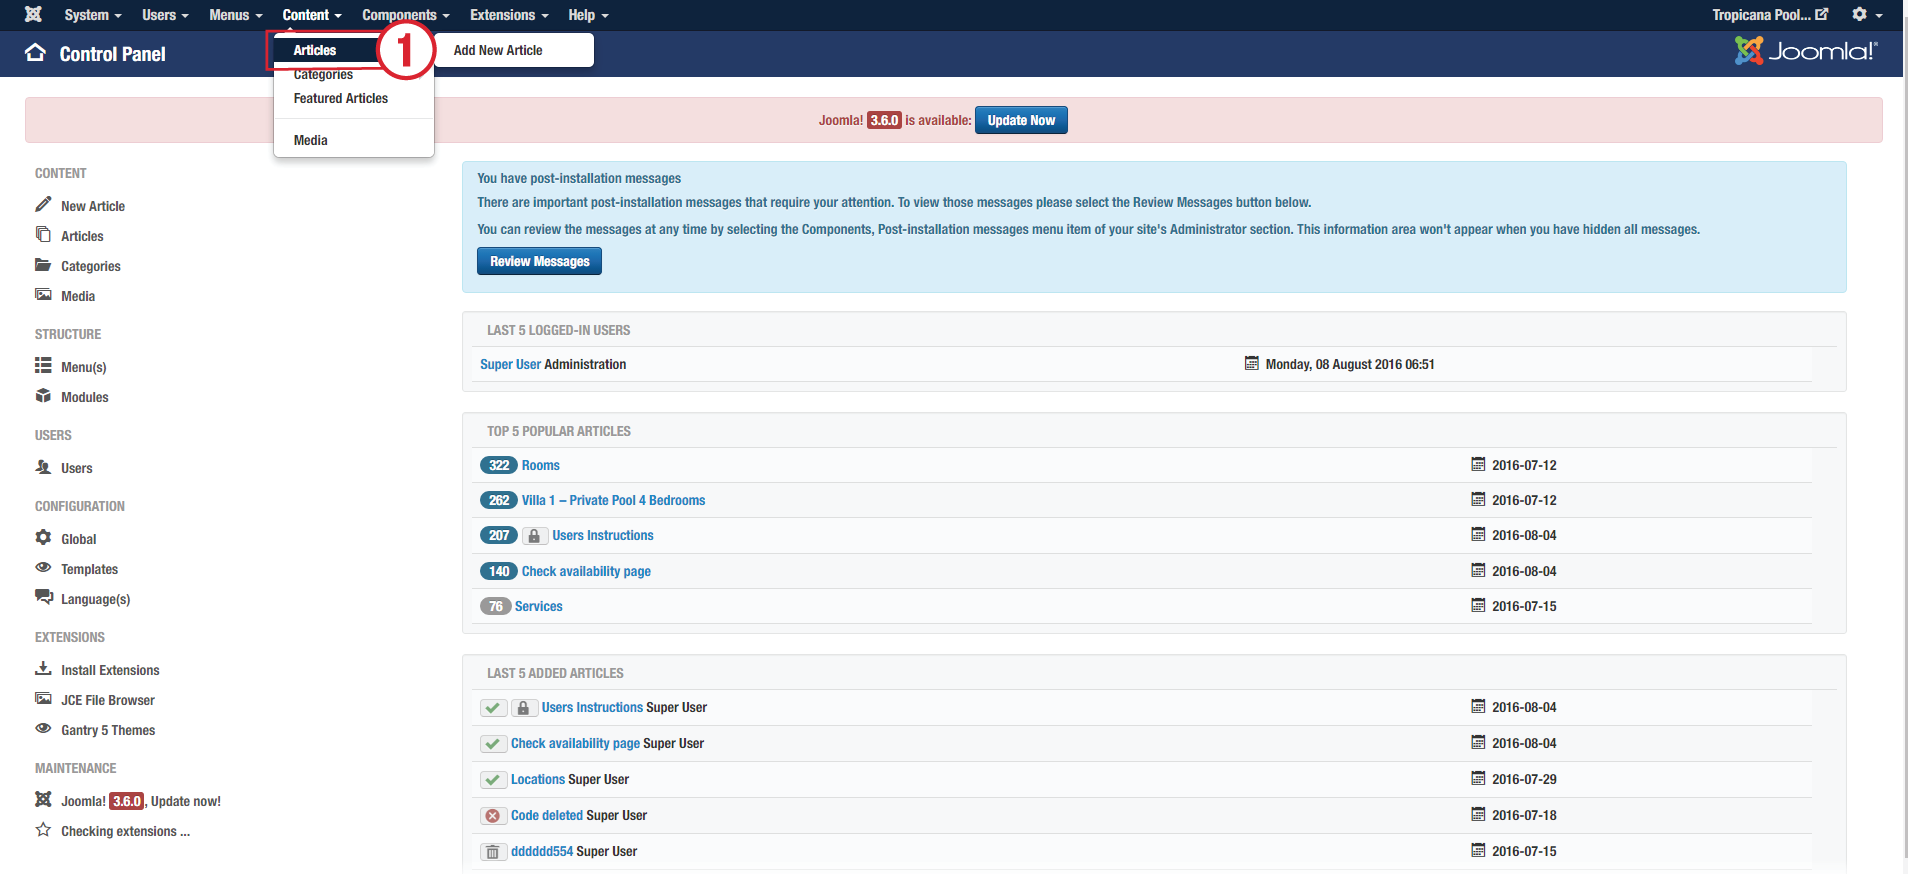
1. Click the Articles menu and choose the articles for editing.
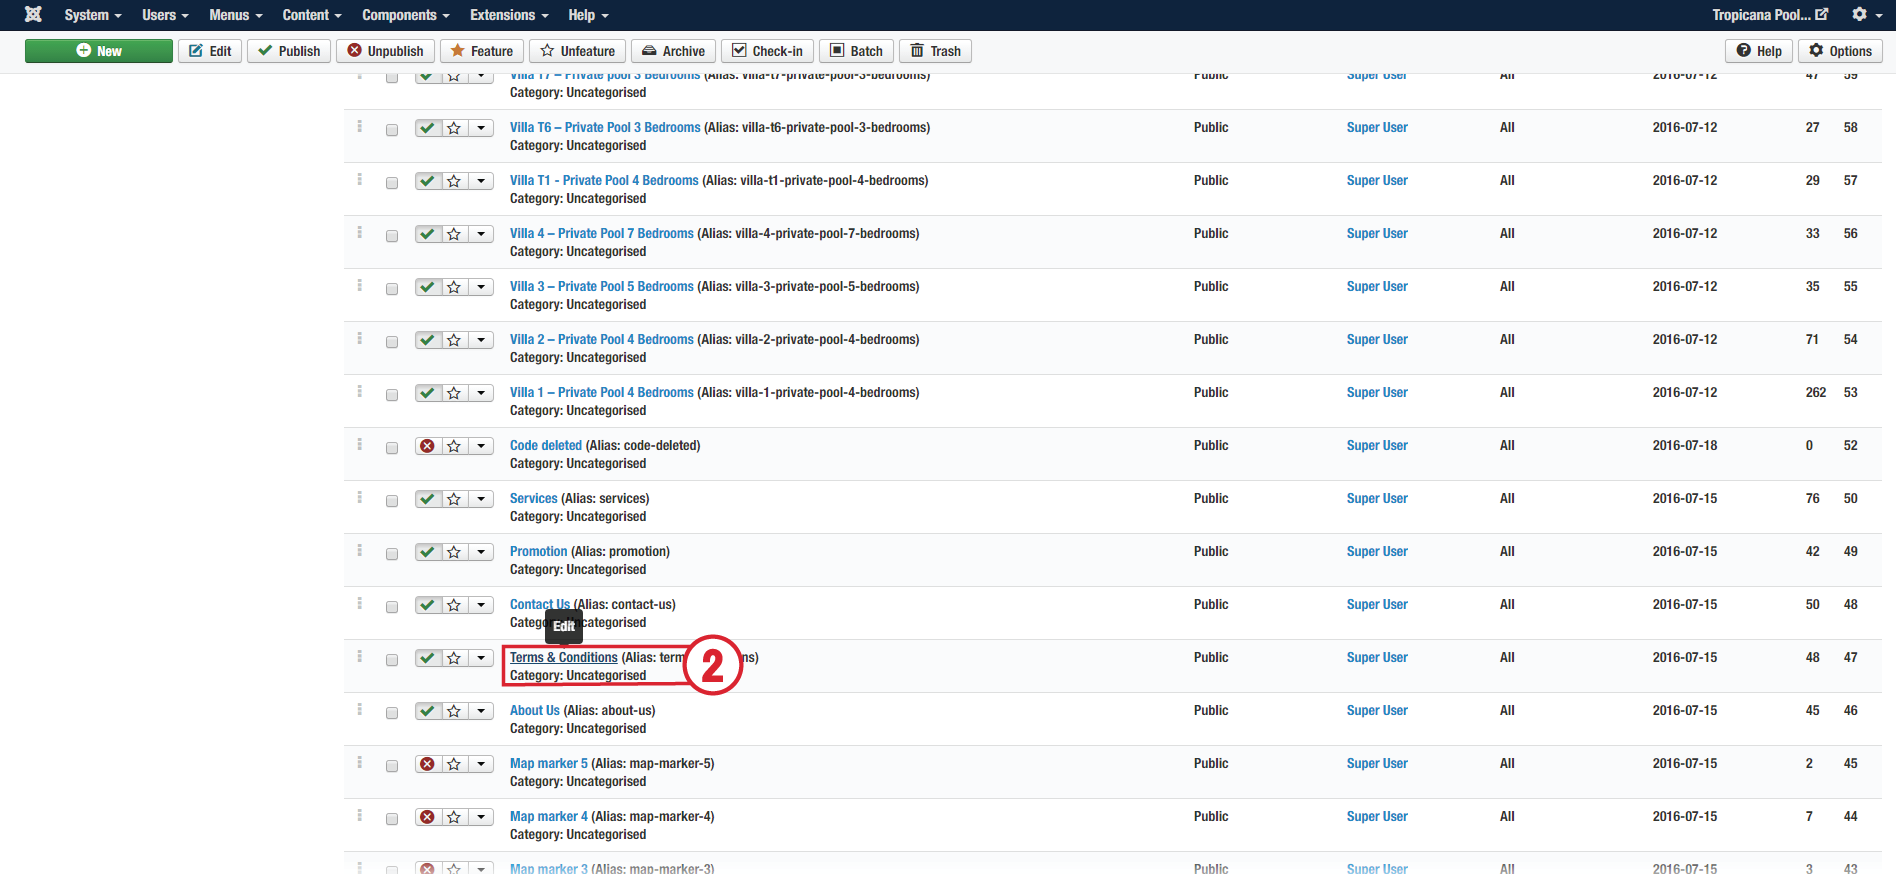
2. Choose the "Terms & Conditions" article for editing.
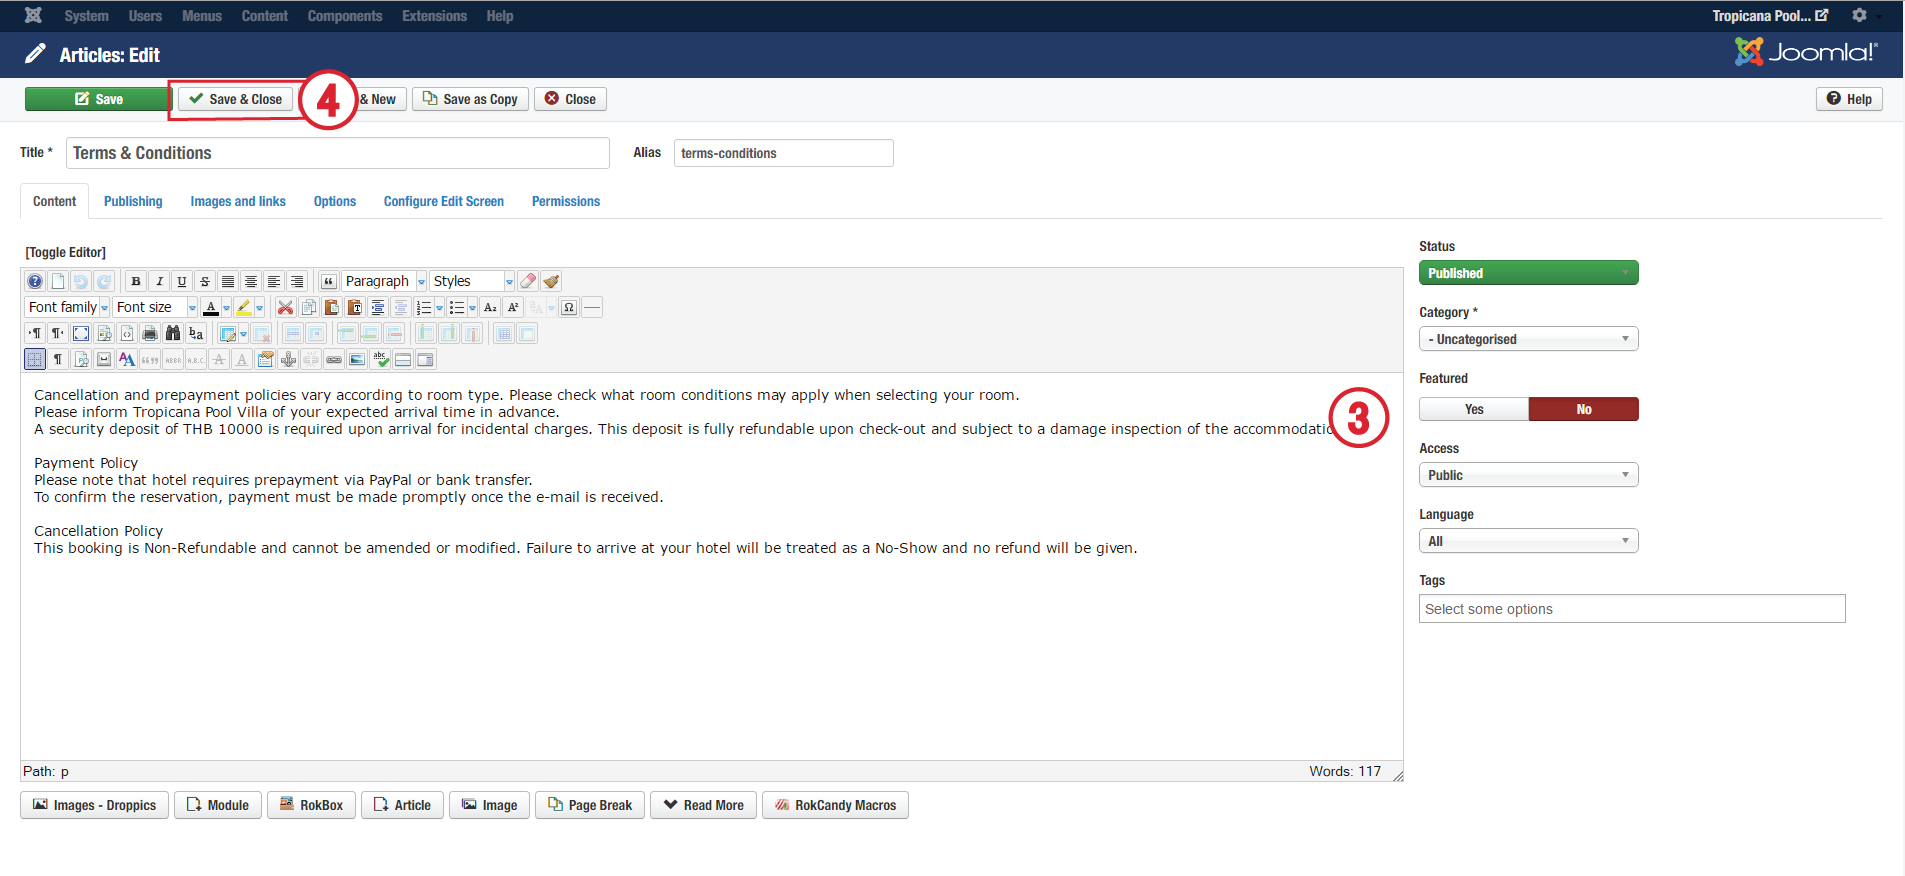
3. Edit content as you want.
4. Save & Close.
ABOUT US
ARTICLE : ABOUT US
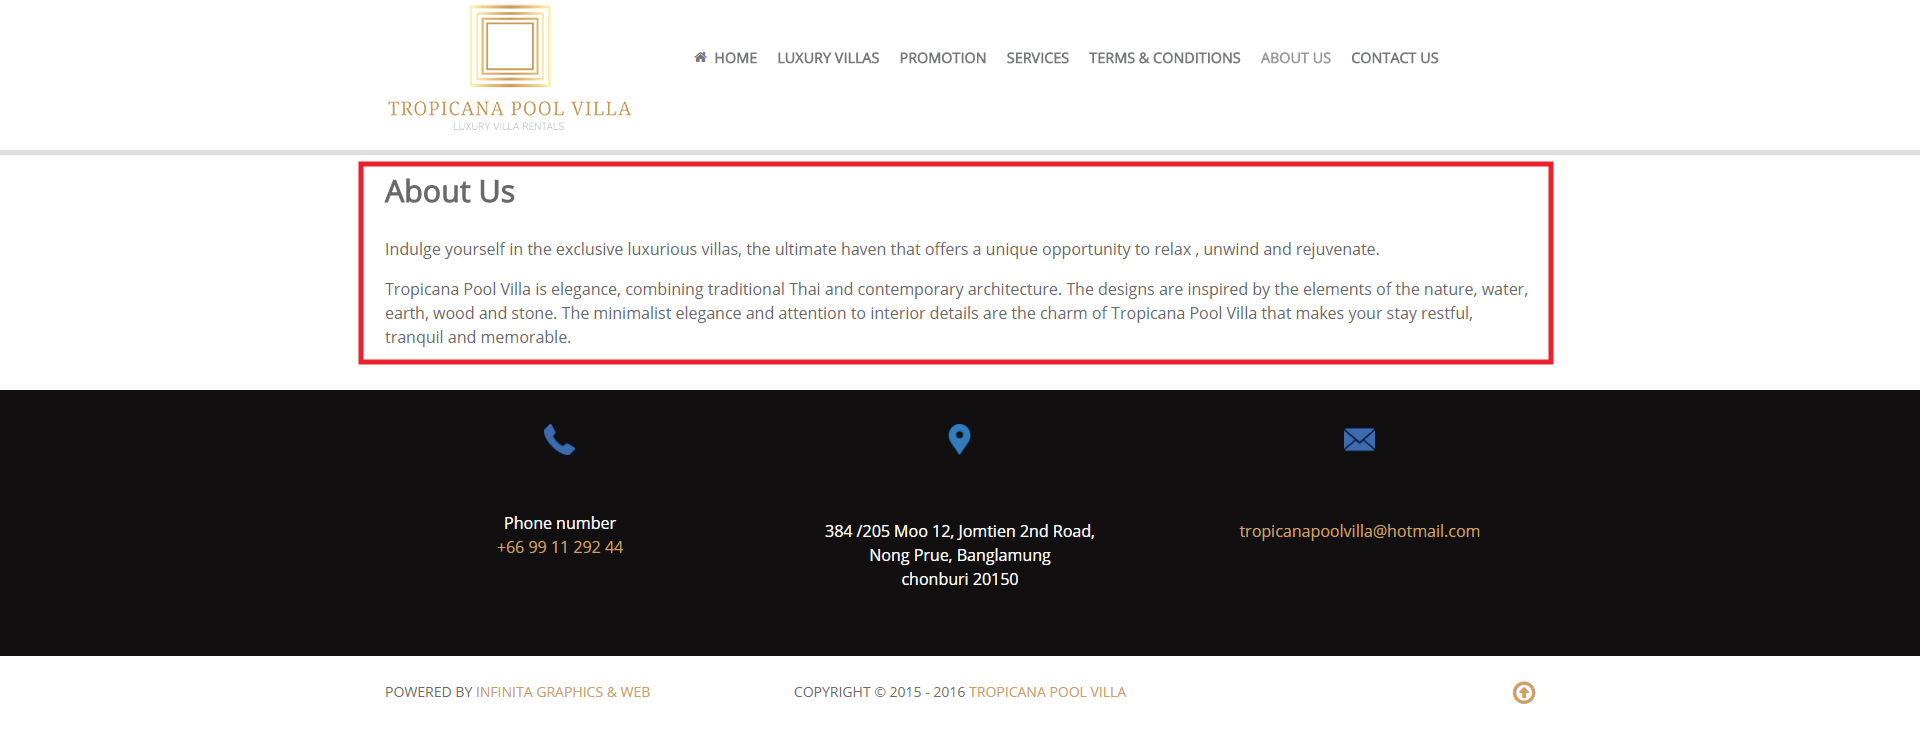
1. Click the Articles menu and choose the articles for editing.
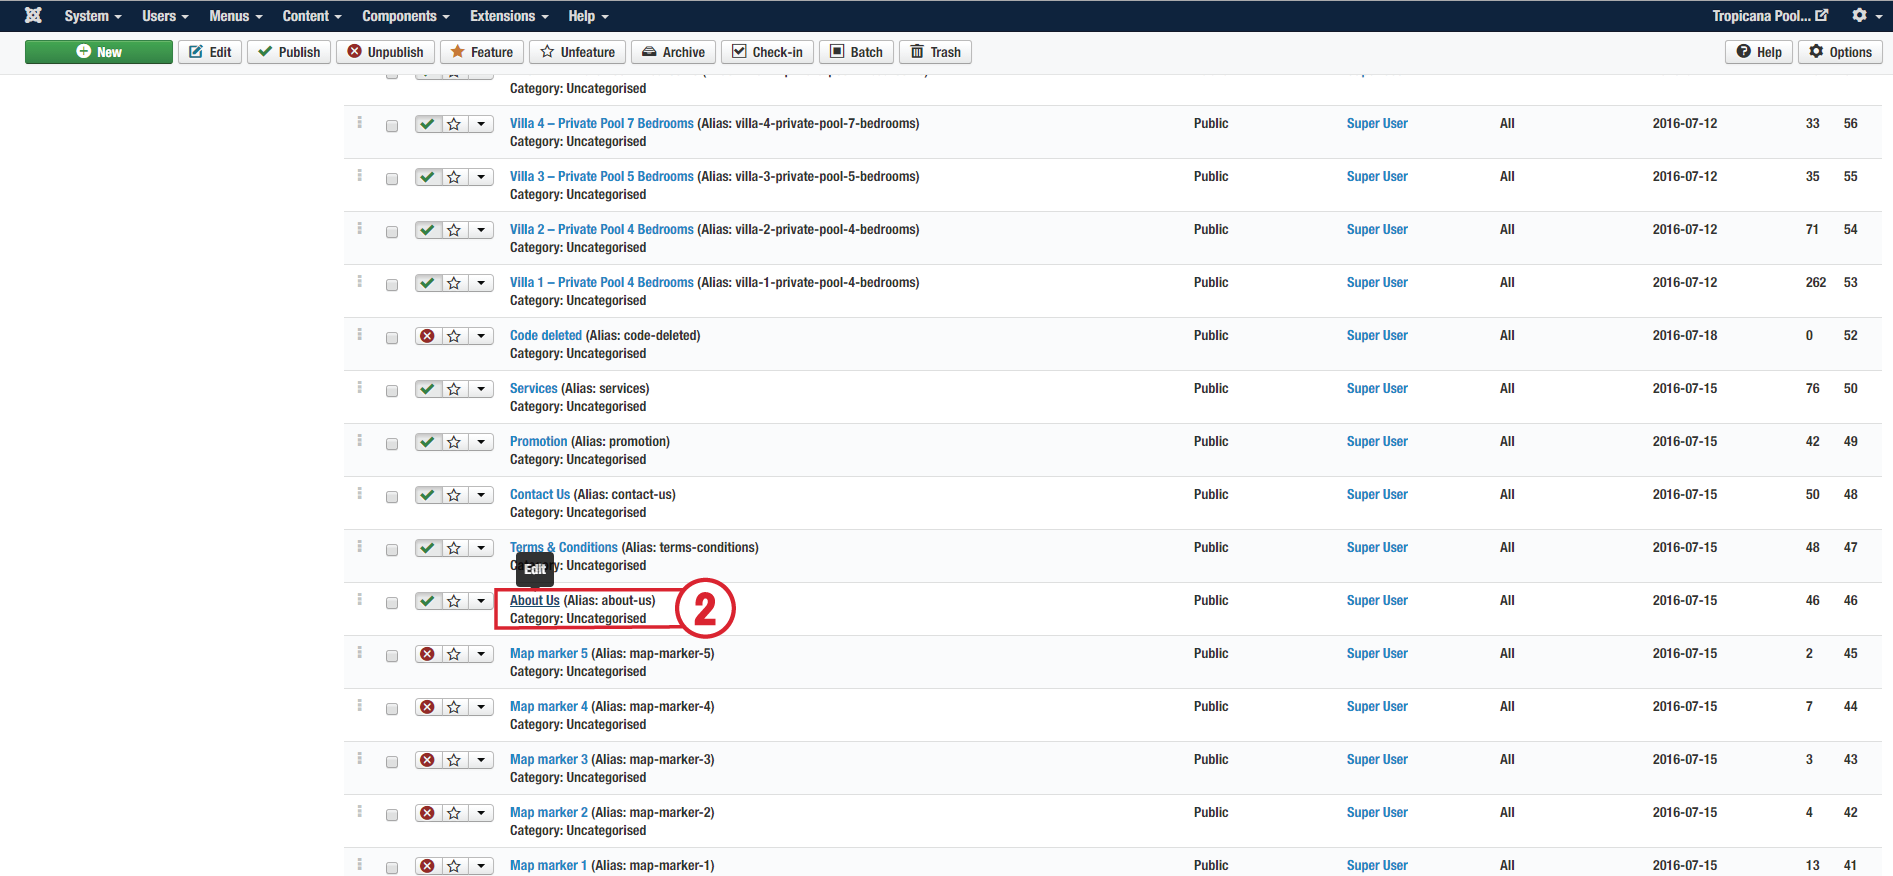
2. Choose the "About Us" article for editing.
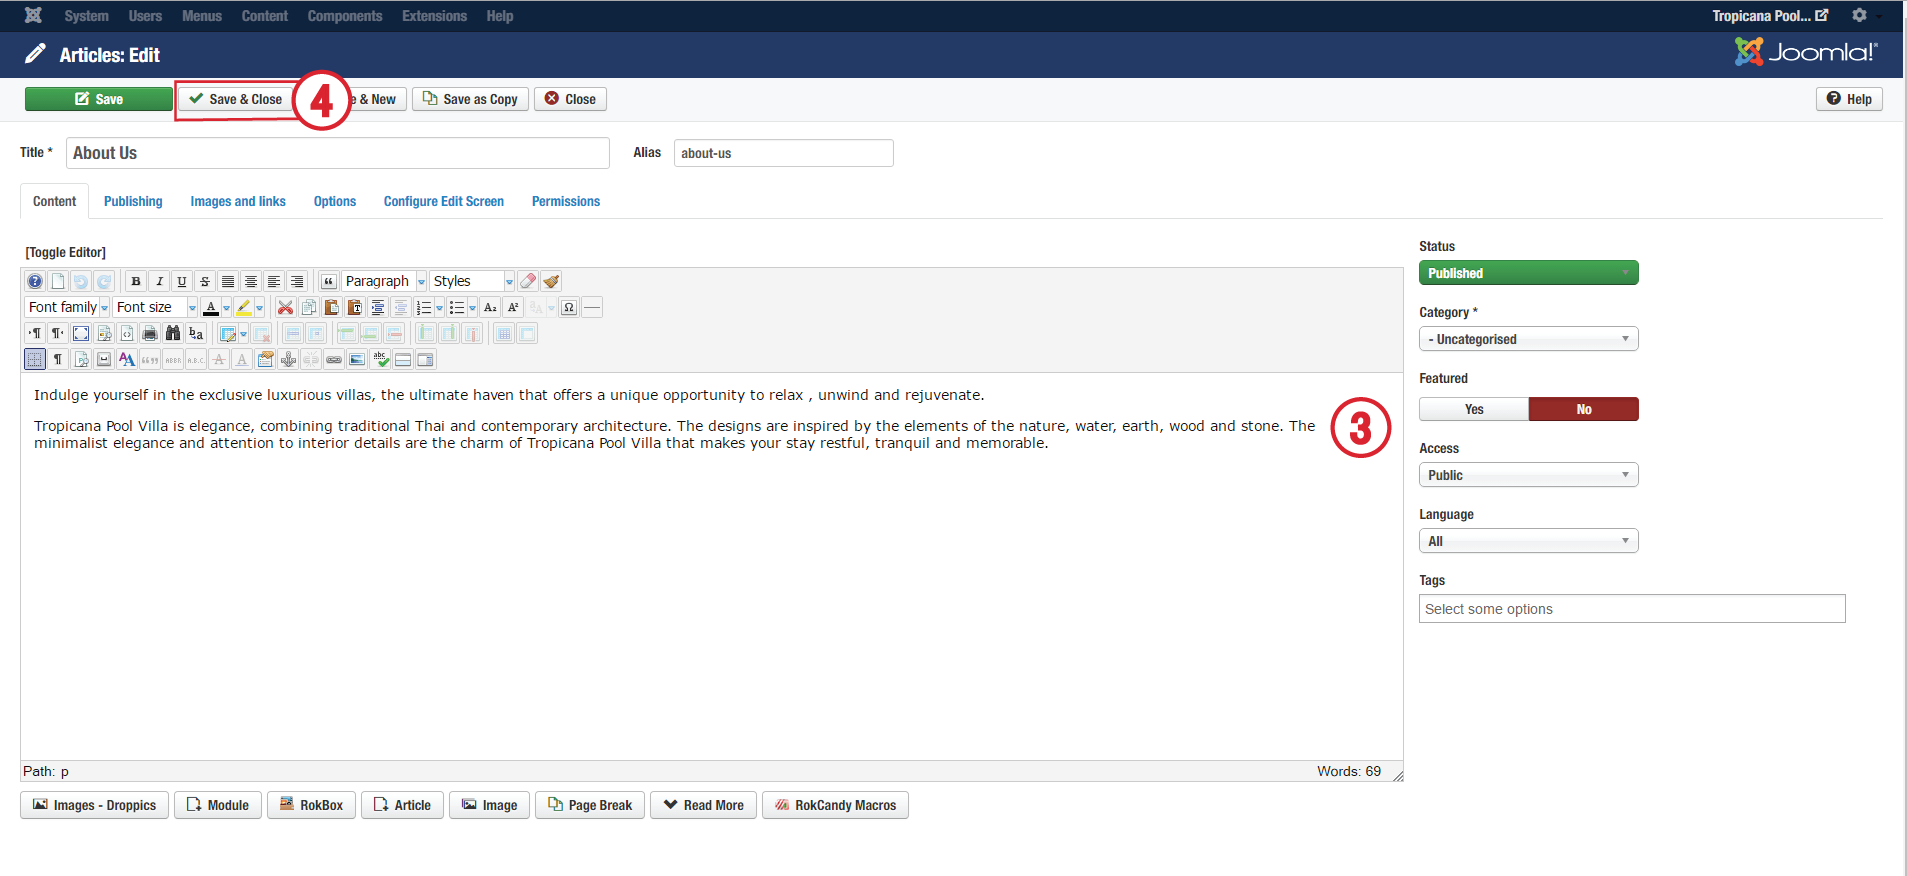
3. Edit content as you want.
4. Save & Close.
CONTACT US
ARTICLE : CONTACT US
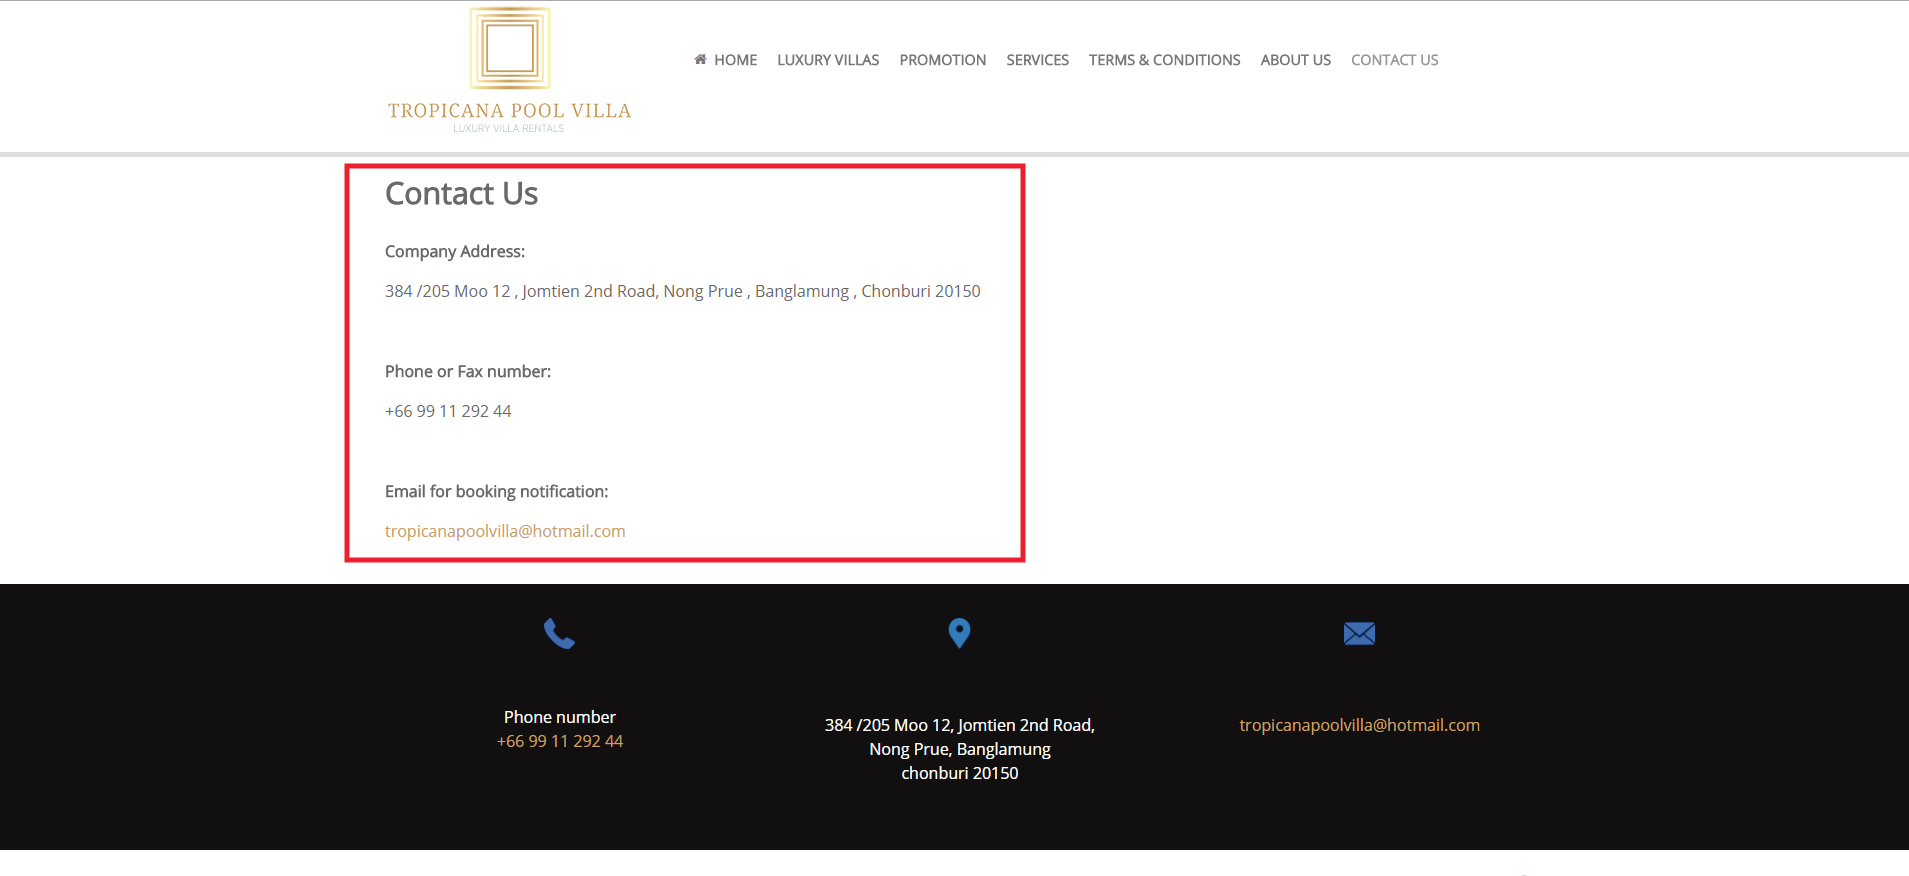
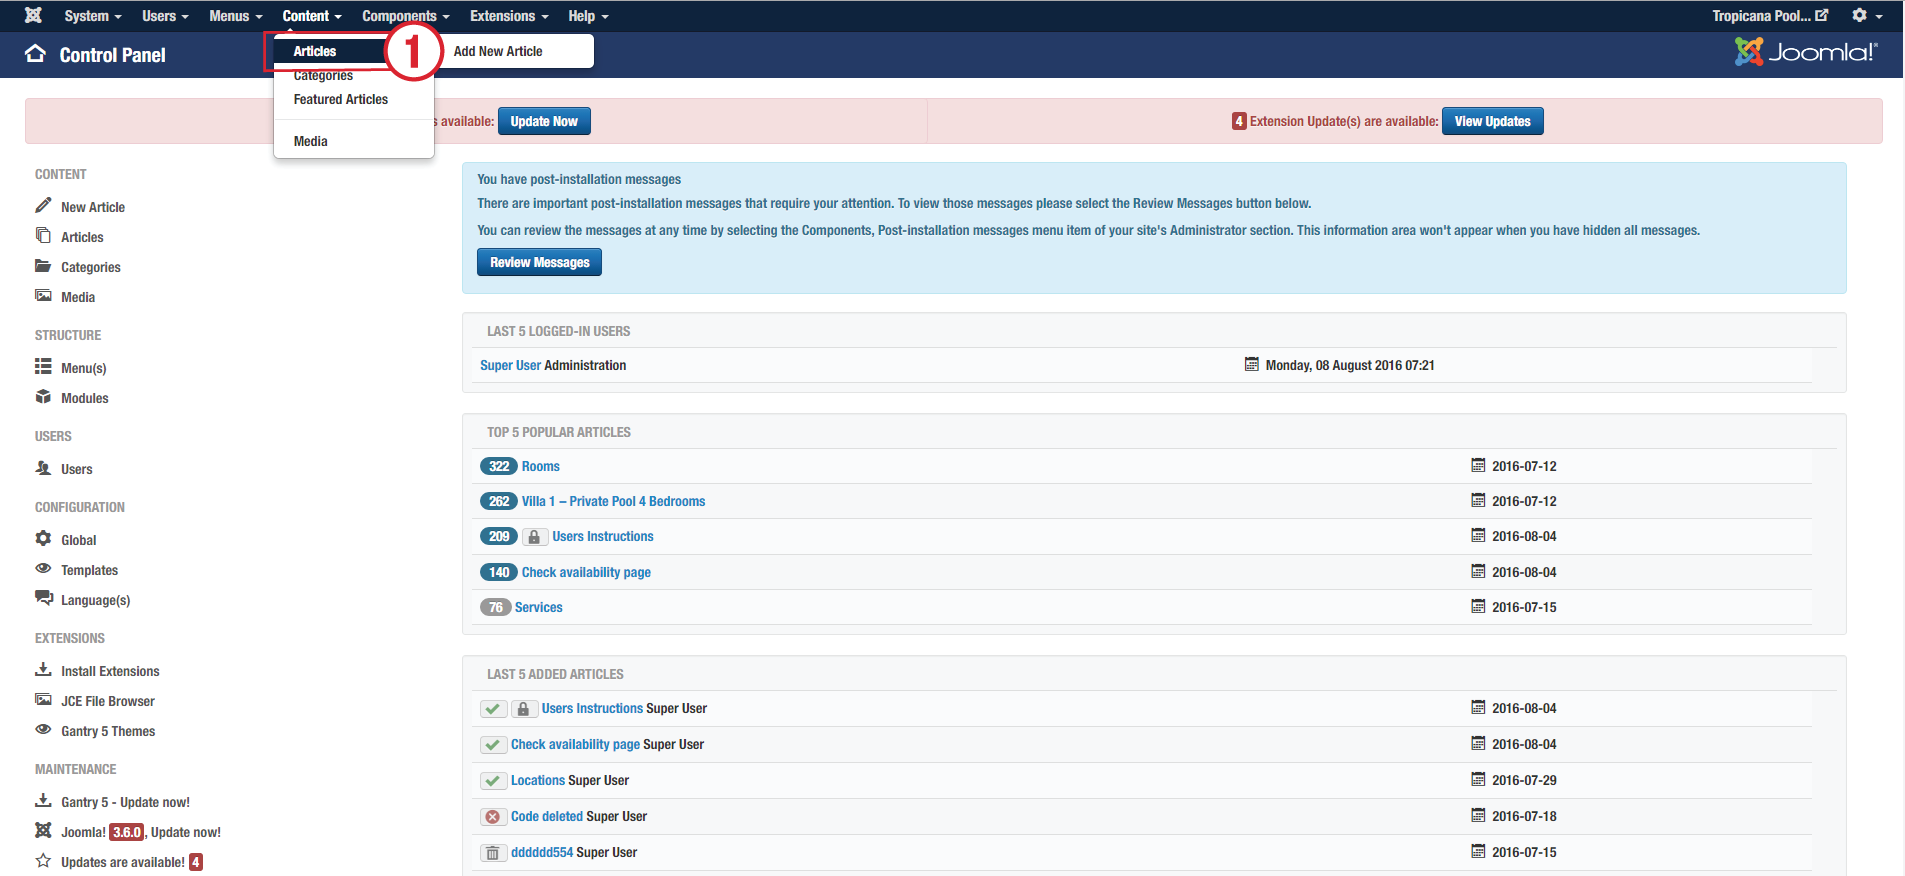
1. Click the Articles menu and choose the articles for editing.
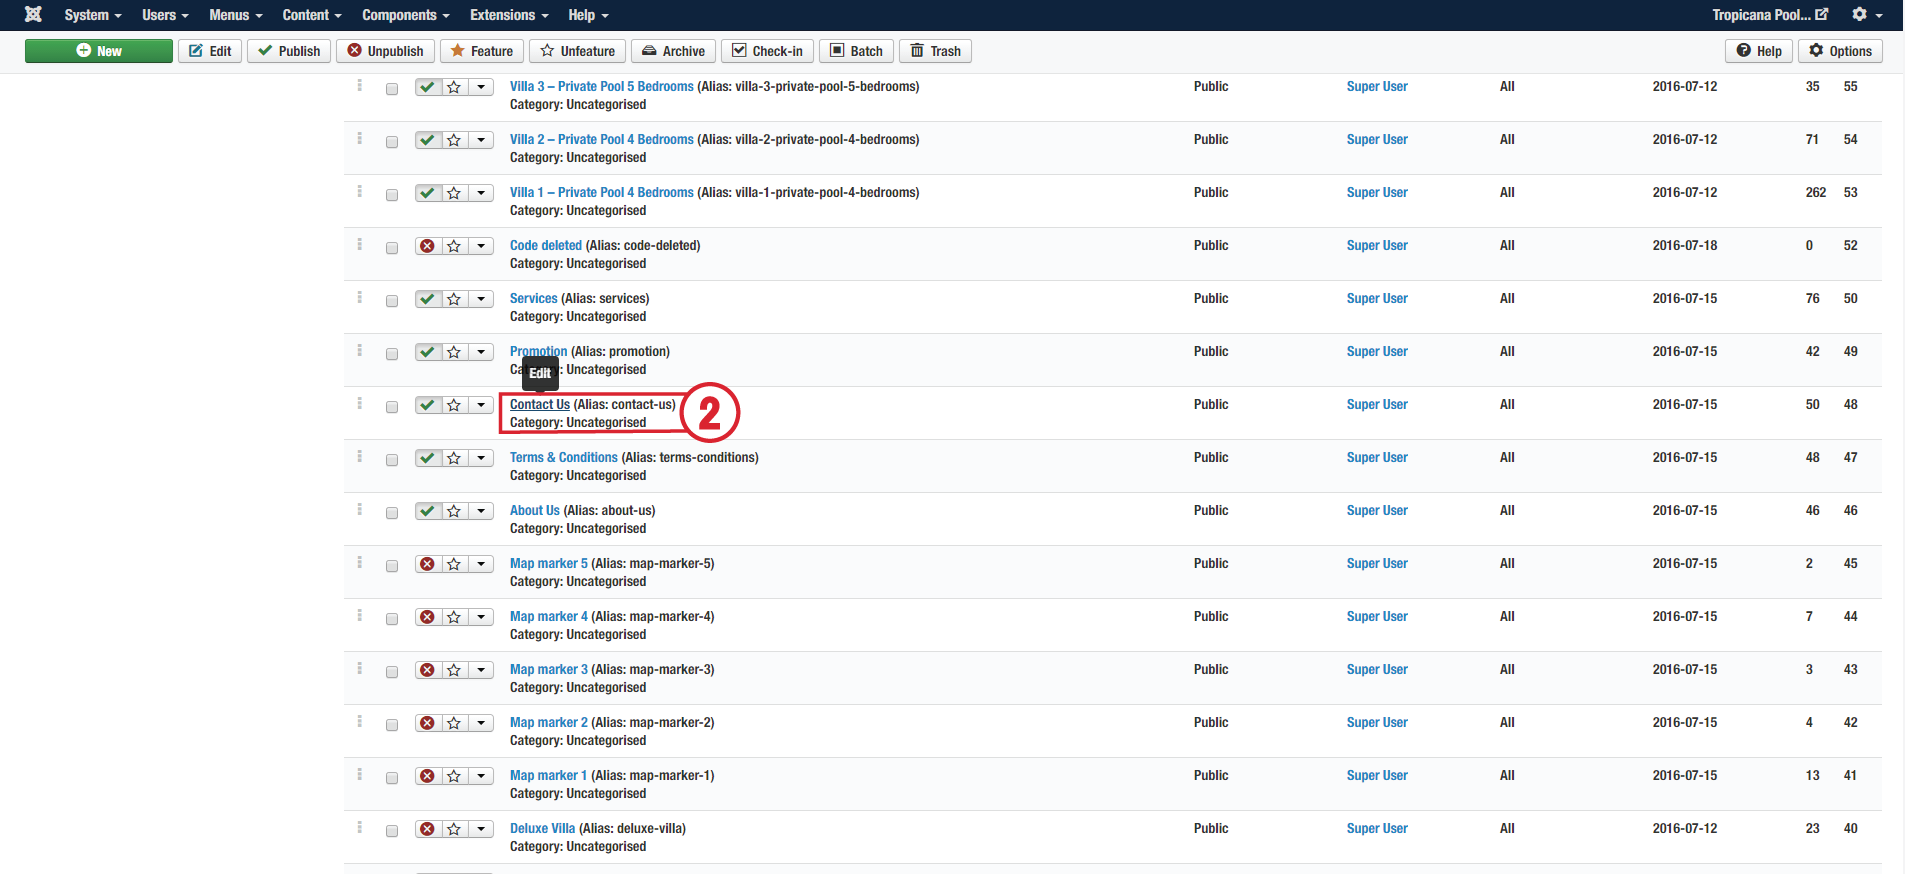
2. Choose the "Contact Us" article for editing.
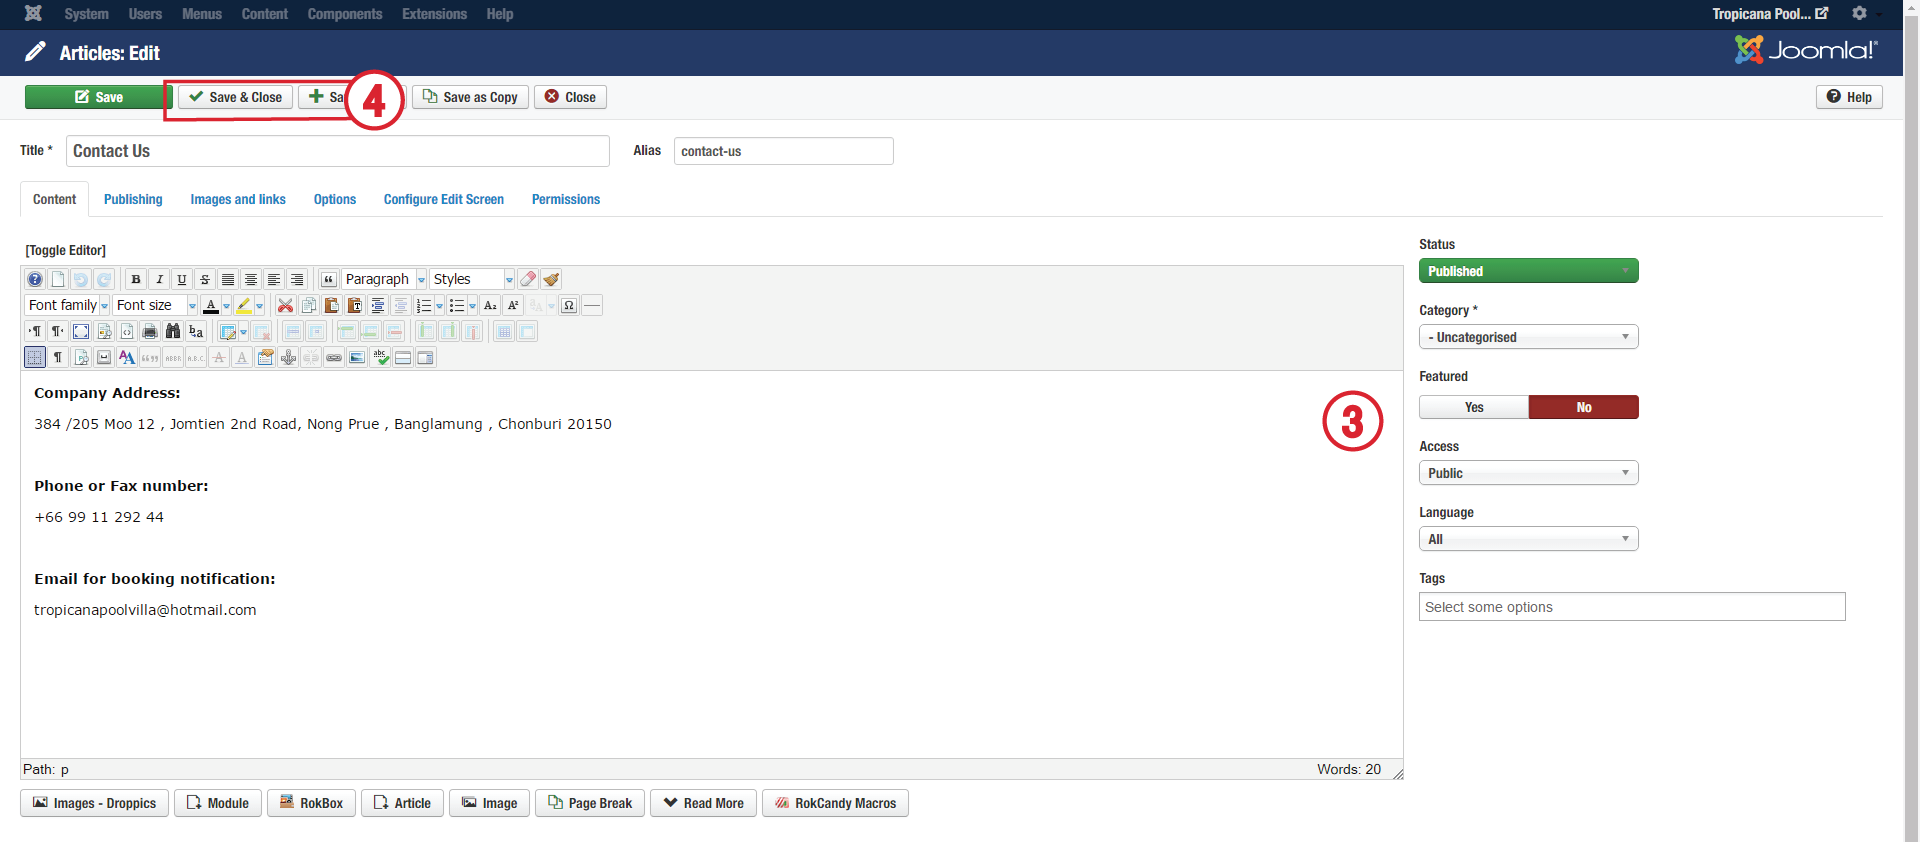
3. Edit content as you want.
4. Save & Close.